Add a new profile
For adding a new profile
- Go to the WooCommerce Admin panel.
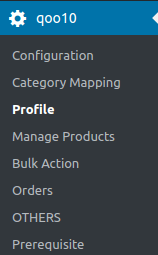
- On the left navigation bar, click the Qoo10 menu.
A Submenu appears below the Qoo10 menu as shown in the following figure:
- Click Profile.
OR
In the right panel, click the PROFILE tab.
The PROFILES page appears as shown in the following figure:
- Click the ADD PROFILE button.
The page appears as shown in the following figure: Note: Click the INSTRUCTION TO USE tab, to view the instruction.
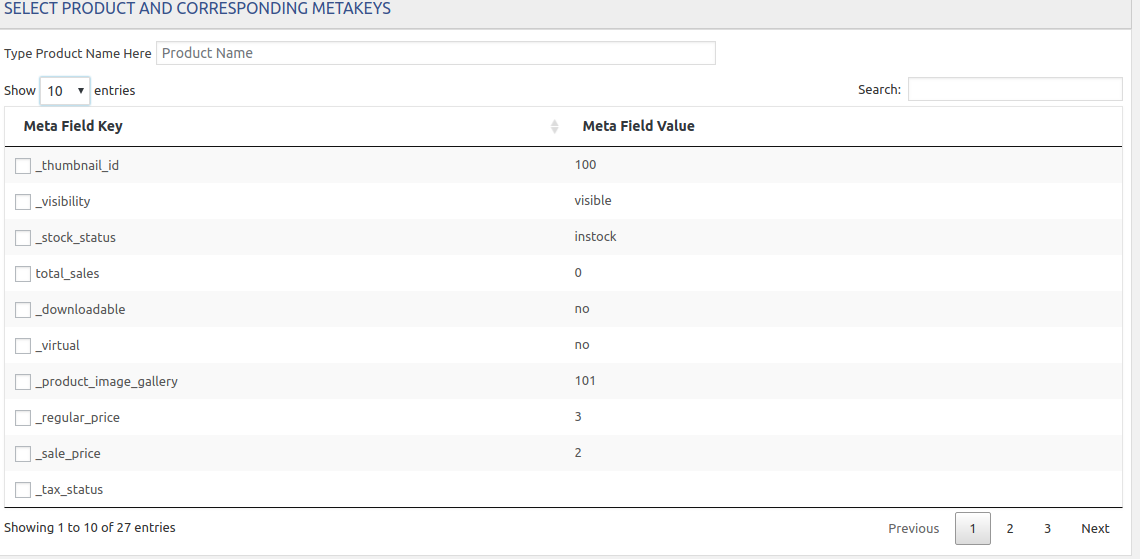
 - Click the SELECT PRODUCT AND CORRESPONDING METAKEYS tab.
The section appears as shown in the following figure:
- In the Type Product Name Here box, enter the required product name to get the attributes of the entered product name.
Note: Enter the initial of the product and a list appears. Select the required one from the list. - In the Meta Field Key column, select the check boxes associated with the required meta-keys.
- Scroll down to the PROFILE INFORMATION tab, and then click the tab.
The section appears as shown in the following figure:
- Following two tabs appear:
- BASIC
- ADVANCE
- Under BASIC, do the following steps:
- In the Profile Name box, enter the name of the profile.
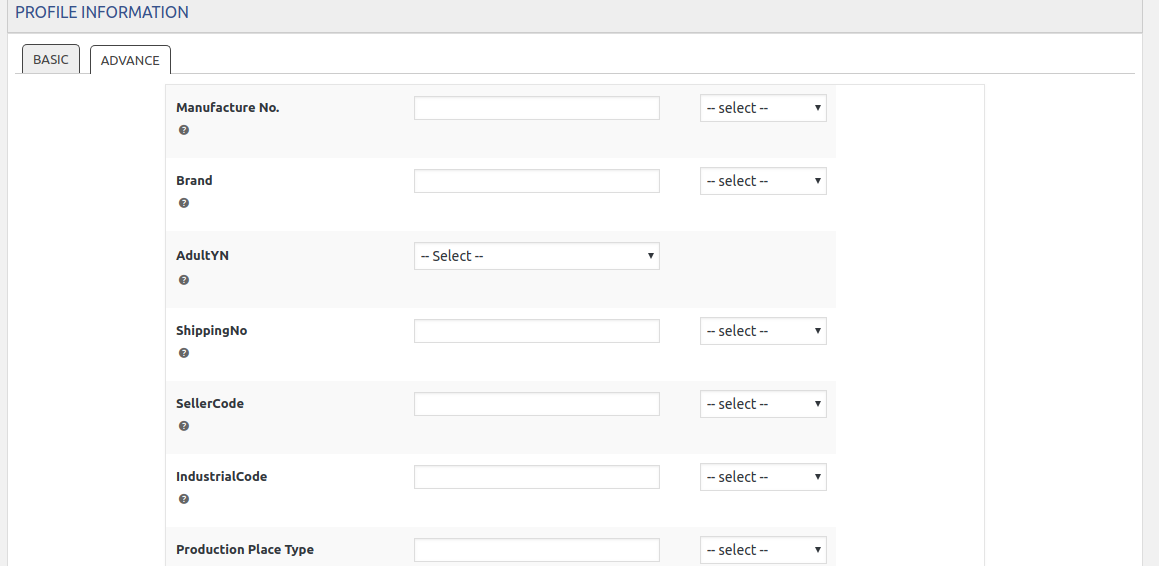
- Click the ADVANCE tab.
The page appears as shown in the following figure:
- In the Manufacture Number, select the required value.
- In the Brand, select the required value.
- In the Adult YN, select the required value.
- In the Shipping Number, select the required value.
- In Seller Code, select the required value.
- In the Industrial Code, select the required value.
- In Production Place type, select the required value.

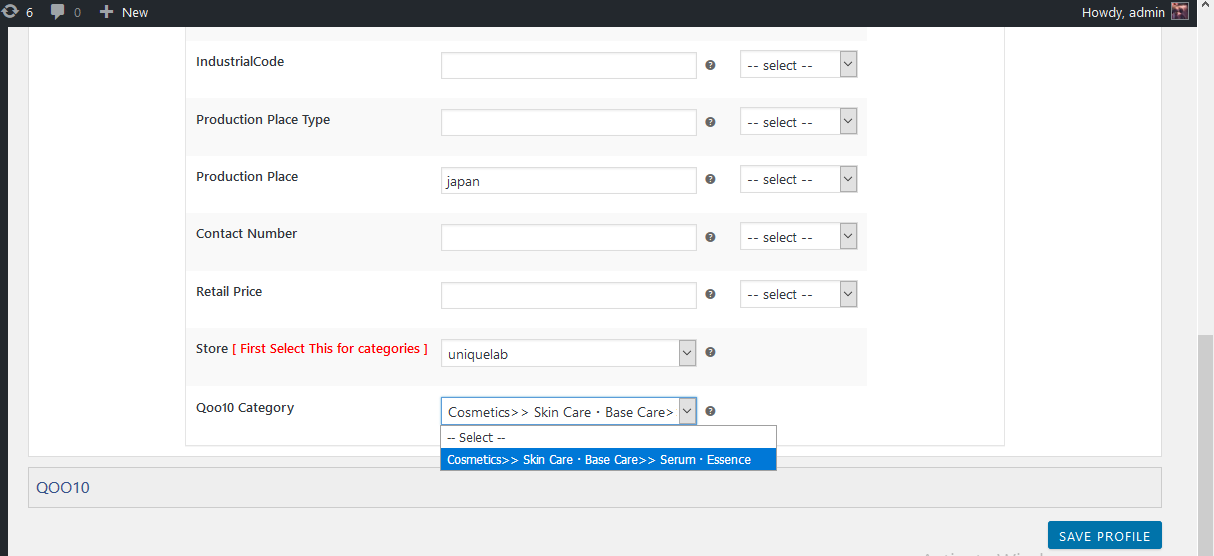
- In Product Place, select the required product place.
- In the Contact Number, select the required contact number.
- In Retail Price, select the required price.
- In the Store, select the required store.
- In the Qoo10 category, select the required category.
Then, click on save and your profile will be saved.
Related Articles
Assign the Profile
For assigning the profile to the product Go to the WooCommerce Admin panel. On the left navigation bar, click the Qoo10 menu. A Submenu appears below the qoo10 menu as shown in the following figure: Click Manage Products. OR In the right panel, click ...Edit Existing Profile
For editing the existing profile Go to the WooCommerce Admin panel. On the left navigation bar, click the Qoo10 menu. A Submenu appears below the qoo10 menu as shown in the following figure: Click Profile. OR In the right panel, click the PROFILE ...Remove the Assignment of the Profile
For removing the assignment of the profile Go to the WooCommerce Admin panel. On the left navigation bar, click the Qoo10 menu. A Submenu appears below the Qoo10 menu as shown in the following figure: Click Manage Products. OR In the right panel, ...Overview
As ecommerce is increasing and growing day by day in Singapore, so the Qoo10 is one of the best marketplaces or you can say it is the home in Singapore for your every need, every want, every day. It operates the online marketplaces across Singapore, ...The Process
Profile-based product uploading provides the admin with a facility to create a group of the required products that have common meta-keys, and then upload those products at one go through uploading that profile (created group). In other words, admin ...