Add a New Profile
- Go to Prestashop Admin Panel
- On the left navigation bar, place the cursor on Bonanza Integration and you will see it getting expanded as below:
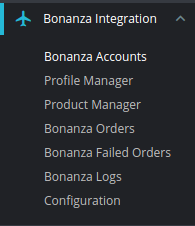
- Click on Bonanza Profile and you will be navigated to a page as shown below:
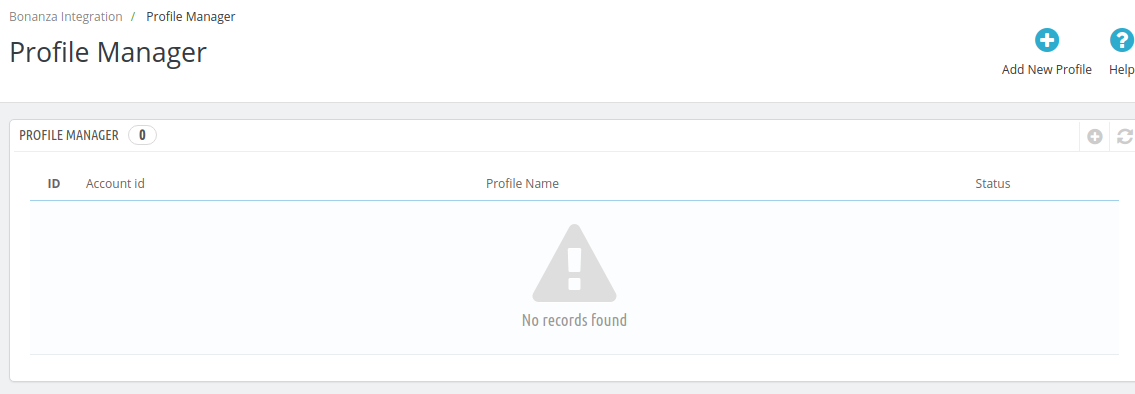
- Click on Add New Profile, to add a profile and select the account.
On selecting, you’ll see the page as below: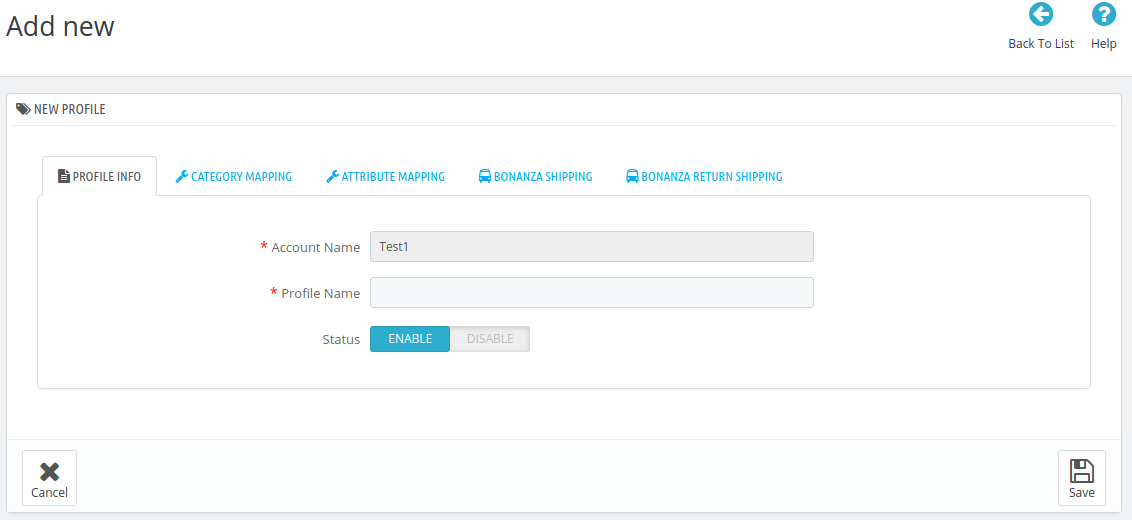
- In the Profile Information, do the following steps:
- In the Account Name, enter the account name.
- In the Profile Name, enter the name of the profile.
- Select Enable as the status to enable the profile.
- Now move on to Category Mapping:
- Click on Category Mapping.
The tab appears as shown in the following figure: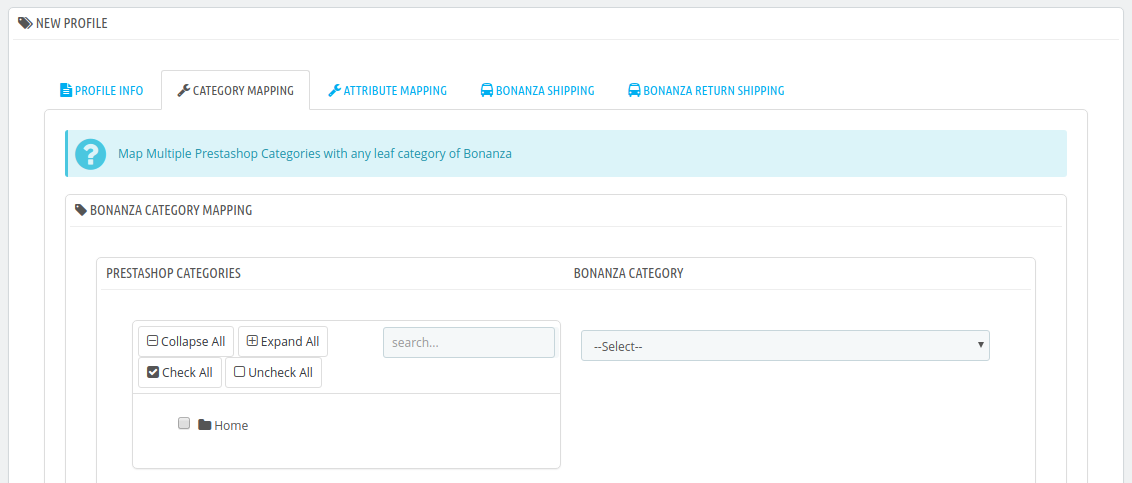
- In the Category Mapping, do the following steps:
- On the left-hand side, choose the Prestashop category, where you want this profile to appear.
- On the right-hand side, choose the relevant categories and sub-category of the Bonanza.
- Once done, click on Save to store or Cancel to discard the changes.
- Click on Category Mapping.
- Now Click on Attribute Mapping adjacent to the Profile Info tab, and you’ll come across a section as below:
The tab appears as shown in the following figure: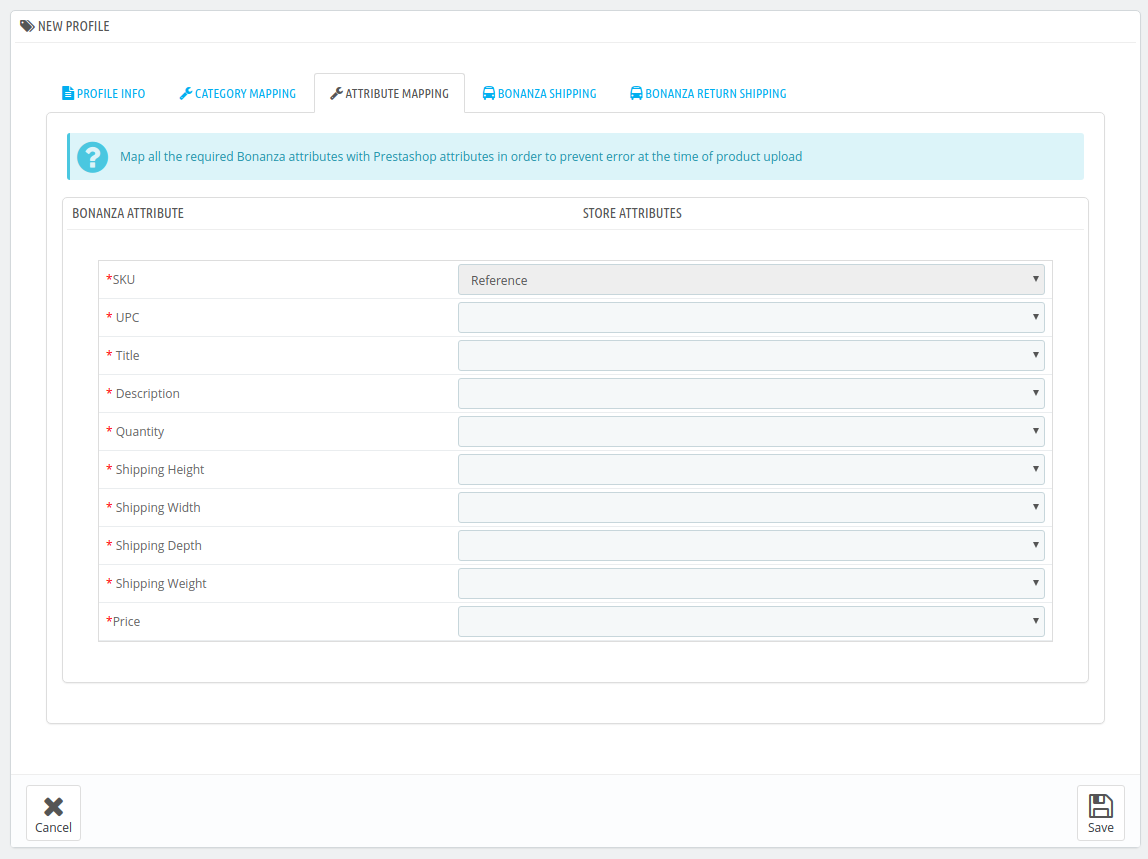
- Note: Since these attributes depend on the product categories, they vary with individual product categories.
- Fill all the required details and click on Save button to save the settings.
Now move to the Bonanza Shipping
- Click on Bonanza Shipping
The tab appears as shown in the following figure: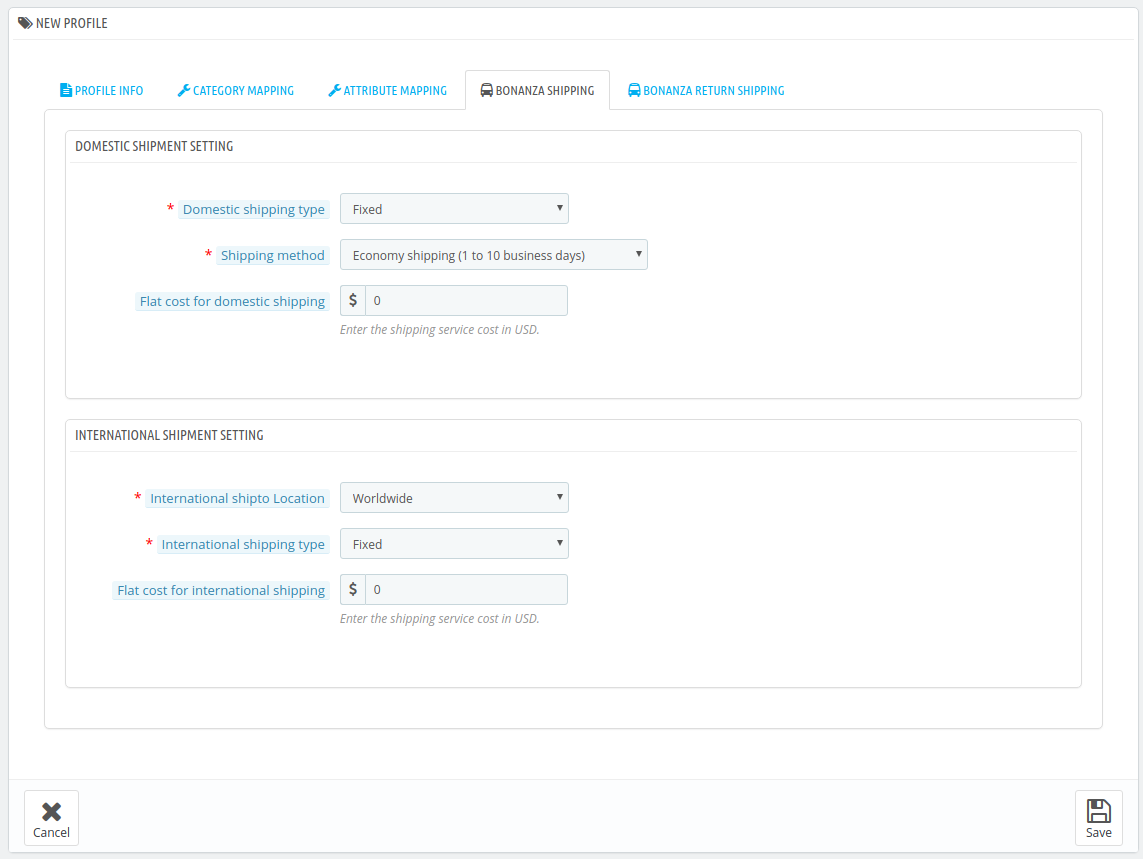
- In the Bonanza Shipping, there are two sections
- First, in the Domestic Shipment Setting, Select the Shipping Type.

- Fixed is when you wish to keep the shipping charges Fixed.
- Calculated is when you wish to charge according to the product price.
- Free Is when no shipping charges are applied.
- First, in the Domestic Shipment Setting, Select the Shipping Type.
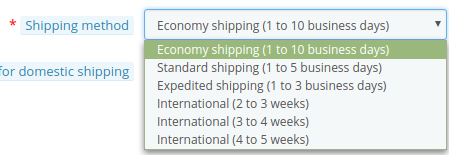
- Choose the desired Shipping Method from the next section
Now move to INTERNATIONAL SHIPMENT SETTING
- Choose the locations in which you want to apply to ship
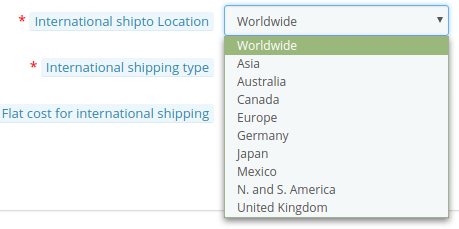
- Rest is the same as domestic shipping.
Now move to the last category Bonanza Return Shipping:
- Click on Bonanza Return Shipping.
The tab appears as shown in the following figure: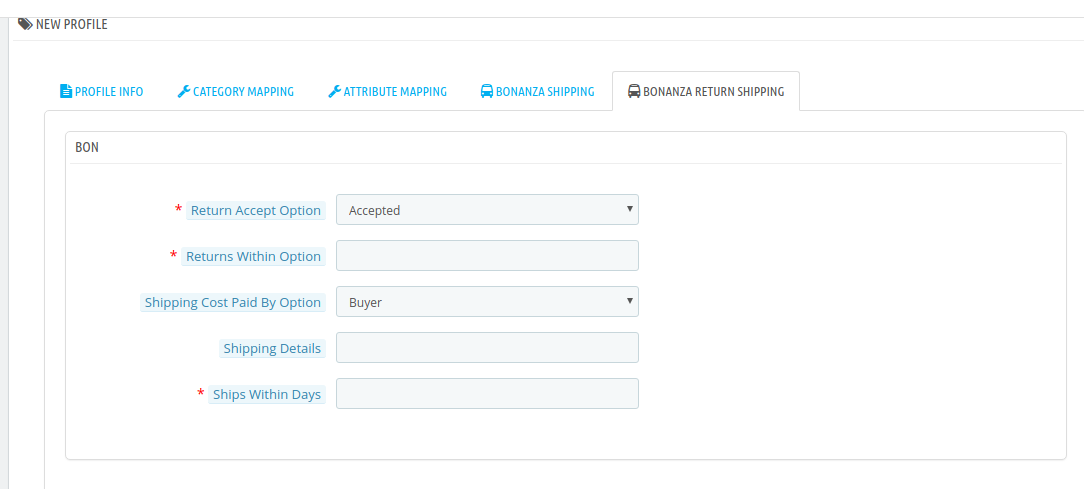
- In the Bonanza Return Shipping, do the following steps:
- In the Return Accept Option box, choose the option accordingly.
- In the Returns Within Option, enter the number of days in which you need to return.
- In the Shipping Cost Paid by Option, choose who will pay the cost of shipping.
- In the Shipping details, enter the shipping details.
- In the Ships within days, enter the number of days in which you need to ship.
- Then click on Save Button to save the profile information.
Related Articles
Edit the Existing Profile
Go to Prestashop Admin Panel On the left navigation bar, place the cursor on Bonanza Integration and you will see it getting expanded as below: Click on Bonanza Profile and you will see the page as shown below: To edit the profile, click on the Edit ...Delete the existing profile
To delete an existing profile, a seller needs to: Go to Prestashop Admin Panel. On the left navigation bar, place the cursor on Bonanza Integration and you will see it getting expanded as below: Click on Bonanza Profile and you will see the page as ...Overview
Bonanza is the marketplace, which is well known for its unique collection of crafts, fashion, vintage, and so on. Now, Prestashop store owners can get integrated their Prestashop stores with the Bonanza marketplace with the help of CedCommerce and ...Manage Bonanza Accounts
Once save the configuration settings, the Bonanza menu appears on the top navigation bar of the Admin Panel. The store owner has to fill out the retrieved the Bonanza DEVELOPER ID and BONAPITIT CERTIFICATE ID details in the respective fields ...Uploading/Updating Selected Products
To upload/update a product, a seller needs to: Go to Prestashop Admin Panel On the left navigation bar, click on Bonanza Integration and you will see it getting expanded as below: Click on Bonanza Products and you will see the page as shown below: In ...