Add a new Profile
To add a new profile
- Go to the Magento Admin panel.
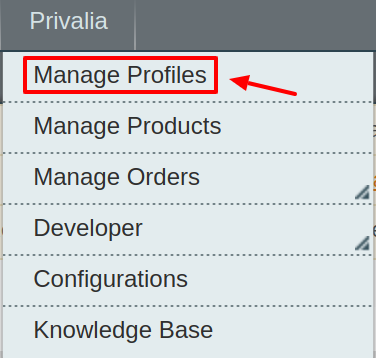
- On the top navigation bar, move the cursor over the Privalia tab, and then point to the Manage Profiles menu.
The menu appears as shown in the following figure:

3. Click Manage Profiles. The Privalia profile listing page appears as shown:

4. Click the Add New Profile button.
The Add Privalia Profile page appears as shown in the following figure:

5. In the right panel, under Profile Information, do the following steps:
- In the Profile Code box, enter a profile code.
Note: It is only for internal use. Use the unique profile code with no spaces. Start with small letters. - In the Profile Name box, enter the name of the profile.
Note: Use the unique name to identify the profile. - In the Status list, select Active to enable the profile.
Note: The Inactive option disables the profile.
- Click the Save and Continue button.
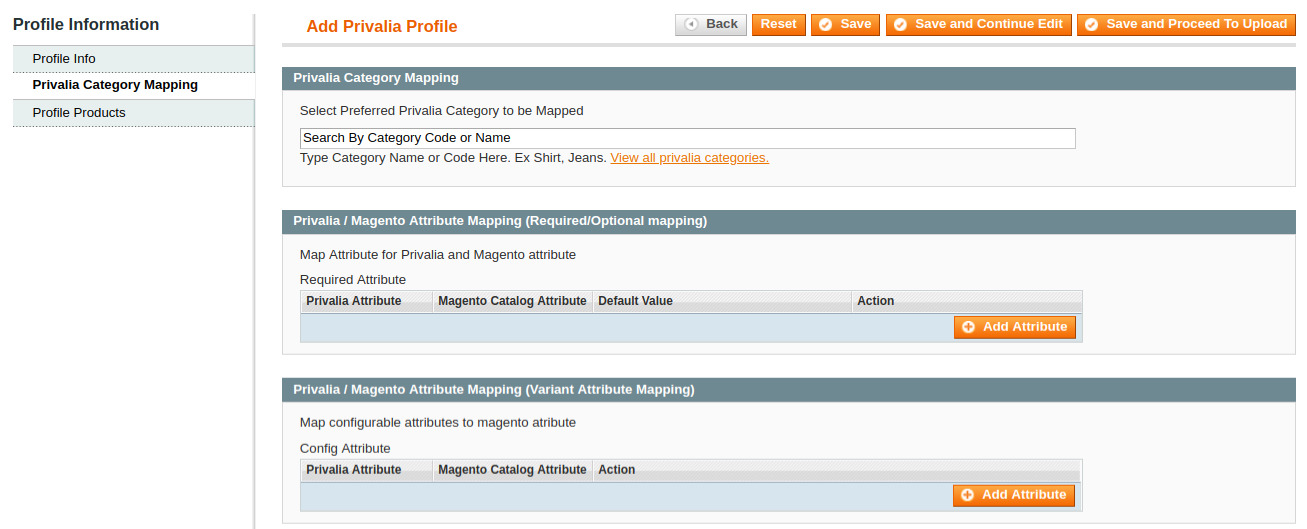
6. In the left navigation panel, click the Privalia Category Mapping menu. The page appears as shown in the following figure:

- In the right panel, go to the Privalia Category Mapping section.
- In the Category list, select the required Privalia category that the admin wants to map.
Depending upon the selected category, the Privalia and the Magento attributes appear under the Privalia / Magento Attribute Mapping (Required/ Optional mapping) section, if exist. - Go to the Privalia / Magento Attribute Mapping (Variant attribute mapping) section. Map the configurable attributes to Magento attributes.
- Click Save and Continue Edit button.
7. In the left navigation panel, click the Profile Products menu. The page appears as shown in the following figure:

- All the products assigned to the profile are listed in this table.
8. Click the Reset Filter button. All the products are listed in the table.
- Select the check boxes associated with the required products to assign them to the new profile.
Note: Admin can assign the product to only one profile.
9. Click the Save button. The created profile is saved and listed on the Privalia Profile Listing page.
Or
Click the Save and Continue Edit button to save the created profile and continue editing, if required.
Or
Click the Save and Upload Product button to save the profile and make ready to upload the product on Privalia.
The assigned products are listed on the Product Manager page.
Related Articles
Delete A Profile
To delete the existing profile Go to the Magento Admin panel. On the top navigation bar, move the cursor over the Privalia tab, and then point to the Manage Profiles menu. The menu appears as shown in the following figure: 3. The Privalia Profile ...Edit an Existing Profile
To edit the existing profile Go to the Magento Admin panel. On the top navigation bar, move the cursor over the Privalia tab, and then point to the Manage Profiles option and click on it. The menu appears as shown in the following figure: 3. The ...Syncing the Category
Before creating a new profile, a seller needs to sync the categories available on Privalia marketplace to the Magento admin panel. To do so, the admin needs to: Go to the Magento admin panel. Place the cursor on Privalia on the top navigation bar and ...Syncing the Attributes
After the Categories have been synced to the seller’s admin panel, the Attributes need to be synced before the creation of a new profile. To do so: Go to the Magento admin panel. Place the cursor on the top navigation bar of Privalia and it will ...Privalia Configuration Setting
After obtaining the API credentials from the Privalia Seller account, the Magento store owner has to paste them in the respective fields displayed on the Privalia Configuration page of the admin panel. To set up the configuration settings in the ...