Add New Profile
To add a new profile
- Go to the Magento Admin panel.
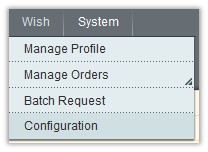
- On the top navigation bar, point to the Wish menu.
The menu appears as shown in the following figure:

- Click the Manage Profile menu.
The Wish Profile Listing page appears as shown in the following figure:

- Click the Add New Profile button.
The page appears as shown in the following figure:

- In the right panel, under Profile Information, do the following steps:
- In the Profile Code box, enter a profile code. Note: It is only for the internal use. Use the unique profile code with no spaces. Start with small letters.
- In the Profile Name box, enter the name of the profile. Note: Use the unique name to identify the profile.
- In the Status list, select Active to enable the profile. Note: The Inactive option disables the profile.
- Click the Save and Continue button.
- In the left navigation panel, click the Wish Attribute Mapping menu.
The page appears as shown in the following figure:

- In the right panel, go to the Wish / Magento Attribute Mapping (Required/ Variant mapping) section.
- In the Wish Attribute column, select the required Wish attribute to map it with the corresponding Magento attribute.
- In the Magento Catalog Attribute column, select the required Magento attribute to map it with the corresponding Wish attribute.
- Click the Add Attribute button to add more attributes.
- Repeat the mapping of all the required or optional Magento attributes listed with the corresponding Wish attributes.
- Click the Save and Continue button.
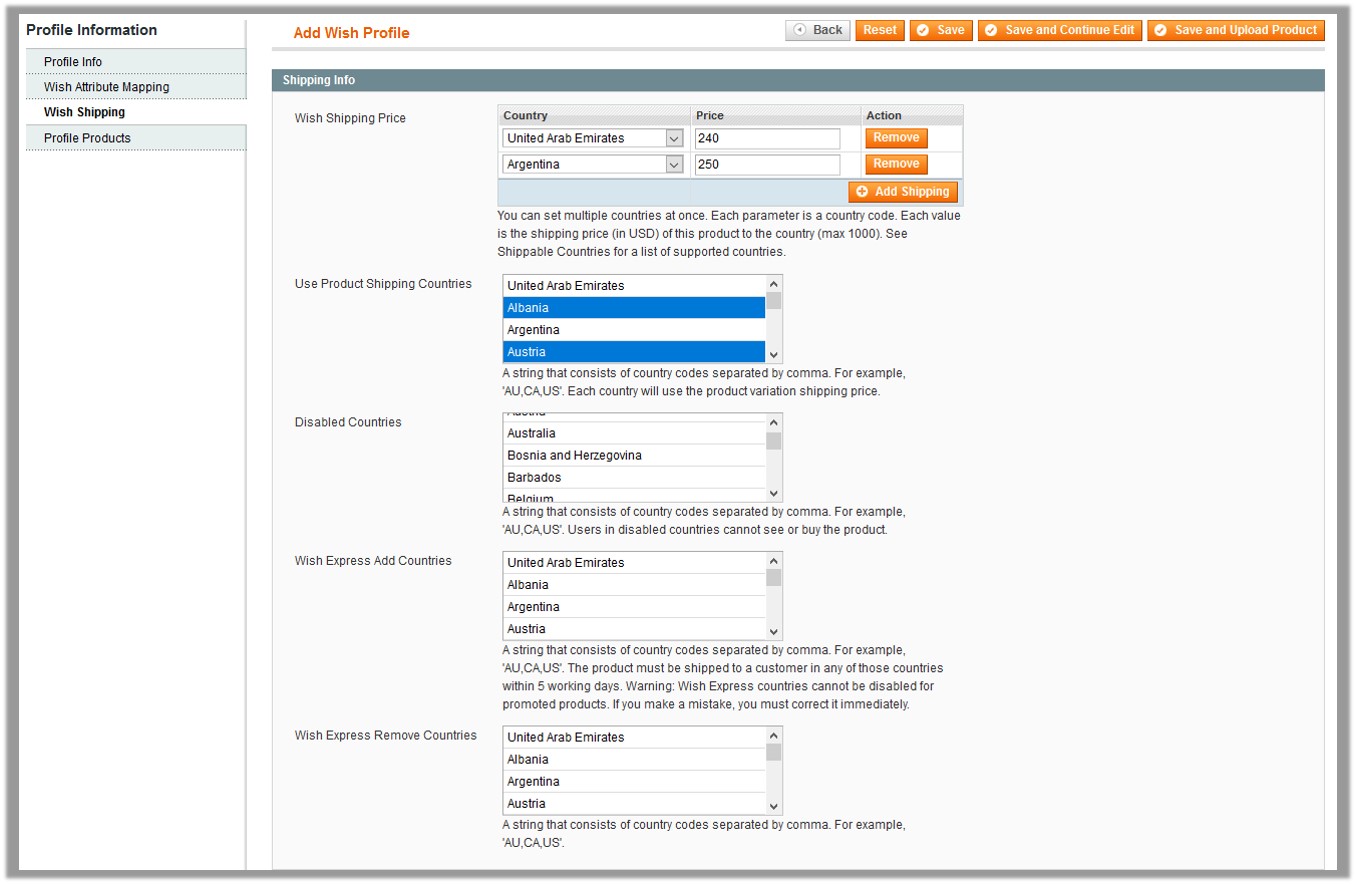
- In the left navigation panel, click the Wish Shipping menu.
The page appears as shown in the following figure:

- In the right panel, under the Shipping Info section, do the following steps:
- Wish Shipping Price: Admin can set the different shipping price for multiple countries at once. Do the following steps:
- Click Add Shipping button.
- In the Country column, select the country name.
- In the Price column, select the shipping price for the selected country. Note: Click the Add Shipping button to add more country name and the corresponding shipping price.
- In the Use Product Shipping Countries list, select the product shipping countries for use. Note: Each selected country will use the product variation shipping price.
- In the Disabled Countries list, select the countries to disable so that the users in disabled countries cannot see or buy the product.
- In the Wish Express Add Countries list, select the required countries. It is necessary to ship the products to the customer in any of these selected countries within 5 working days. Caution: Wish Express countries cannot be disabled for the promoted products.
- In the Wish Express Remove Countries list, select the countries to remove them from the Wish Express list.
- Click the Save and Continue button.
- In the left navigation panel, click the Profile Products menu.
The page appears as shown in the following figure:
 Since no products are assigned to the profile, there are no products listed in the table.
 - Click the Reset Filter button.
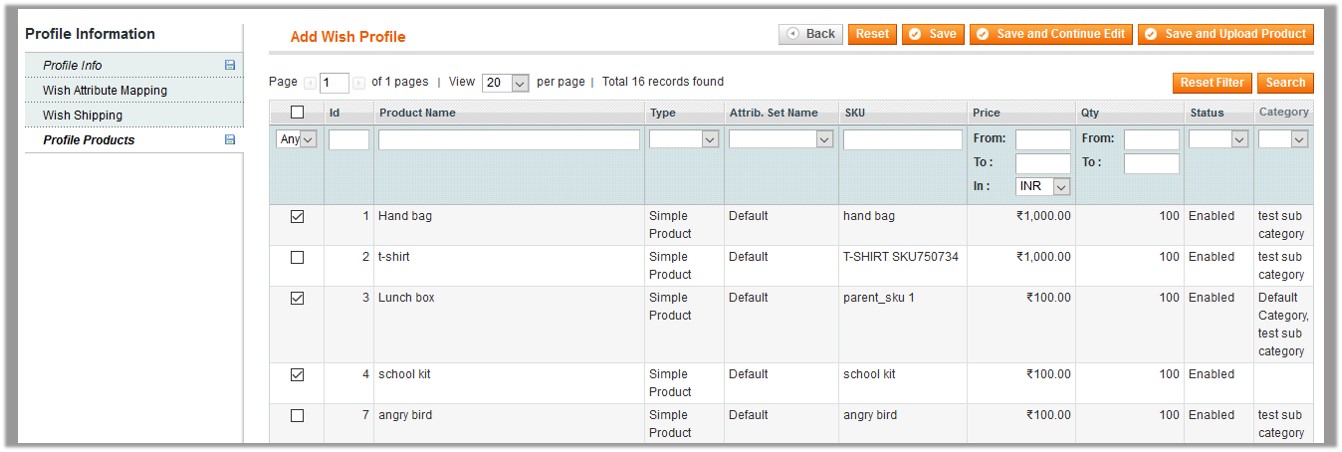
All the products are listed in the table as shown in the following figure:

- Select the check boxes associated with the required products those the admin wants to assign to the new profile. Note: Admin can assign one product to only one profile.
- Click the Save button.
The created profile is saved and listed on the Wish Profile Listing page.
Or
Click the Save and Continue Edit button to save the created profile and continue editing, if required.
Or
Click the Save and Upload Product button to save the profile and make ready to upload the product on Wish.
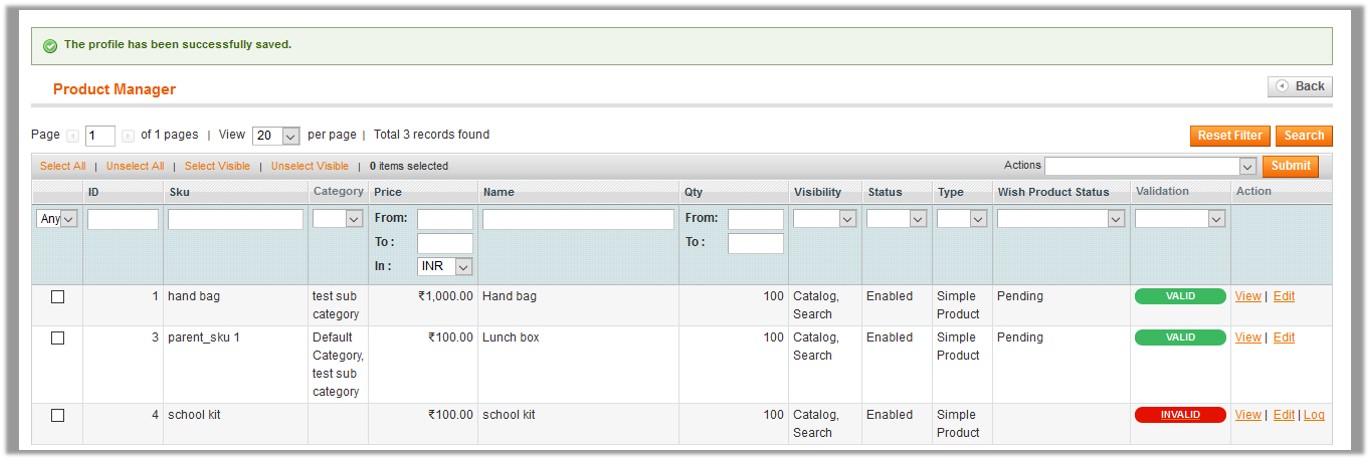
The assigned products are listed on the Product Manager page and a success message for saving the profile appears on the same page as shown in the following figure:

Related Articles
Add A New Batch
To add a new batch Go to the Magento Admin panel. On the top navigation bar, point to the Wish menu. The menu appears as shown in the following figure: Click the Batch Request menu. The Wish Batch Listing page appears as shown in the following ...Edit the Existing Profile
To edit the existing profile Go to the Magento Admin panel. On the top navigation bar, point to the Wish menu. The menu appears as shown in the following figure: Click the Manage Profile menu. The Wish Profile Listing page appears as shown in the ...Delete The Existing Profile
Delete the Profiles Admin can delete the current existing profile and also the selected profiles in bulk. To delete the current profile Go to the Magento Admin panel. On the top navigation bar, point to the Wish menu. The menu appears as shown in the ...Manage the Products Assigned to the Profile
On this page, the admin can view and edit the product, and validate and upload the individual product. Also, the admin can view the error message if any error exists in any product details. The admin can also submit certain actions on the selected ...Submit Actions on the Selected Products of the same Profile
To validate and upload products from the same profile Go to the Magento Admin panel. On the top navigation bar, point to the Wish menu. The menu appears as shown in the following figure: Click the Manage Profile menu. The Wish Profile Listing page ...