Add New Profile
To add a new profile, a seller needs to:
- Go to Prestashop Admin Panel
- On the left navigation bar, place the cursor on ManoMano Integration and you will see it getting expanded as below:
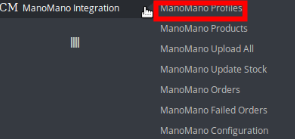
- Click on ManoMano Profile and you will be navigated to a page as shown below:

- Click on Add New Profile, to add a profile. On clicking, you’ll see the page as below:
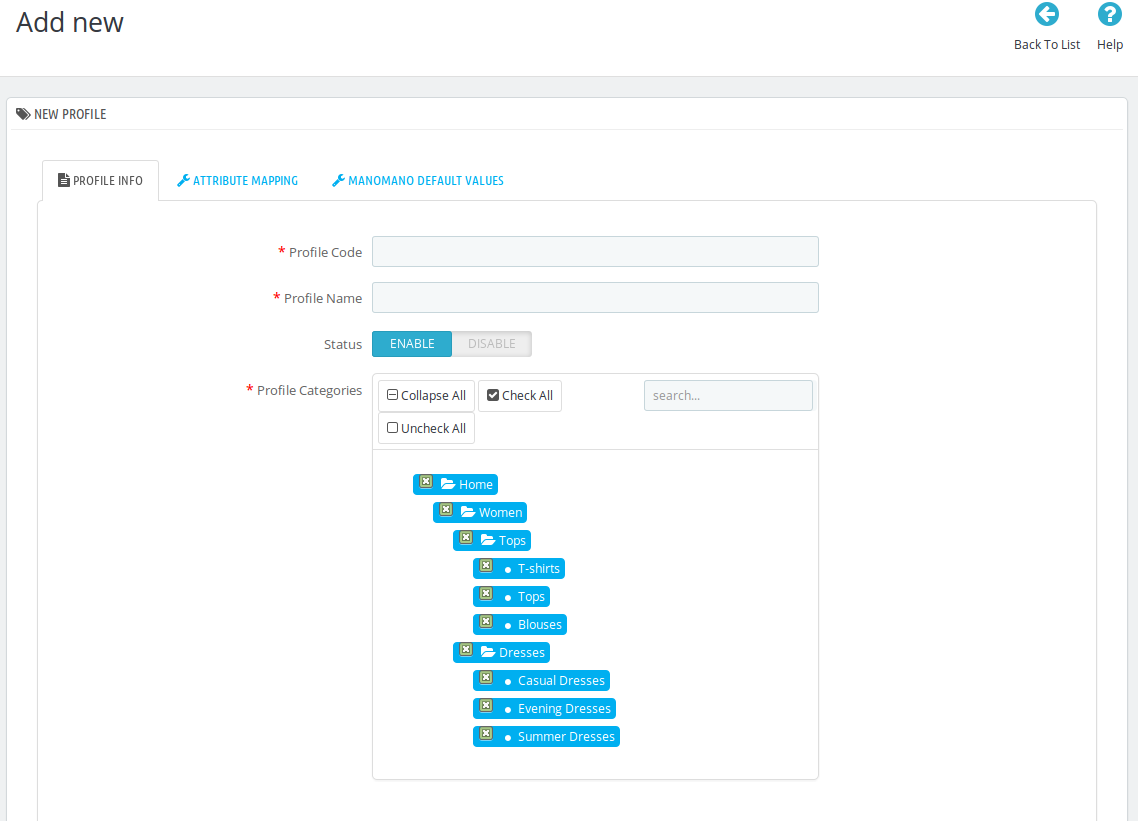
- In the Profile Code, enter the code for the profile you are making.
- In the Profile Name, enter the name of the profile.
- Select Enable as the status to enable the profile.
- In Profile Category, select the category for the profile by expanding the categories.
- Click on the Save button on the bottom right.
Now Click on Attribute Mapping adjacent to the Profile Info tab, and you’ll come across a section as below:
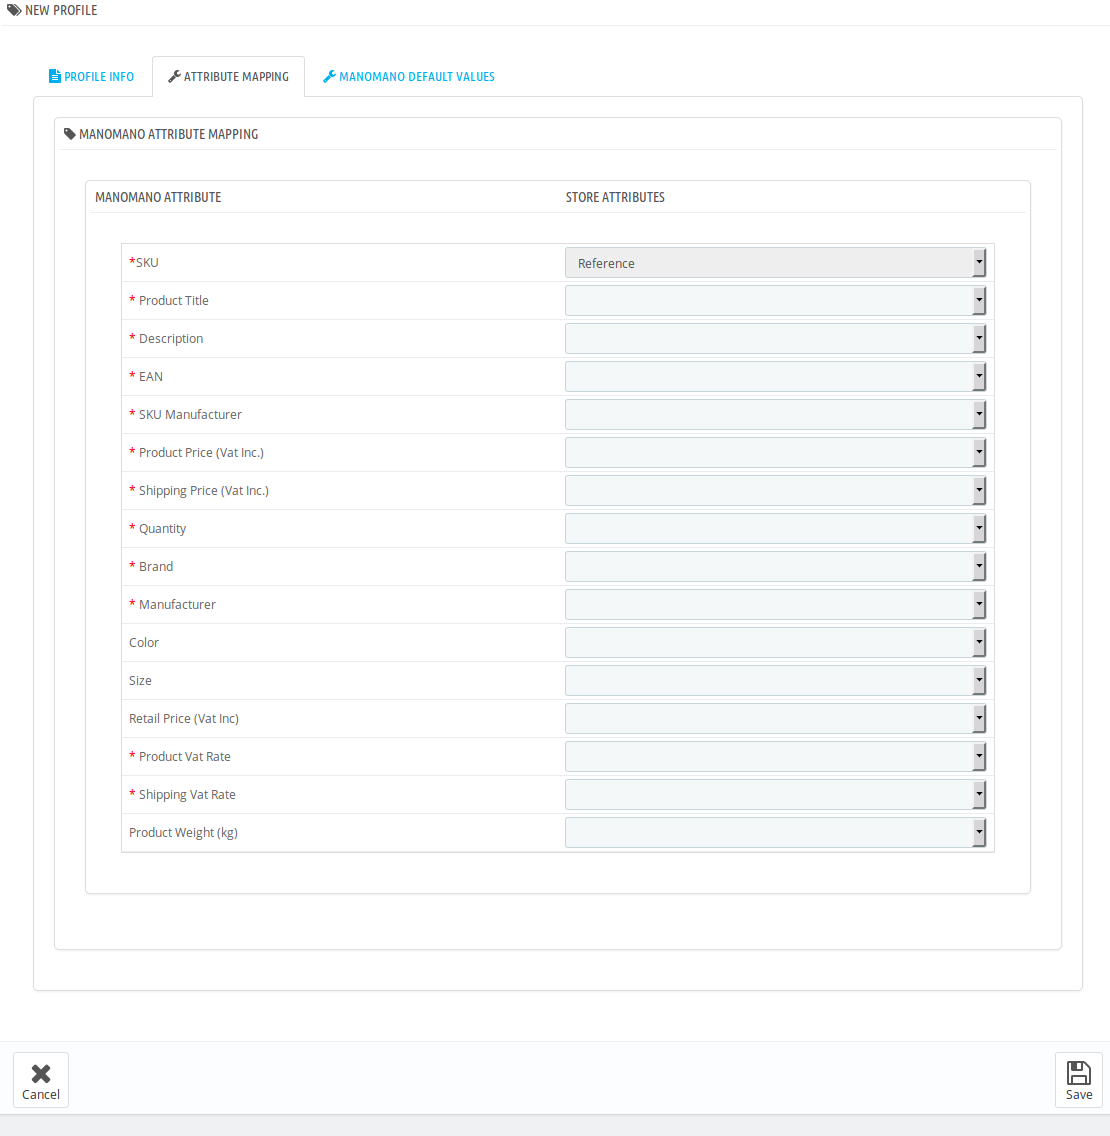
- Map the ManoMano title attribute with prestashop attribute.
- Map the ManoMano description attribute with prestashop attribute.
- Map the ManoMano EAN attribute with prestashop attribute.
- Map the ManoMano SKU Manufacturer attribute with prestashop attribute.
- Map the ManoMano product price(Vat Inc.) attribute with prestashop attribute.
- Map the ManoMano shipping price(Vat Inc.) attribute with prestashop attribute.
- Map the ManoMano quantity attribute with prestashop attribute.
- Map the ManoMano brand attribute with prestashop attribute.
- Map the ManoMano manufacturer attribute with prestashop attribute.
- Click on Save button, and the attribute mapping will be saved.
Now click on the ManoMano Default Values next to the Attribute Mapping and you will see the section as shown below:
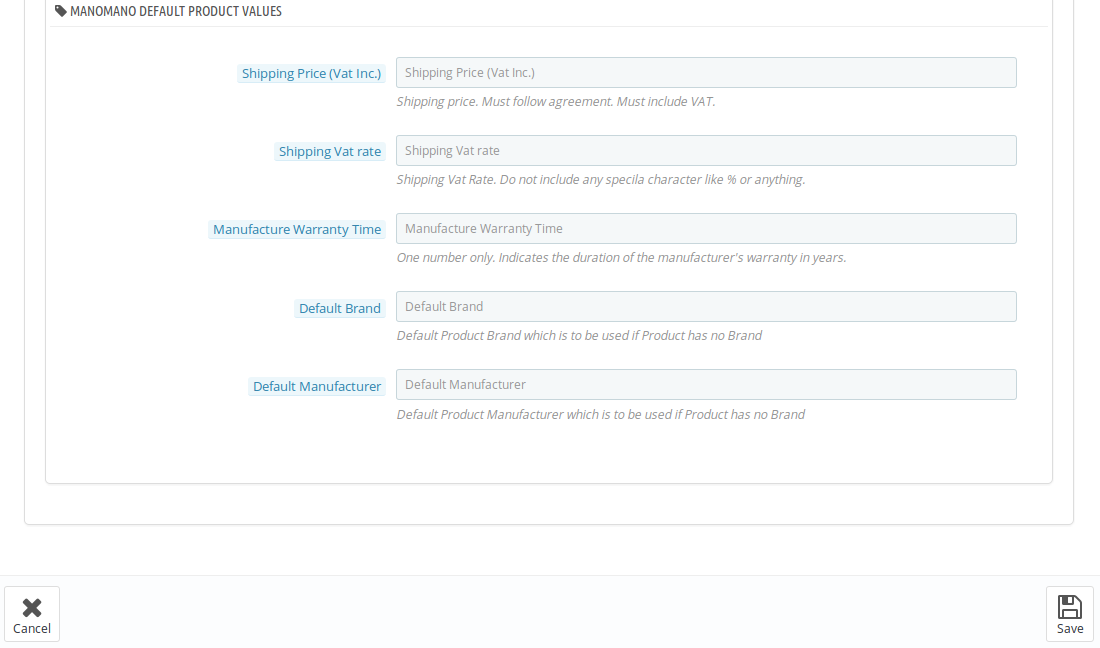
- In the Shipping Price, enter the charge that you want to levy on the shipping of the product when the user buys it. It must follow agreement and include VAT.
- In Shipping Vat rate, enter the vat rate.
- In Manufacture Warranty Time, enter the number which should be single digit. It is to mention the duration of the manufacturer’s warranty in year(s).
- In Default Brand, enter the default brand name which is to be used when the product has no brand name.
- In Default Manufacturer, enter the name which gets used when the product has no manufacturer.
- Save the actions you’ve taken by clicking on Save button in the bottom right of the page.
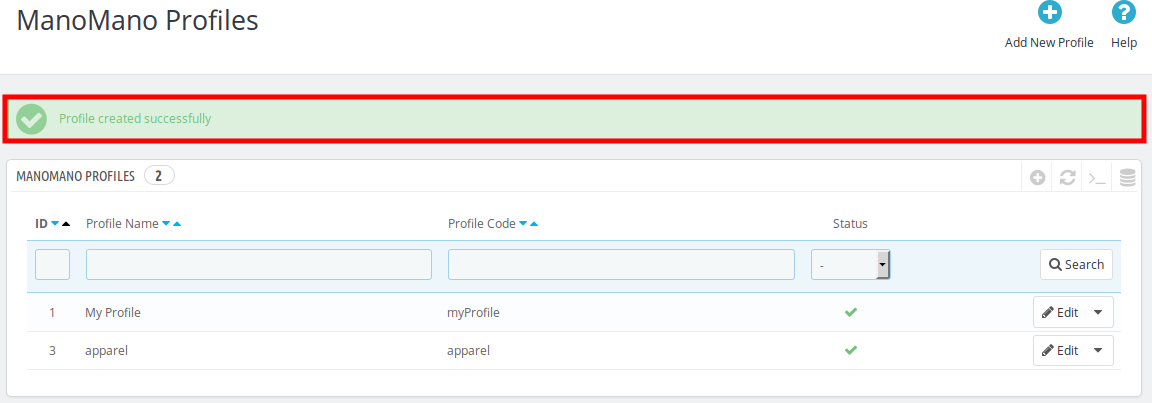
- Your profile gets created and you get navigated to the ManoMano profile page with a message of profile creation, as shown in the image below:
Related Articles
Edit the Existing Profile
To edit an existing profile, a seller needs to: Go to Prestashop Admin Panel On the left navigation bar, place the cursor on ManoMano Integration and you will see it getting expanded as below: Click on ManoMano Profile and you will see the page as ...Deleting a Profile
To delete an existing profile, a seller needs to: Go to Prestashop Admin Panel On the left navigation bar, place the cursor on ManoMano Integration and you will see it getting expanded as below: Click on ManoMano Profile and you will see the page as ...ManoMano Prestashop Integration Extension Installation
To install the extension: Go to the Prestashop Admin panel. On the left navigation bar, point cursor to the Modules and Services. The menu appears as shown in the following figure: You need to click the Modules and Services menu, and you will come ...Configuration Settings
Once the module gets installed, you get navigated to the Configuration page which looks like as has been shown below: You may take step by step actions as you will see below: General Settings: Select Yes in the Enable part so that your module gets ...Overview
If you’re a merchant who deals in DIY products, then ManoMano is a platform that can prove to be your key to success. To help you sell on ManoMano, CedCommerce brings to you the perfect solution. Read on to know more. Founded in 2013, ManoMano is an ...