Adding a new profile
To add a new profile, a seller needs to:
- Go to Prestashop Admin Panel
- On the left navigation bar, place the cursor on Cdon Integration and you will see it getting expanded as below:
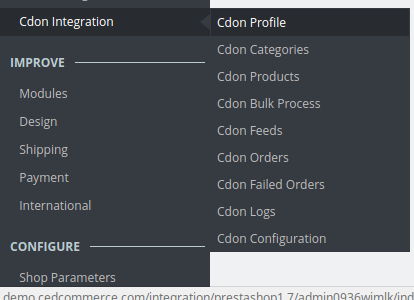
- Click on Cdon Profile and you will see the page as shown below:

- Now click on Add New Profile. You will be taken to the page as shown below:
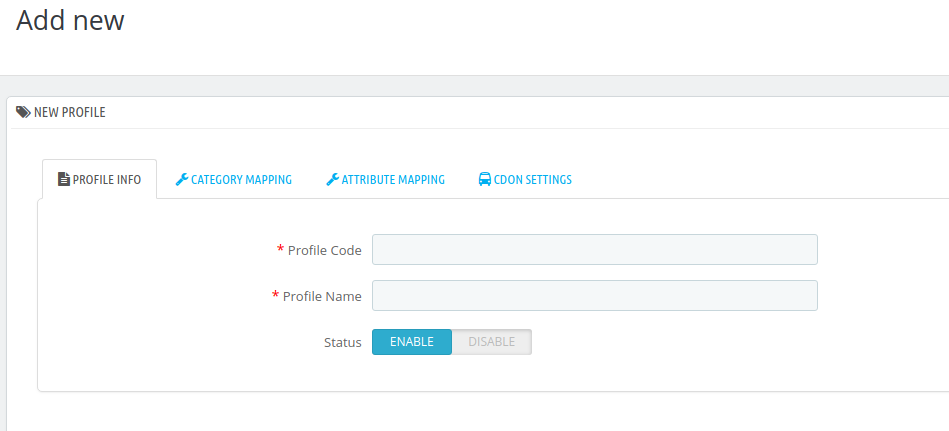
- In the Profile code, enter the code for the profile you are making.
- In the Profile name, enter the name of the profile.
- Select Enable as the status to enable the profile.
- Click on the Save button.
Now Click on Category Mapping adjacent to the Profile Info tab, and you’ll come across a section as below: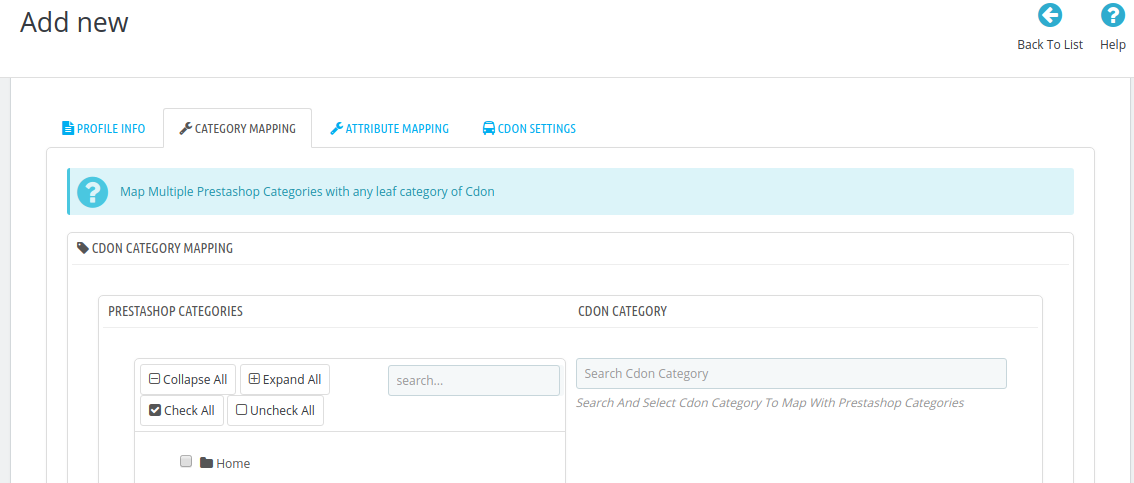
- In this section
- You have to map your PrestaShop category with Cdon Category.
- The PrestaShop categories are mentioned on the left & Cdon Categories on the right.
- Select the required category of Cdon by typing under Search Cdon Category.
- Map Multiple Prestashop categories with Cdon categories and move to the next section.
Now Click on Attribute Mapping adjacent to the Category Mapping tab, and you’ll come across a section as below: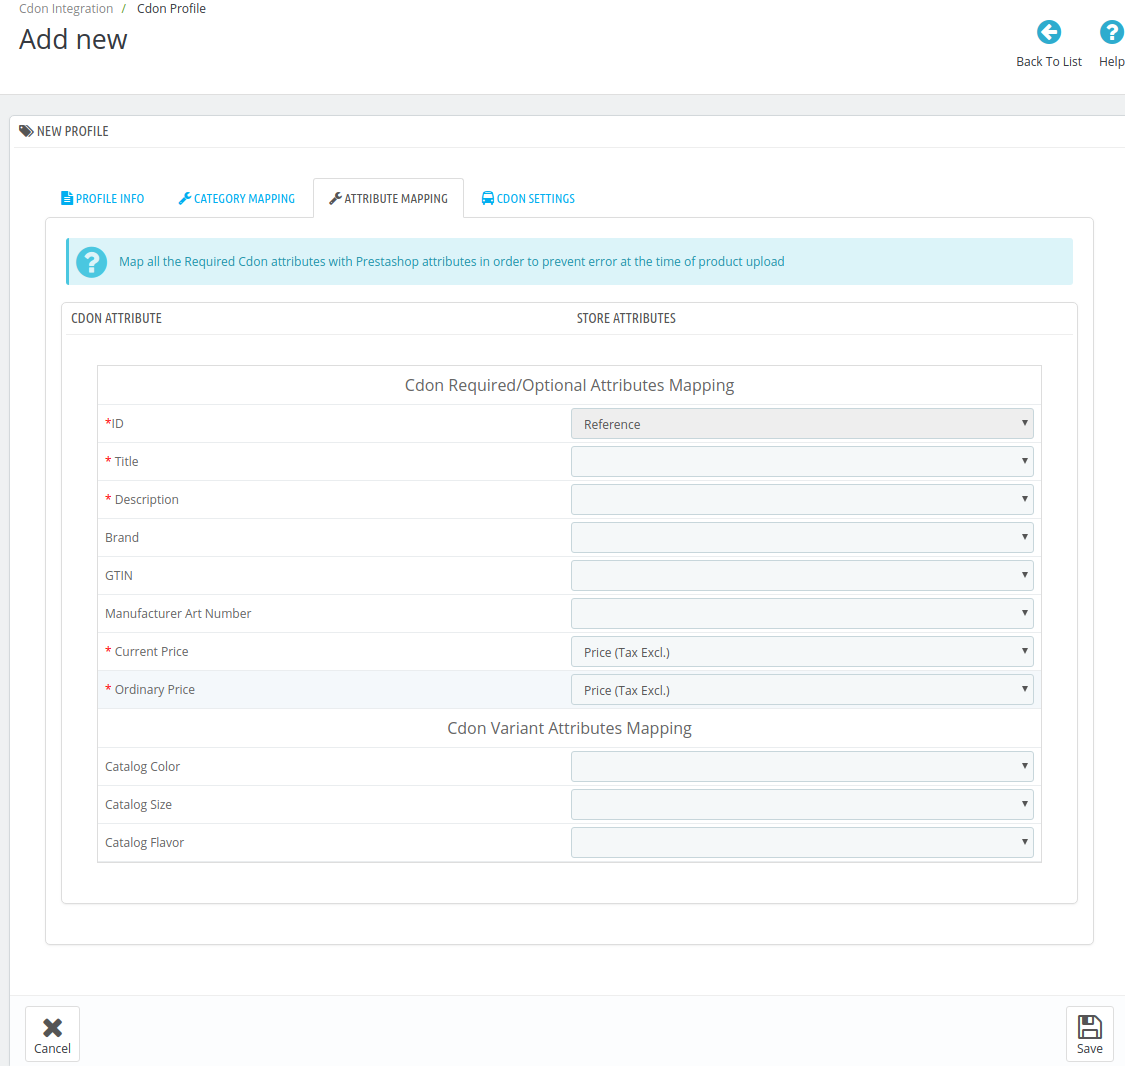
- Here all the Cdon attributes are mentioned on the left which you have to match with PrestaShop attribute on the right.
- Now from the drop-down menu select all the attributes and perform the desired mapping.
Click on the Cdon Settings adjacent to the Attribute Mapping and you will see the section as shown below:
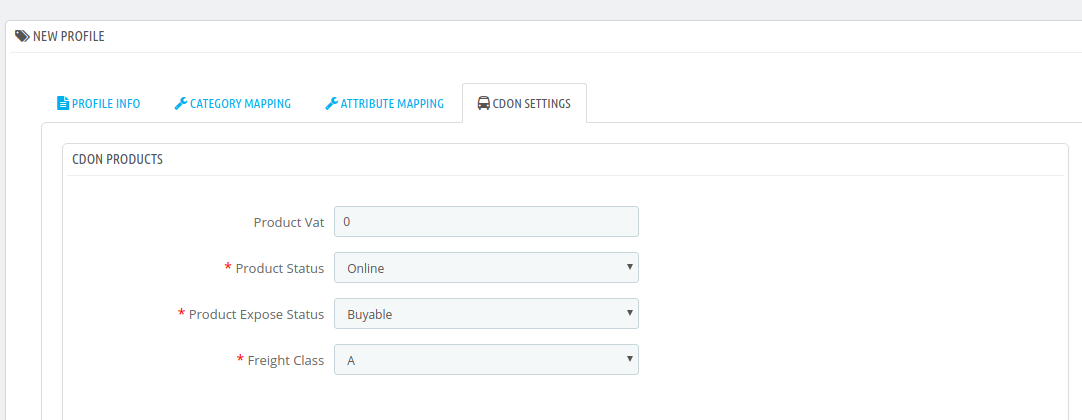
In Cdon products
- In the Product VAT section choose the tax that is applied to the product.
- In the Product Status section, you can choose the current status of the product.
- Select the Product Expose Status from the drop-down menu next on the list.
- In the Freight Class, you can adjust the freight Class of your products (for example – A,B,D).
Now click on Save button and your profile will be created.
Related Articles
Cdon Integration For Prestashop - Overview
Cdon Prestashop Integration is an efficient API integration that helps the Prestashop store owners to synchronize inventory, price, and other product details for the product creation and its management between the Prestashop store and the Cdon ...Cdon Feeds
To view Cdon feeds: Go to Prestashop Admin Panel On the left navigation bar, place the cursor on Cdon Integration and you will see it getting expanded as below: Click on Cdon Feeds and you will see the page as shown below: All the feeds are listed on ...Cdon Logs
To see and manage Cdon logs, Go to your PrestaShop admin Panel. Place cursor on Cdon Integration. When the menu appears, click Cdon logs. On clicking it, you will be navigated to the page as: To see the log, Click the view sign () under Response. On ...Cdon Failed Orders
The admin can see the failed Cdon orders and has the liberty to cancel those orders as well. To cancel the failed order: Go to Prestashop Admin Panel On the left navigation bar, place the cursor on Cdon Integration and you will see it getting ...Cdon Prestashop Extension Installation
To install the extension: Go to the Prestashop Admin panel. On the left navigation bar, point cursor to the Modules and Services. The menu appears as shown in the following figure: Now click the Modules and Services menu, and you will come across a ...