Adding a New Profile

To Add a New Profile,
- Go to your Magento 2 Admin Panel.
- On the left navigation bar, click on RueDuCommerce Integration.
The menu appears as shown below: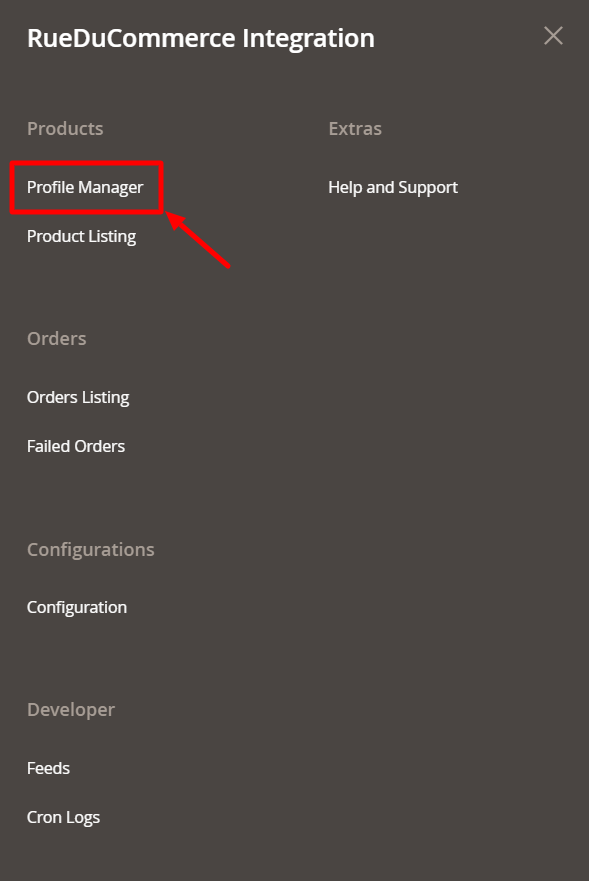
- Now click on Profile Manager and you will be navigated to the page as shown below:
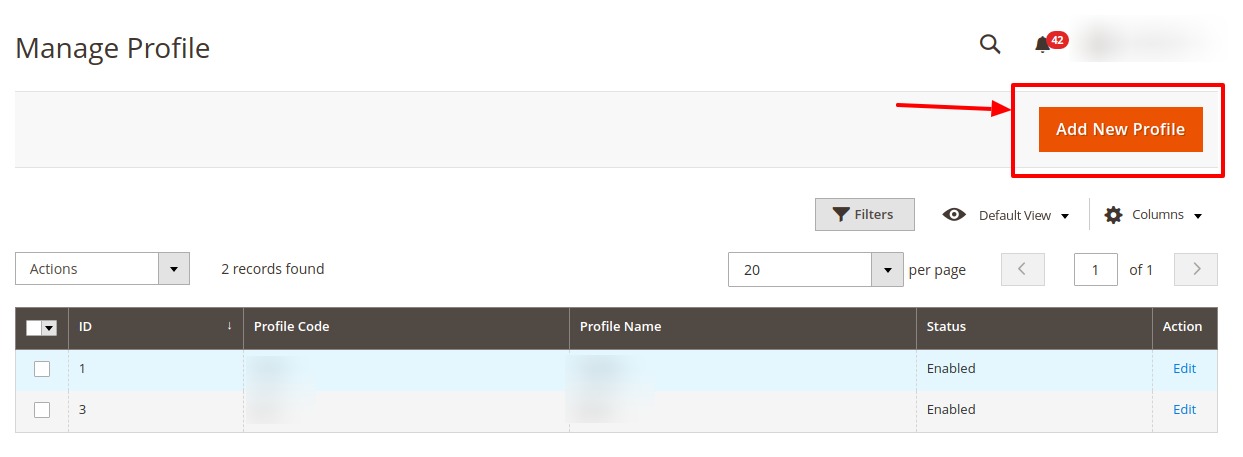
- Click on Add New Profile on the top right of the page. You will be taken to the page as shown below:
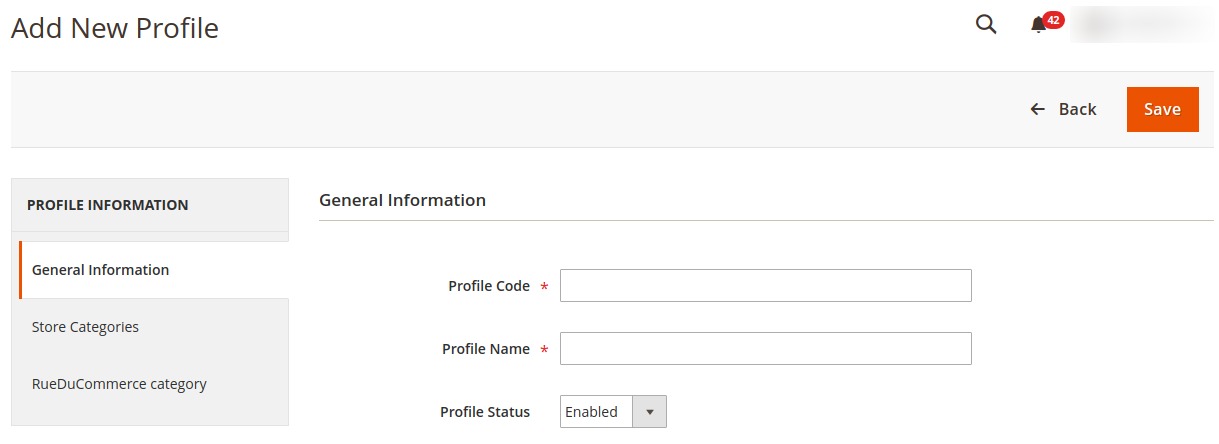
- In Profile Code, add a code that you want for your profile.
- In Profile Name, enter the name that you want for your profile.
- In the Profile Status, select Enabled to enable your profile.
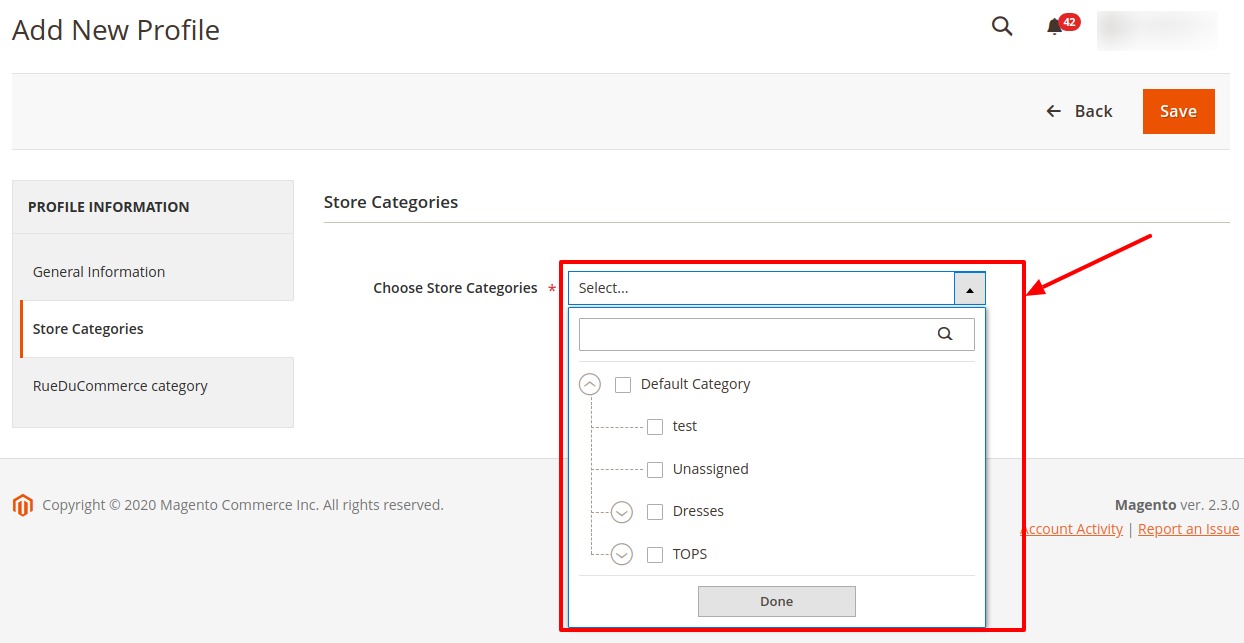
Now click Store Categories from the left menu. The section gets expanded as shown below:
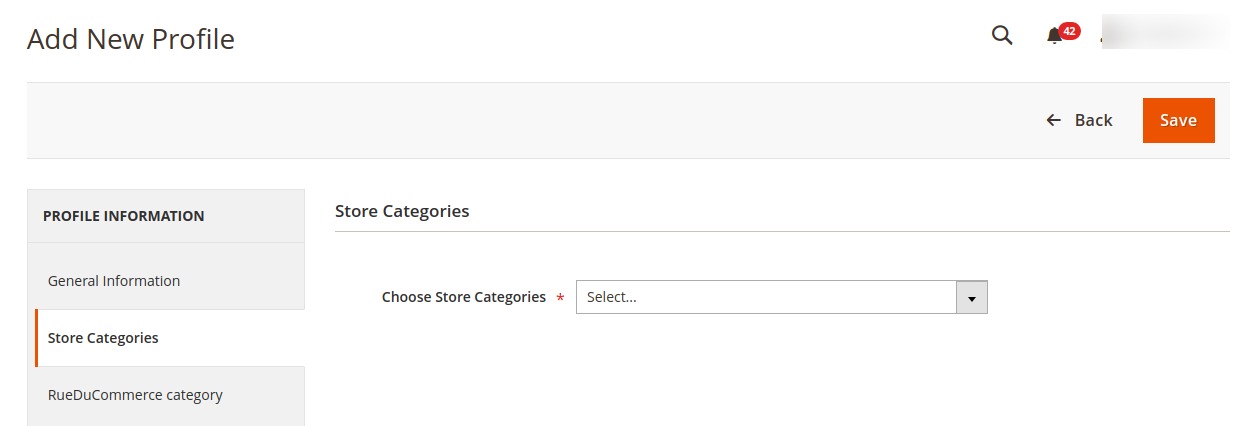
- From Choose Store Categories, select the Magento 2 category for your profile, from the category list as shown below:
Now click RueDuCommerce Category from the left menu. The section gets expanded as shown below:
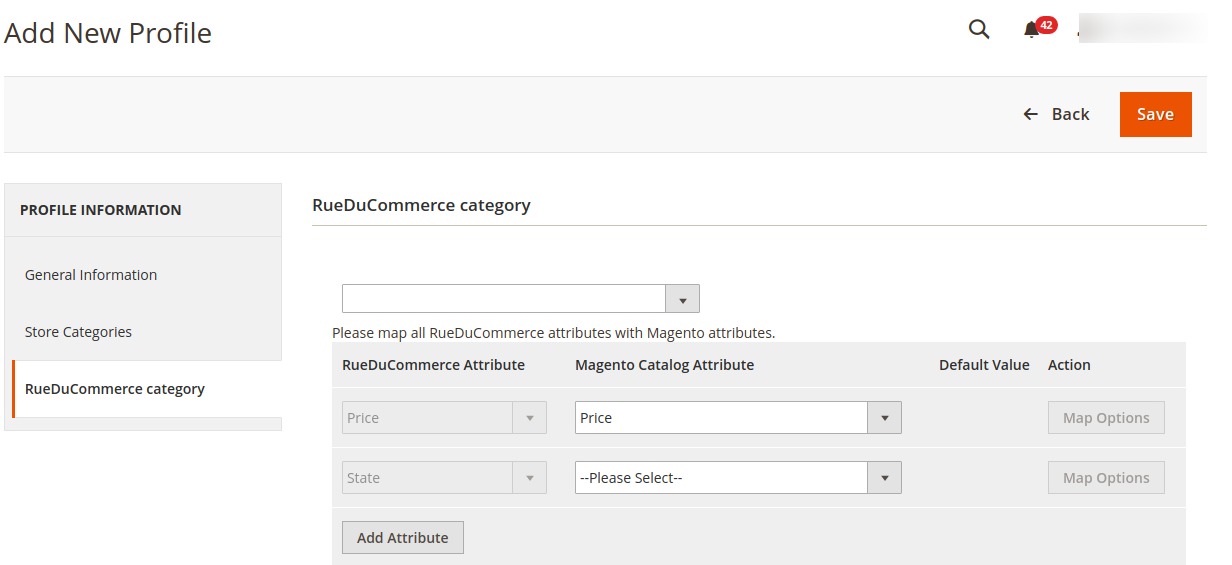
- Select the category and depending on it, child categories will appear further from where you may choose the needed ones as shown below:
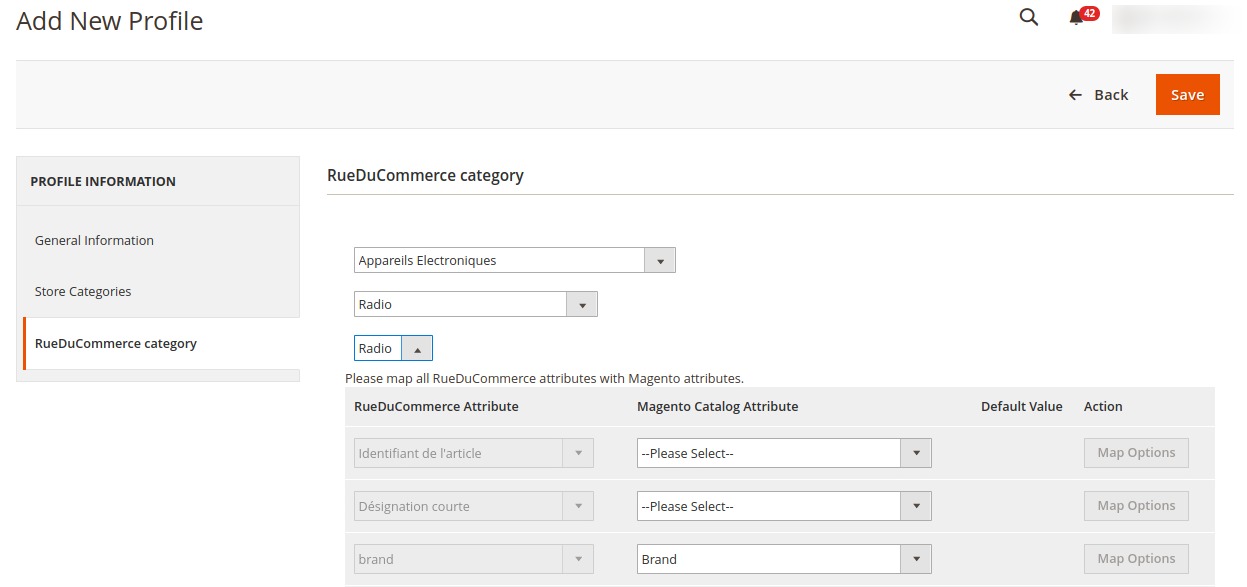
- Once you have completed the mapping, click on Save button on the top right of the page.
- The profile will be saved and appear on the profile page.
Related Articles
Profile Management
The Profile Actions that can be taken while doing the RueDuCommerce Integration for Magento 2 are: Addition of a new profile Editing a profile Enabling/Disabling a profile Deleting a profileDeleting a Profile
Deleting a Profile To Delete a Profile, Go to your Magento 2 admin panel. On the left navigation bar, Click on RueDuCommerce Integration. The menu appears as shown below: Click on Profile Manager. On clicking it, you will be navigated to page as ...Editing the Profile
Editing the Profile To Edit the Profile that you’ve created, Go to your Magento 2 admin panel. On the left navigation bar, Click on RueDuCommerce Integration. The menu appears as shown below: Click on Profile Manager, and you’ll be navigated to the ...Enable/Disable Profile
To Enable or Disable the profile, Go to your Magento 2 admin panel. On the left navigation bar, Click on RueDuCommerce Integration. The menu appears as shown below: Click on Profile Manager, and you’ll be navigated to the page as shown below: Now ...Overview
Want to sell on Rue du Commerce? Have an overview of this marketplace and Rue du Commerce Integration Extension for Magento 2 by CedCommerce. Founded in 1999, the Rue du Commerce marketplace is one of the pioneers of e-commerce sites in France. The ...