All Profiles
Under the "Profiling", you can see the option to "All Profiles" where you can see all your created profiles. The page appears as follows:
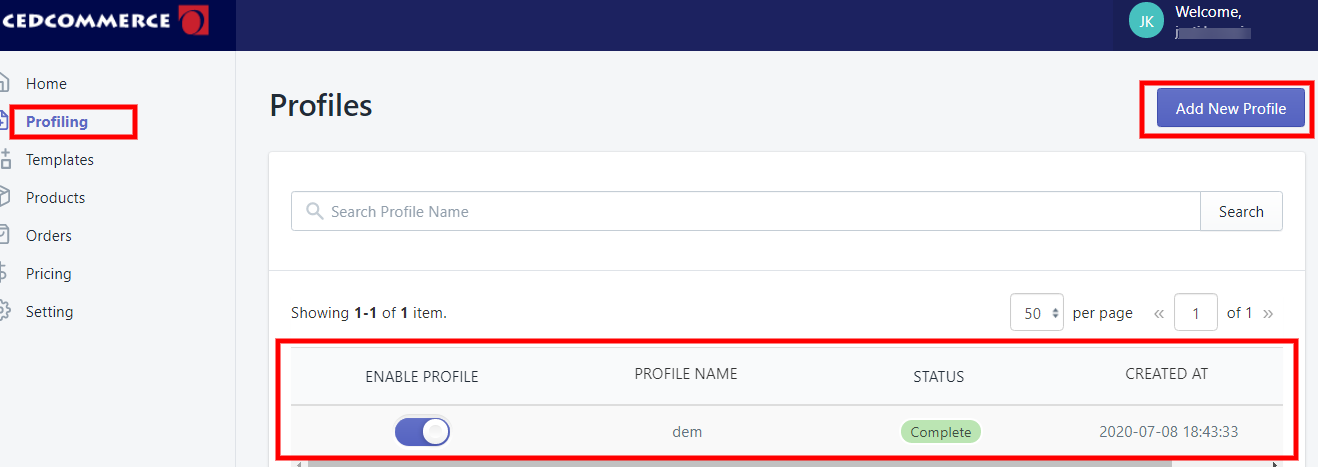
To add a new profile, click on the button "Add New Profile", the following page will appear:
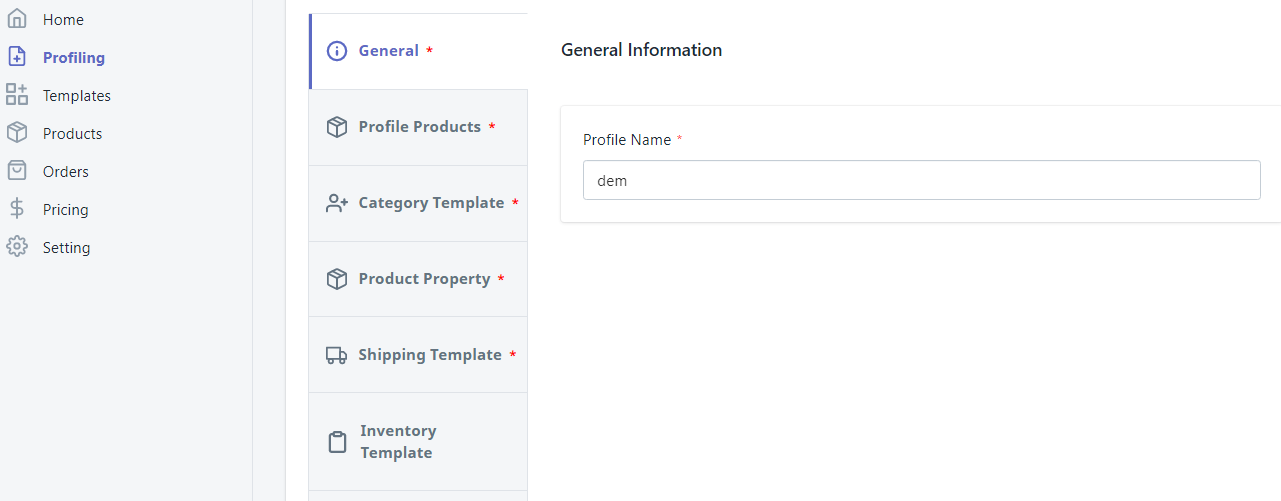
-> General Information - You need to mention the Profile Name in the General Information. Profile name should be different from one another. NOTE:- You cannot edit a Profile's name once it gets saved!!
-> Profile Products -
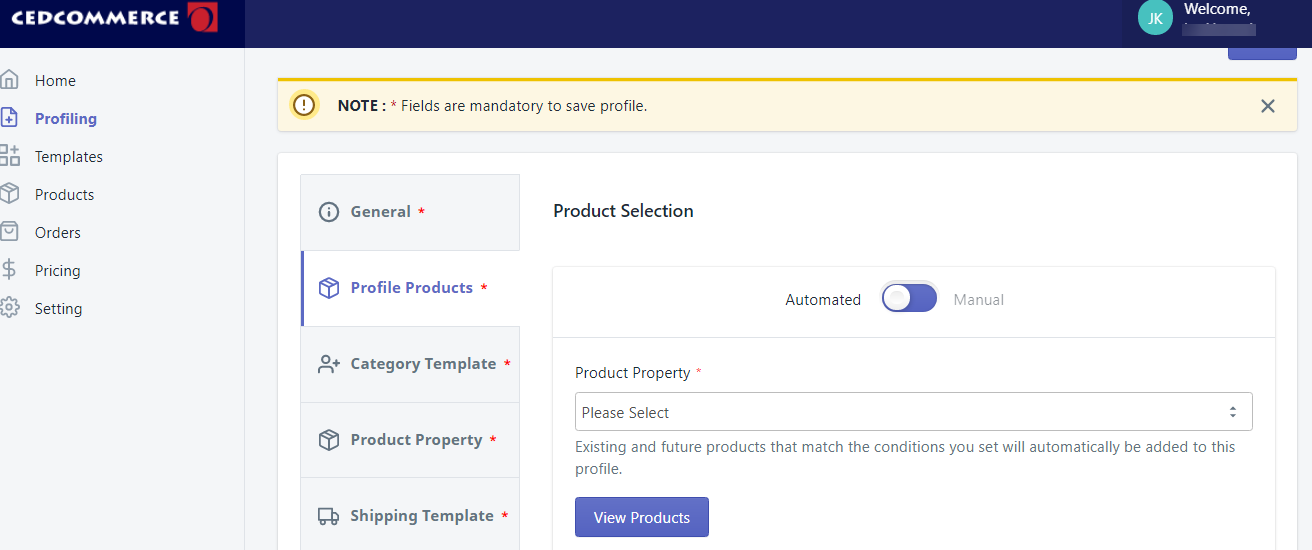
Here you can see two options “Automated” and “Manual”. If you choose "Automated", then the products will automatically be assigned to the profile when imported new products with the same condition. If you choose "Manual", then you'll need to manually add the products in the profile when imported new products.
Select the properties over which you want to create the profiles, it may be either Product type or Vendor or Tags or Title. The next you'll need to complete the mapping part for the products.
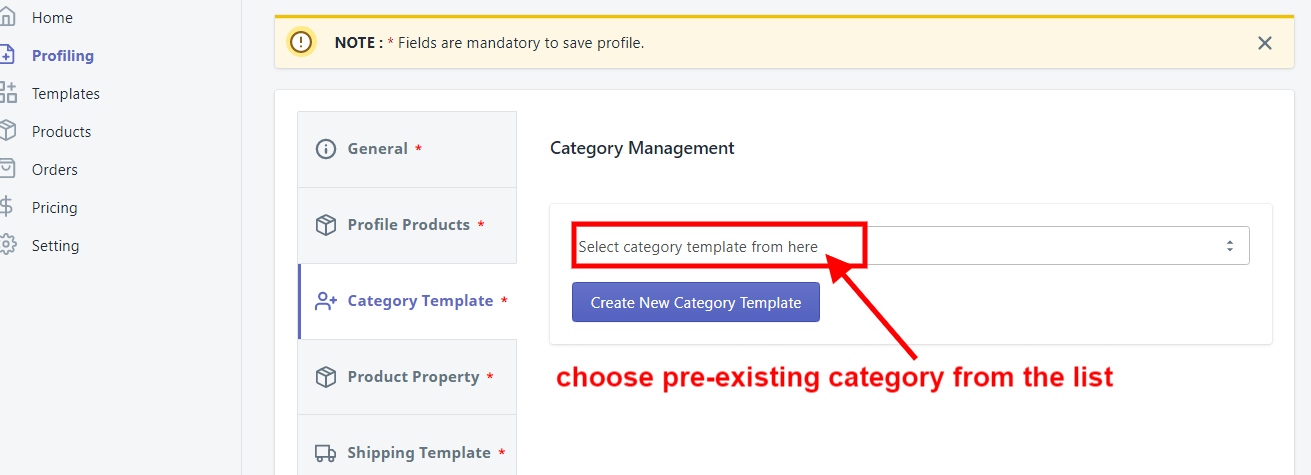
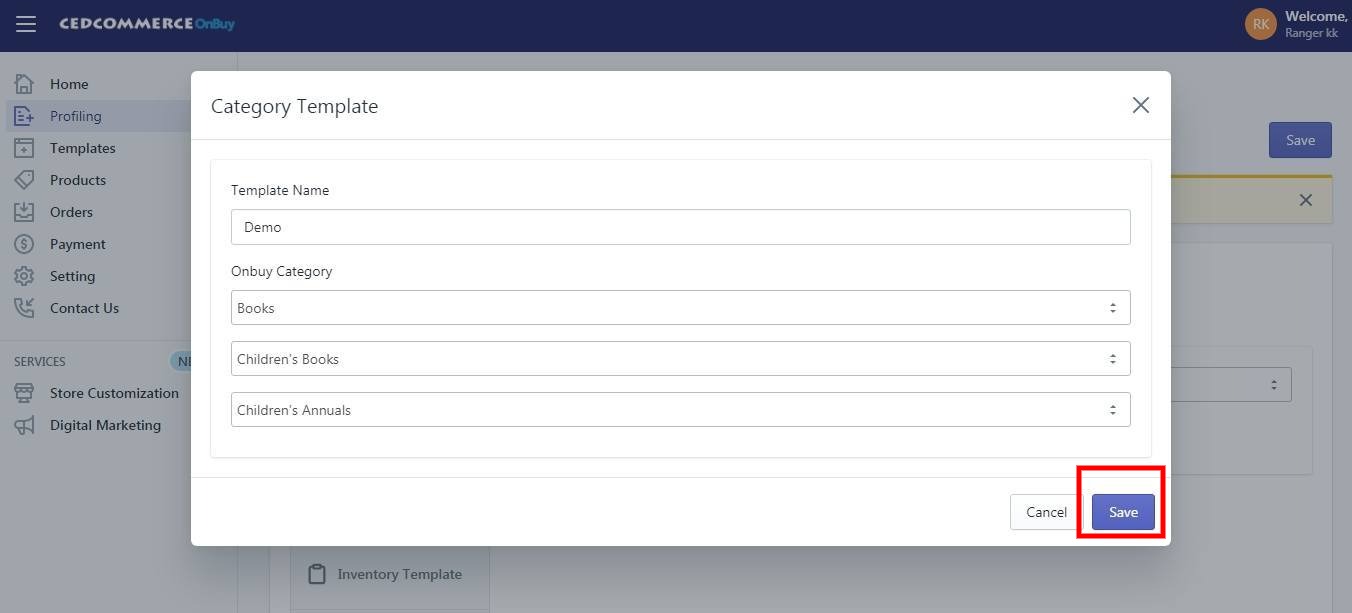
-> Category Template - Overstock Marketplace Category - In the mapping section, select the respective Overstock marketplace category in which your Shopify product will come under. You need to go to the root category for the product.
Note-> Here in the App you can directly choose the Preexisting Category template or create a new one.
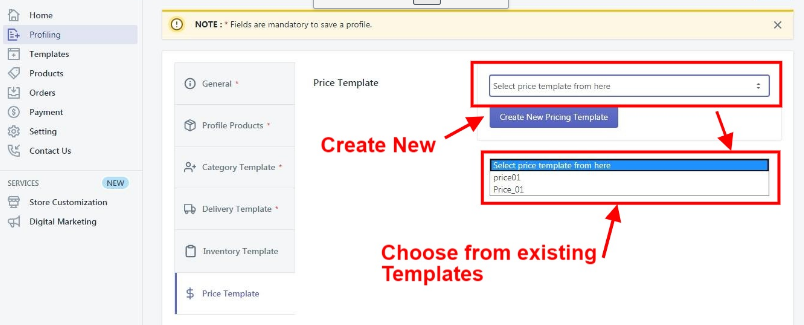
-> Price Template - This template is not necessary, but it may help you to customize your Price of your products on Overstock. Like if you want to send different Price from your Shopify Store.
Choose the Price Template from the drop-down which you want to assign in the respective profile. If no template has been created, can create one before assigning. (If you want you can Skip this field as it is not madatory to create a Profile). After completing all the required fields, click on Save button.
Your Profile will be successfully created at this point.


-> Profile Products -

Select the properties over which you want to create the profiles, it may be either Product type or Vendor or Tags or Title. The next you'll need to complete the mapping part for the products.
-> Category Template - Overstock Marketplace Category - In the mapping section, select the respective Overstock marketplace category in which your Shopify product will come under. You need to go to the root category for the product.
Note-> Here in the App you can directly choose the Preexisting Category template or create a new one.


Overstock Variant Mapping- Map the preferred Overstock attributes here(like Size for size, Color for color etc).
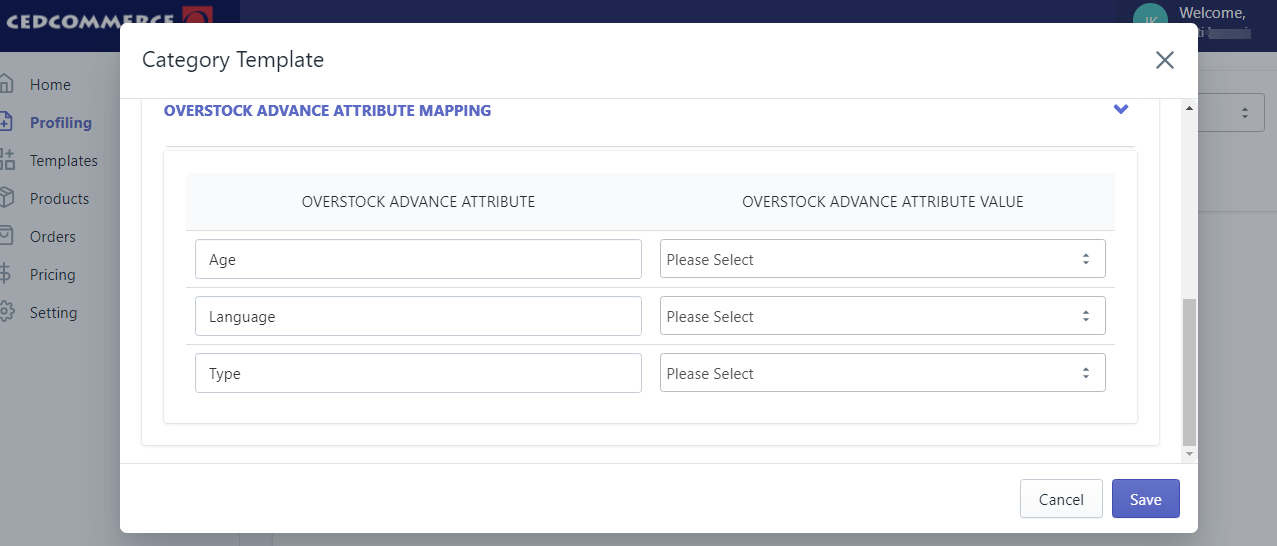

Overstock Value Mapping- Map the Shopify options with the Overstock's Value(Color, Size, Etc.) as above.
-> Product Template - Choose product's country of origin in this template. 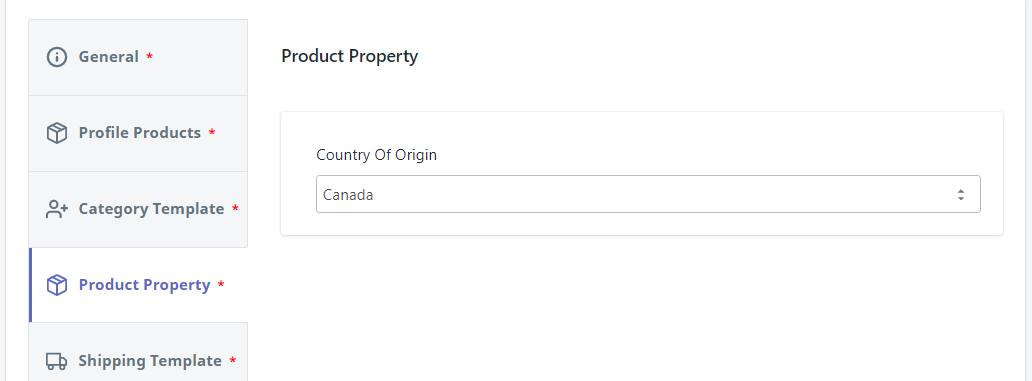
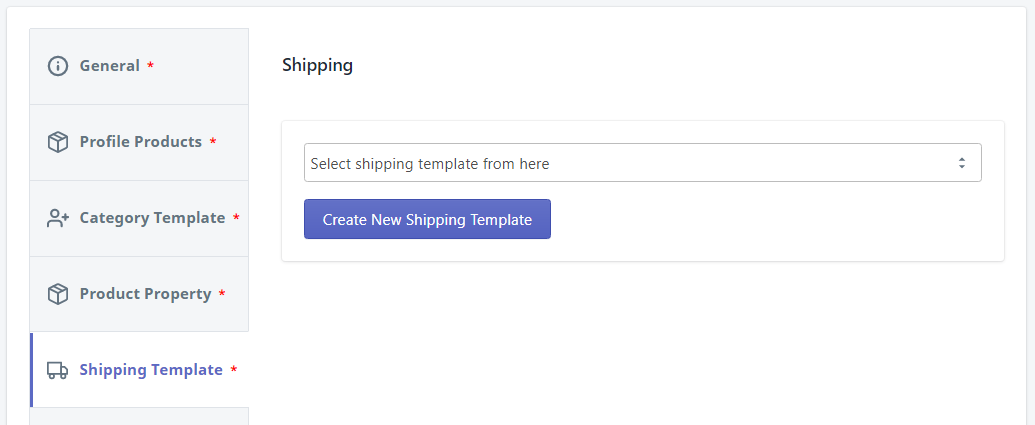
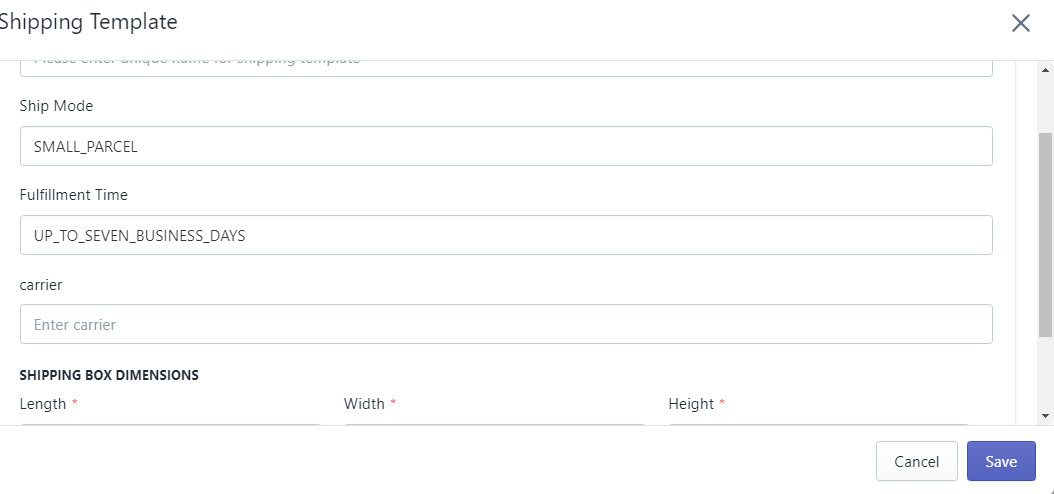
-> Shipping Template - Fill the shipping template name or directly choose the Pre-existing Category template to assign the shipping method, Carrier name, days to fulfill, etc values to all products.


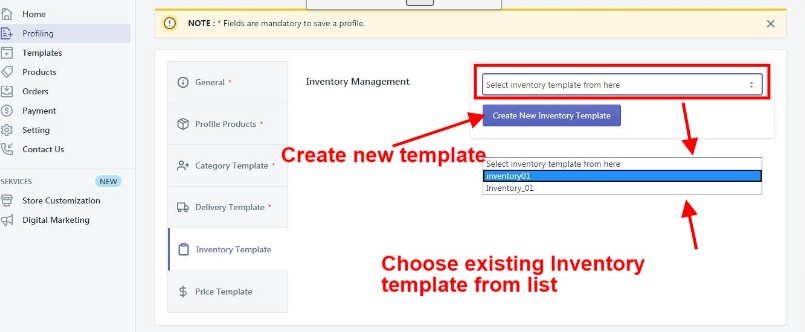
-> Inventory Template - This template is not necessary, but it may help you to customize your Inventory on Overstock. Like if you want to send different inventory from your Shopify Store.
Choose the Inventory Template from the drop-down which you want to assign in the respective profile. If no template has been created, can create one before assigning. (If you want you can Skip this field as it is not mandatory to create a Profile).
Choose the Inventory Template from the drop-down which you want to assign in the respective profile. If no template has been created, can create one before assigning. (If you want you can Skip this field as it is not mandatory to create a Profile).

Choose the Price Template from the drop-down which you want to assign in the respective profile. If no template has been created, can create one before assigning. (If you want you can Skip this field as it is not madatory to create a Profile). After completing all the required fields, click on Save button.

Related Articles
How to Install the Overstock Integration
Selling on Overstock is a seamless process but one has to apply for the seller account by filling the details required. You can click on the given link to apply for the Seller account: https://overstock.force.com/requestToSell/s/. Once you fill these ...Sync with Overstock
If you are already selling on Overstock and have products on Overstock, you can synchronize the product status from the Overstock.com to the App Go to the "Overstock Marketplace Integration" App. Click on the "Products" in the left panel. The ...Upload Products on Overstock
To upload all the products on Overstock.com Go to the "Overstock Marketplace Integration" App. Click on the "Products" in the left panel. The "Products" page appears as follows: On this page, all the products are listed with all the details. Select ...Overstock API Settings
Overstock API Settings These are the API details of your Overstock App and appears as follows: Seller Id: This shows the Overstock seller id of the account which is connected with the Integration App. Consumer Key: This shows the consumer key of the ...Connect With Overstock
Step 1: To complete this step, you need to follow the below steps: 1). Login to your OnBuy Account and visit your OnBuy Account as shown below: *NOTE - If you don't have OnBuy Seller Account, you can register HERE 2). To connect your OnBuy Account ...