Assign Order to Driver
To assign an order to a driver, Admin has to complete the order using the following steps and then assign it to the delivery boy.
- Under the Sales section, go to orders.
- From the list, click on the view label of the order for which the shipment will be made.
- Create an invoice (if required) & then click on the Ship button.

- After clicking on the Ship button, submit the shipment of the order.
- Once created successfully, you will get the notification, “The shipment has been created.”
- Go to the Delivery app tab > Assign a driver to order section.
- You will see the orders ready to assign here—select the order for which the delivery boy is to be assigned.
- Once selected, the following page will get open.
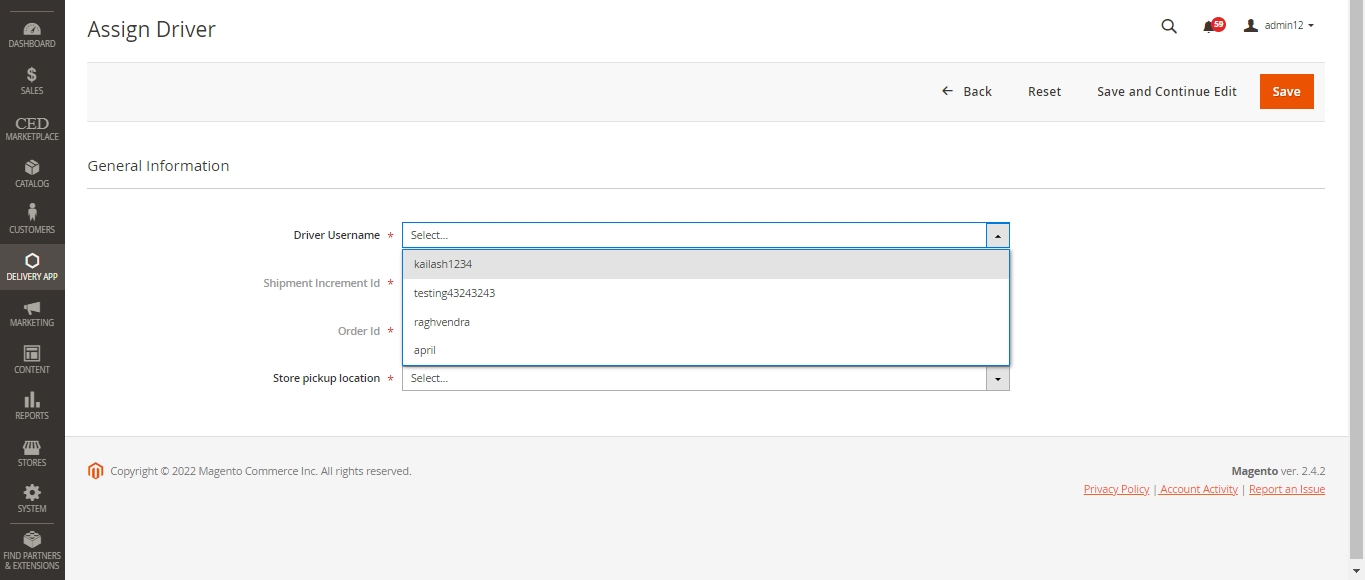
- Choose the delivery boy (Only drivers with online status at the time of assignment will show in the dropdown) and then choose the store pickup location.
- Click on the save label to complete the assignment process & once done. It will redirect to the Assign Driver grid.

- In the Assign Driver grid, Admin can see that the order is assigned to the respective delivery boy.
- Further, the Admin can also see the other orders’ statuses. Admin can also reassign an already assigned order to another delivery boy.
Related Articles
Delivery Boy App
The MageNative’s Delivery Boy app allows online store owners to offer seamless delivery management. The store owner can easily add the delivery agents, assign orders, and manage the transactions from the Admin panel. This app’s end-user is the ...Manage Delivery App
This section allows an Admin to add/edit a driver or delivery boy. Add a Delivery Boy To edit a driver click on the Edit button available driver-wise in the grid. To add a driver, click on the ADD DRIVER. A page consisting of information form will ...Admin Driver Chat Settings
Navigate to Stores > Configuration > MAGENATIVE DELIVERY APP > Admin-Driver Chat Settings Enable Live Chat: Using the dropdown label, select Yes or No to Enable or Disable seller chat. In the next given field, enter the Chat Server URL. Here, the ...Assigned Driver
In this section, the Admin can see the order-wise delivery statuses and the delivery boy assigned. There are some more details available order-wise like Assignment time, Date on which order has been delivered, the amount received for the order, etc. ...Admin Interface in App
Click on the toggle button and slide it towards the Admin side to log in as Admin on the Delivery Boy App. Sign in as Admin with Magento 2 user ID and password. A page will be displayed some tabs along with the current chosen physical store on the ...