Bulk Actions
With the Bulk Action feature, the admin has an ability to perform the following Bulk actions:
- Bulk Profile Assignment: Assign the selected profile to the category. Thus, the selected profile is assigned to all the products that come under the category.
- Bulk Product Upload: Upload the selected categories to Qoo10. Also, can select the required products to upload and exclude the products not to upload on Qoo10.
To Assign the Profile:
- Go to the WooCommerce Admin panel.
- On the left navigation bar, click the Qoo10 menu.
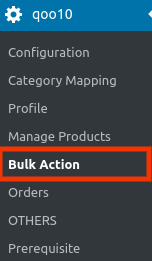
A Submenu appears below the qoo10 menu as shown in the following figure:
- Click Bulk Action.
OR
In the right panel, click the BULK ACTION tab.
The Bulk Action page appears as shown in the following figure:
- Here in the "Current Shop" you just need to select the shop in which you want to upload your products as shown in the above image.
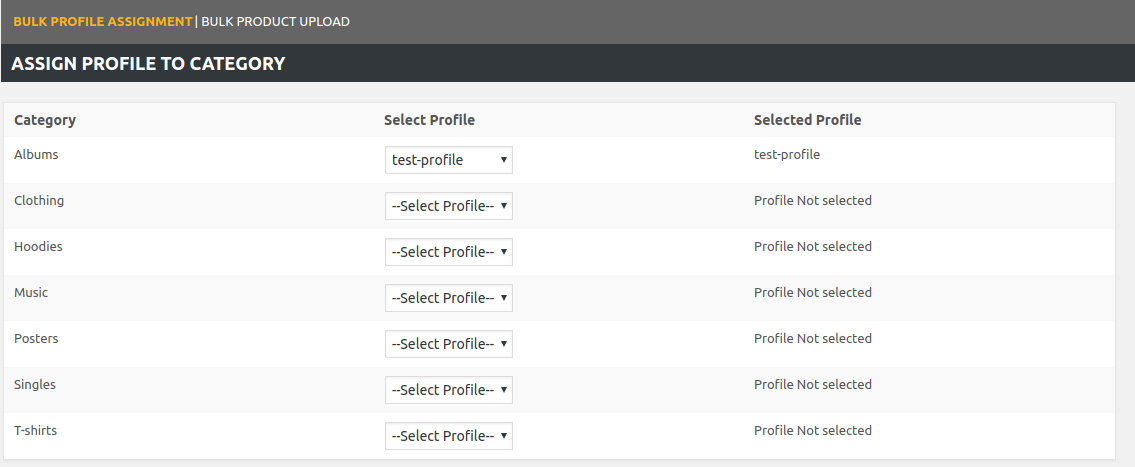
- Once you had selected the Shop then the ASSIGN PROFILE TO CATEGORY page appears as shown in the following figure:

- Scroll down to the category to assign the profile.
- In the row of the required category, move to the Select Profile list.
- In the Select Profile list, select the required profile.
The selected profile is assigned to the category and a success message appears.4
To Upload Products in Bulk:
- Go to the WooCommerce Admin panel.
- On the left navigation bar, click the Qoo10 menu.
A Submenu appears below the qoo10 menu as shown in the following figure:
- Click Bulk Action.
OR
In the right panel, click the BULK ACTION tab.
The Bulk Action page appears as shown in the following figure:
- Here in the "Current Shop" you just need to select the shop in which you want to upload your products as shown in the above image.
- Once you had selected the Shop then fill these required fields as shown in the image below:

- In the Select Categories box, click to select the required categories from the list.
- In the Select Products box, click to select the required products from the list of products upload.
- In the Exclude Products box, click to select the products from the list to hold back from product upload.
- Click the SAVE CHANGES button to save the changes.
- Click the UPLOAD button to upload the selected categories and products on Qoo10.
The selected categories and the products are uploaded and a success message appears on the page.
Related Articles
Deleting The Profiles
To delete Profiles: Go to the WooCommerce Admin panel. On the left navigation bar, click the Qoo10 menu. A Submenu appears below the qoo10 menu as shown in the following figure: Click Profile. OR In the right panel, click the PROFILE tab. The page ...Product Management
Admin can view all the product details such as the assigned profile name, product selling price, and the product inventory. Admin can edit the product meta-keys and assign the profile to the products. Also, the admin can upload the selected products ...Overview
As eCommerce is increasing rapidly in Singapore, so the Qoo10 is probably the best of eCommerce marketplaces or you can say it is the home in Singapore for all your needs, every need, each day. It runs the online marketplaces crosswise over ...Configuration Settings
Once you have successfully installed this extension in the WooCommerce store, the Qoo10 menu appears on the left navigation bar of its Admin Panel. The merchant has to first create a seller account in the Qoo10 seller dashboard. Once the seller ...Order Management
To Fetch Orders: Go to the WooCommerce Admin panel. On the left navigation bar, click the Qoo10 menu. A Submenu appears below the qoo10 menu as shown in the following figure: In the right panel, click the ORDERS tab. The page appears as shown in the ...