Catch Configuration Settings
Once the module gets installed, you get navigated to the Configuration page. To perform Configuration settings: 
- Go to the Prestashop Admin panel.
- In the left navigation panel, place cursor on Catch Integration and the section expands as:
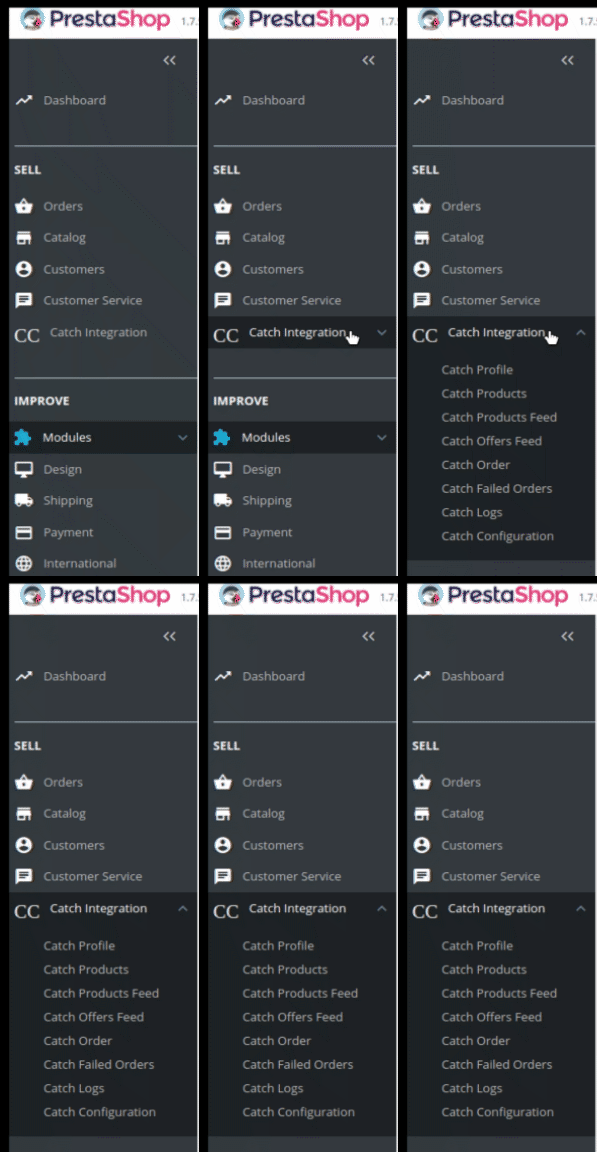
- Now click on Catch Integration:
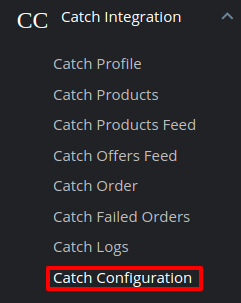
- Now click on Catch configuration and the configuration settings page opens up:
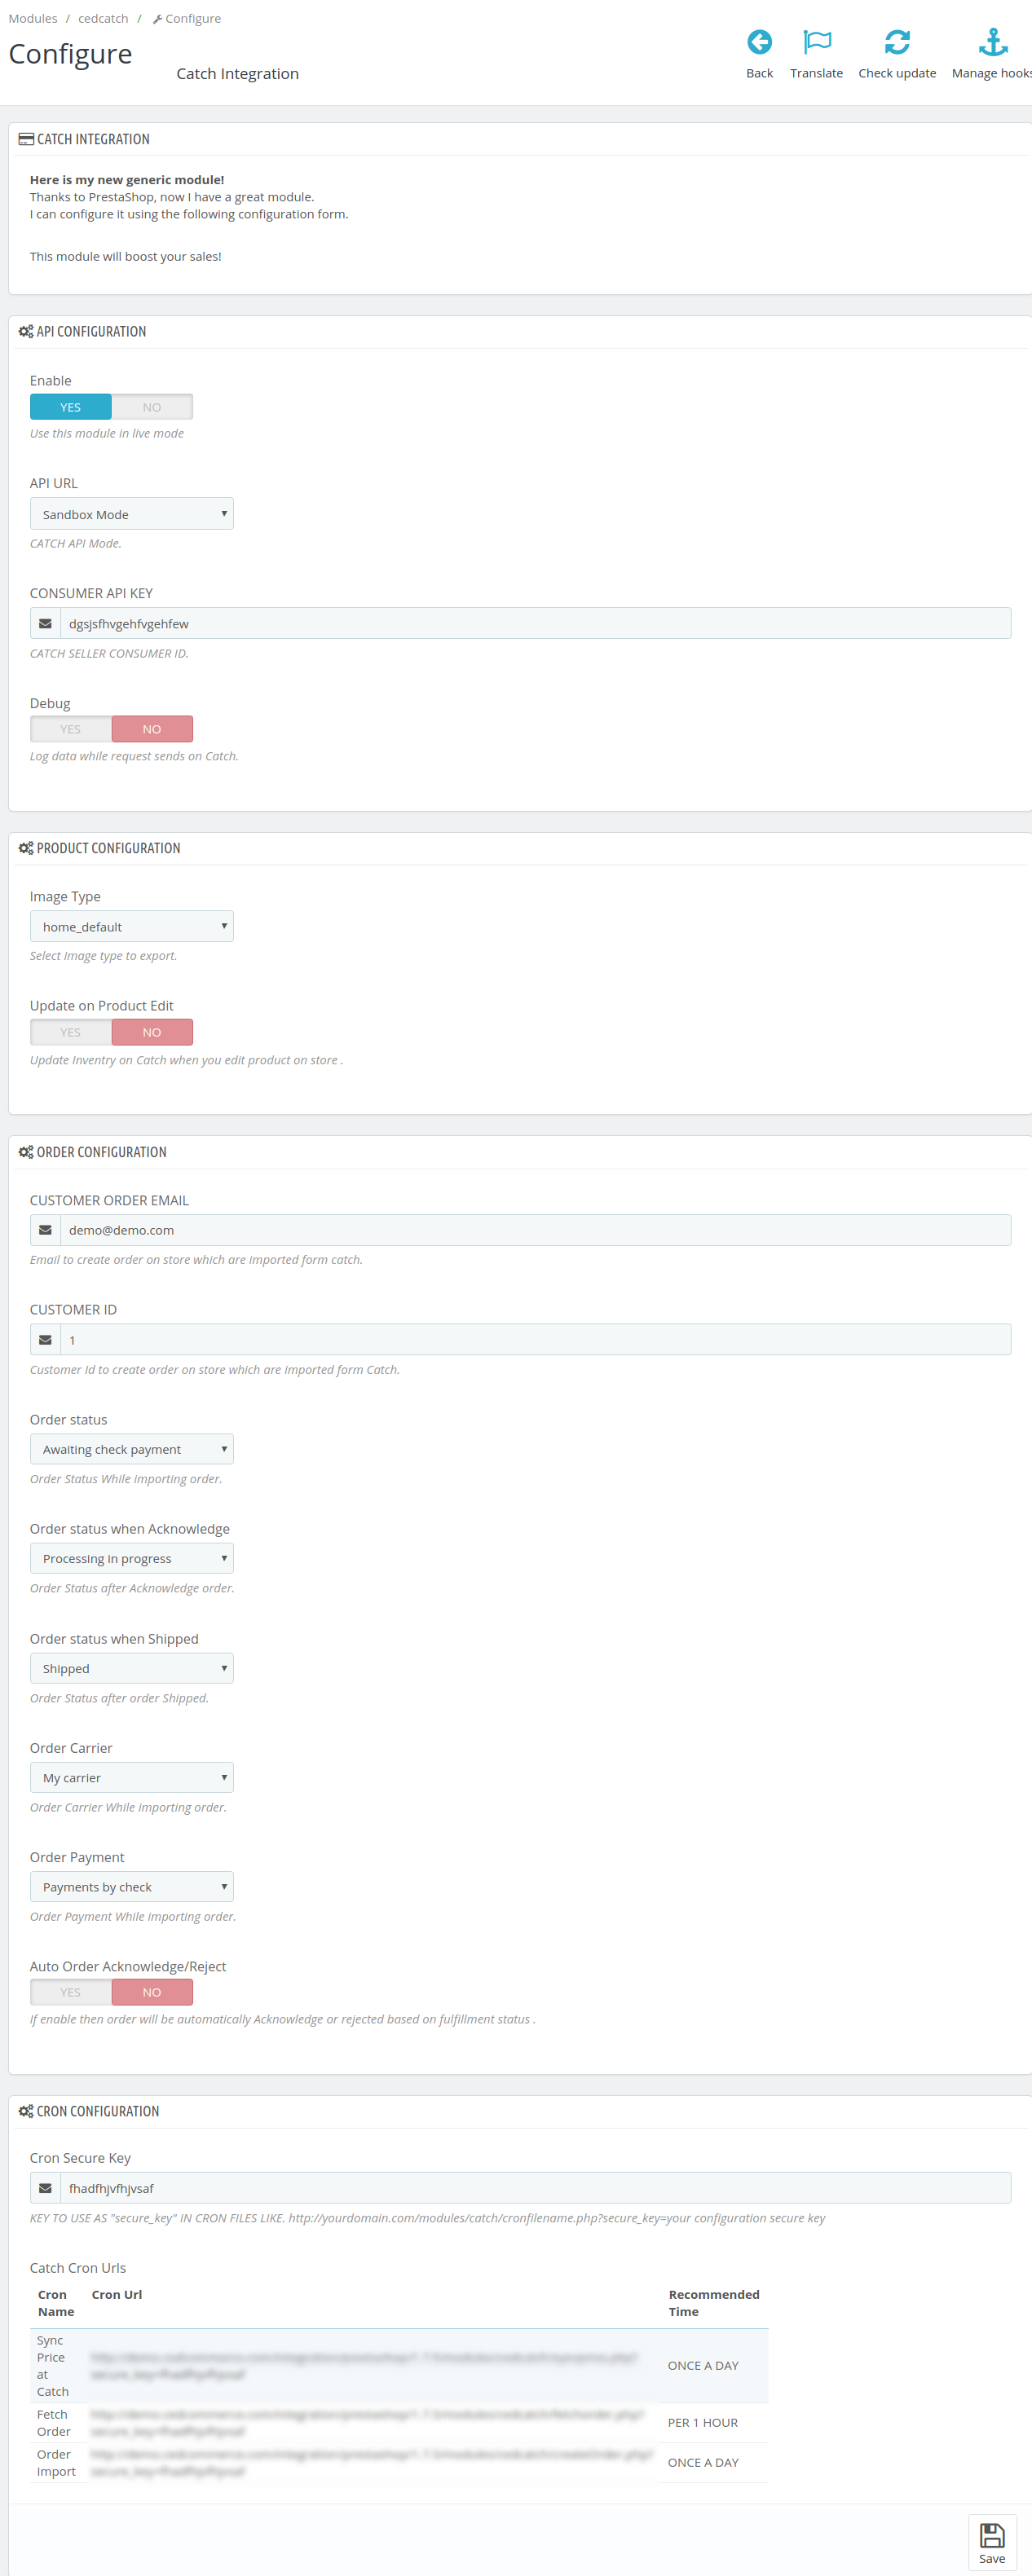
- There are 4 types of configuration settings:
- API
- Product
- Order
- Cron
- You must begin one by one. First is the API Configuration Settings:
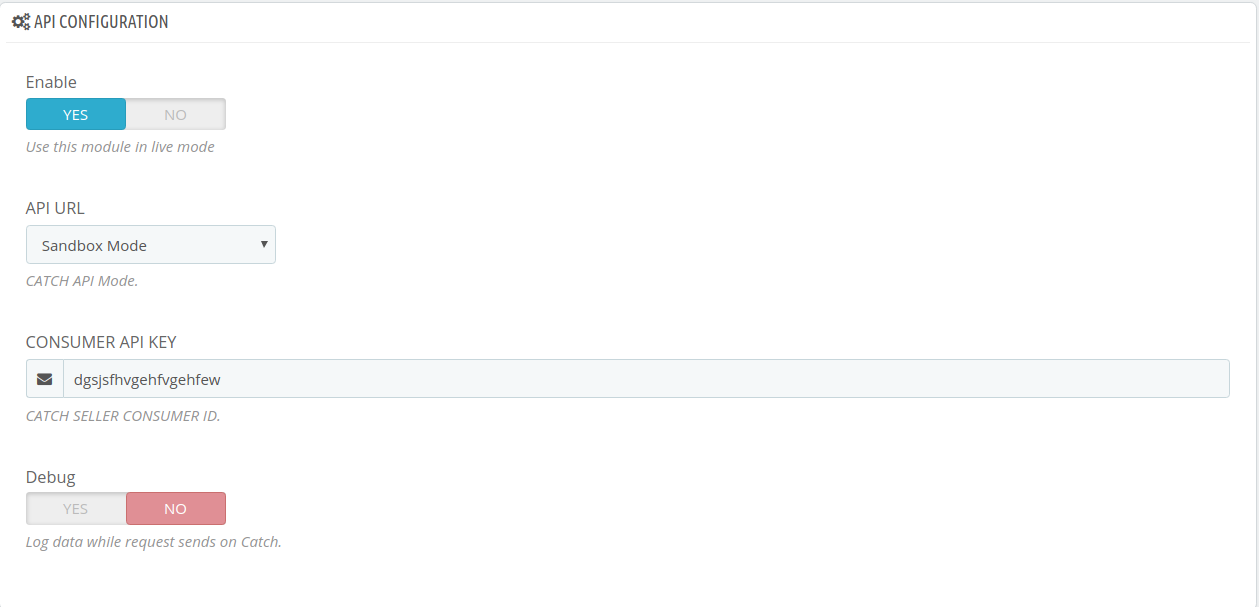
- Select Yes in the Enable part so that your module gets enabled.
- In API Mode, select from Sandbox or Production. The sandbox mode is for testing and the Production mode is for the live changes on Catch Marketplace.
- Enter your Catch API Key in the next section. This is available on your Catch Seller Panel.
- In Debug Mode, select Enable if you want the Debug log to be created.
Product Configuration:

- In Image Type, choose the image type to export from the dropdown menu.
- In Update product on edit, the details of the product will vary as you make changes or edit the product.
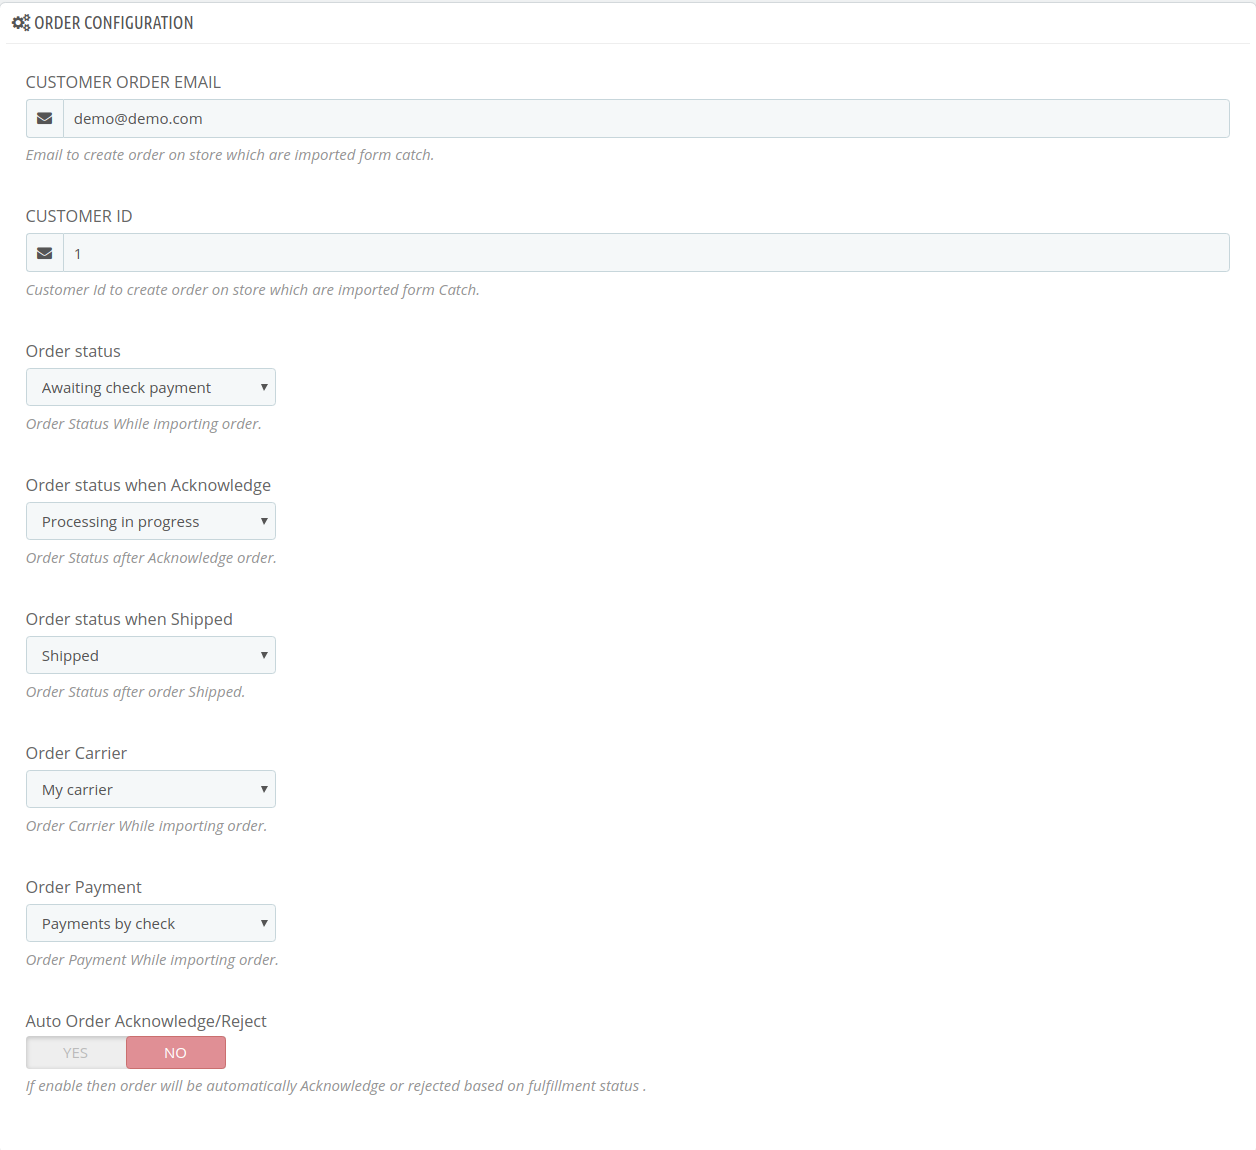
Order Configuration:

- In the Customer Order Mail, you need to provide the Email to create order on the store which is imported from Catch.
- Enter the Customer Id in the next section. Customer Id is a unique id which is used to create order on the Prestashop store which is imported from Catch.
- In the Order status, select the current order status which appears by default.
- In the Order status when acknowledge, select the order status to appear when the order has been acknowledged.
- In the Order status when shipped, select the order status to appear when the order has been shipped.
- In the Order Carrier, select the order carrier set for particular orders while importing the Catch order.
- In the Order Payment, select the order payment method set for each order while importing the Catch order.
- In Auto Order Acknowledge/Reject, if Yes is selected, the order will be automatically accepted or rejected based on fulfillment status.
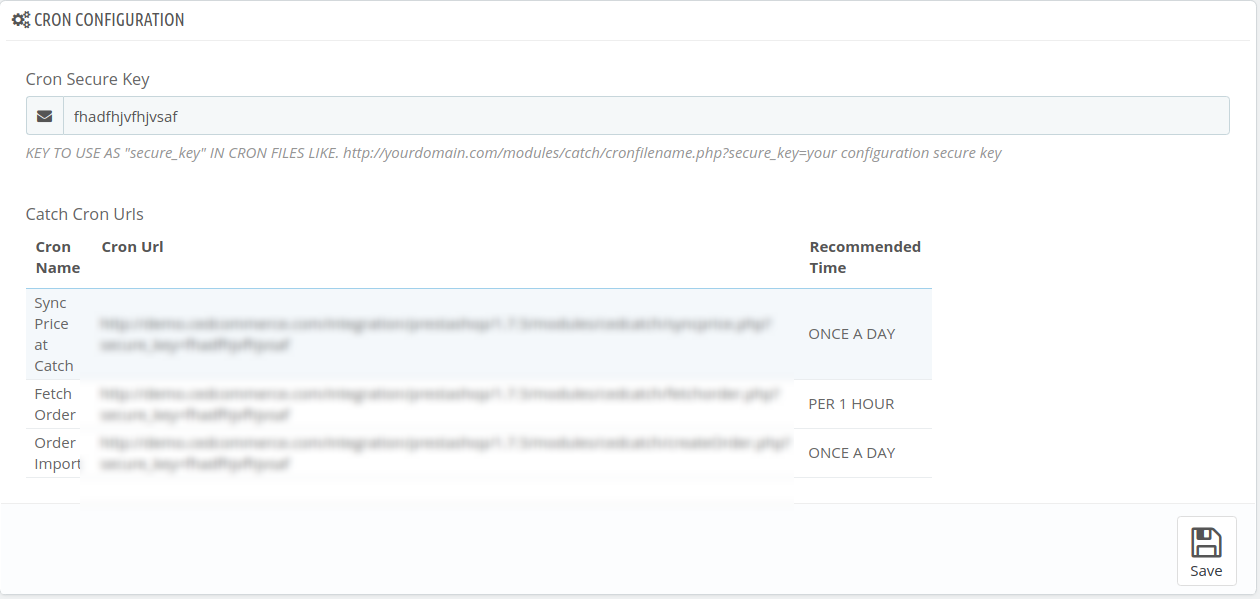
Cron Settings:

- The Sync Inventory Price, Fetch and Create Order Crons are mentioned below.
- Click on the Save Button to save all the settings.
Related Articles
Configuration
While operating a multichannel business, you must set your product, order, currency, and shipping preferences. Based on your preferences, the app will help you with all the automated functionalities between your Catch account and Shopline store. The ...Overview: CedCommerce Catch Integration
About CedCommerce CedCommerce is a leading multichannel enabler that helps online merchants expand their business to international marketplaces like Amazon, eBay, Walmart, and Google via secure, optimized, and scalable integration tools and ...How the Catch Configuration Settings Work?
Once the extension is successfully installed in the Magento 2 store, the CATCH INTEGRATION menu appears on the left navigation bar of the Magento 2 Admin panel. The merchant has to first create a seller account in the Catch seller panel. Once the ...Catch Global Settings
In this, the configuration related to products and order sync is provided. The Global Setting for Catch holds the following features: The meta keys and attributes list section helps you to choose the required meta keys and attributes required for ...Configuration Settings
Once the module has been installed, the first necessary step needs to be taken by the admin is to complete the Configuration. To do the Configuration Settings, Go to your OpenCart admin panel. Click the Catch option which is on the left navigation ...