Categories
To View categories,
- Go to the Magento 2 Admin panel.
- On the left navigation bar, click the Zalando Integration menu.
The menu appears as shown in the following figure:

- Click on Categories.
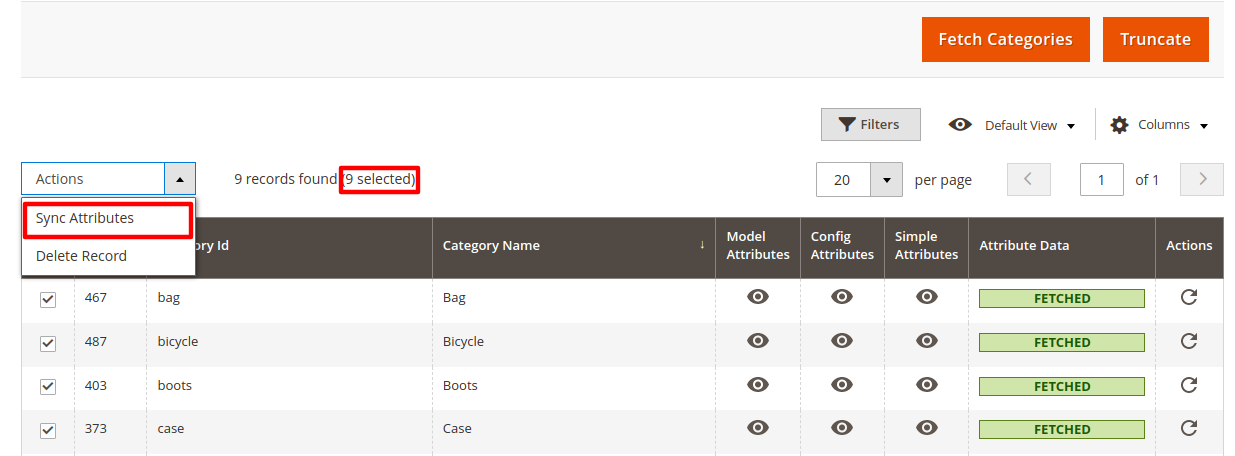
The Manage Categories page appears as shown below:

- The category details will be displayed in the grid.
- To fetch new categories, click on the Fetch Categories button. The categories will be fetched and displayed in the grid.
- To fetch the Attribute Data, select all categories then do the mass action of Attribute Sync to synchronise all attributes data for that category.

- To delete the categories, click on the Truncate button. The selected categories will be deleted.
Related Articles
Overview
Zalando is a European e-commerce company based in Berlin, Germany founded in 2008. This eCommerce company offers fashion and lifestyle products to customers in 17 European markets. Zalando marketplace was earlier famous for selling footwear. At the ...Logs
To view activity details, Go to the Magento 2 Admin panel. On the left navigation bar, click the Zalando Integration menu. The menu appears as shown in the following figure: Click on Logs. The Zalando Log page appears as shown in the following ...Edit an Existing Profile
To edit a profile, Go to the Magento 2 Admin panel. On the left navigation bar, click the Zalando Integration menu. The menu appears as shown in the following figure: Click on Manage Profile. The Manage Profile page appears as shown in the following ...Submit Bulk Actions on Profiles
To perform actions in bulk, Go to the Magento 2 Admin panel. On the left navigation bar, click the Zalando Integration menu. The menu appears as shown in the following figure: Click on Manage Profile. The Manage Profile page appears as shown in the ...Cron Logs
To View Cron Logs, Go to the Magento 2 Admin panel. On the left navigation bar, click the Zalando Integration menu. The menu appears as shown in the following figure: Click on Cron Events. The Cron Grid page appears as shown in the following figure: ...