Category Mapping
The CATEGORY MAPPING page lists all the Qoo10 categories. Admin has to select the Qoo10 categories to which the products need to be assigned.
For selecting the required categories for mapping
- Go to the WooCommerce Admin panel.
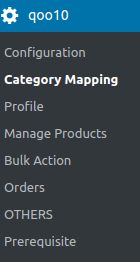
- On the left navigation bar, click the Qoo10 menu.
- In the right panel, click the CATEGORY MAPPING tab.

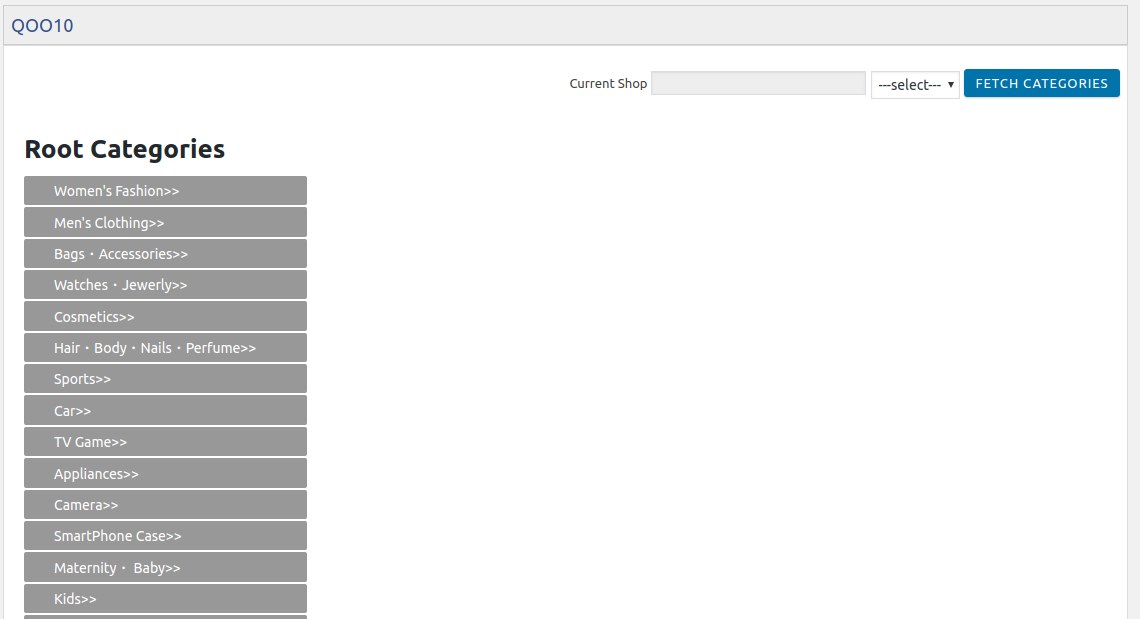
The page appears as shown in the following figure:
- Click the FETCH CATEGORIES button to fetch all the categories from Qoo10.
- Under Root Categories, click the required category.
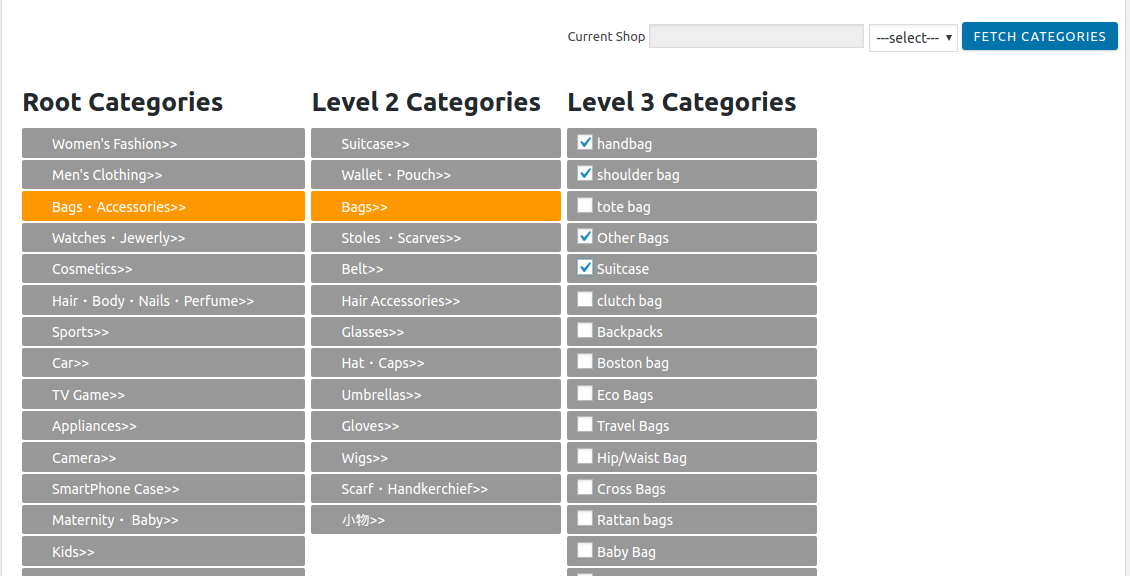
Next level categories list appears. Click the required category.
Note: Keep clicking every next level required categories until the last level categories list and the corresponding checkboxes appear as shown in the following figure:
- Select the check boxes associated with the required categories.
The selected categories are saved and a success message appears on the page.
Related Articles
Overview
As ecommerce is increasing and growing day by day in Singapore, so the Qoo10 is one of the best marketplaces or you can say it is the home in Singapore for your every need, every want, every day. It operates the online marketplaces across Singapore, ...Bulk Action
With the Bulk Action feature, the admin has an ability to perform the following Bulk actions: Bulk Profile Assignment: Assign the selected profile to the category. Thus, the selected profile is assigned to all the products that come under the ...Add a new profile
For adding a new profile Go to the WooCommerce Admin panel. On the left navigation bar, click the Qoo10 menu. A Submenu appears below the Qoo10 menu as shown in the following figure: Click Profile. OR In the right panel, click the PROFILE tab. The ...Configuration Settings
Once you have successfully installed this extension in the WooCommerce store, the Qoo10 menu appears on the left navigation bar of its Admin Panel. The merchant has to first create a seller account in the Qoo10 seller dashboard. Once the seller ...Upload the Selected Products
For uploading the selected products Go to the WooCommerce Admin panel. On the left navigation bar, click the Qoo10 menu. A Submenu appears below the qoo10 menu as shown in the following figure Click Manage Products. OR In the right panel, click the ...