Configuration
After installing the VAT Validation extension for Magento 2, the admin has to set up the configuration settings to enable the extension feature.
To enable the VAT validation extension feature
- Go to the Admin panel.
- On the left navigation bar, click the STORES menu, and then click Configuration. The Configuration page appears.
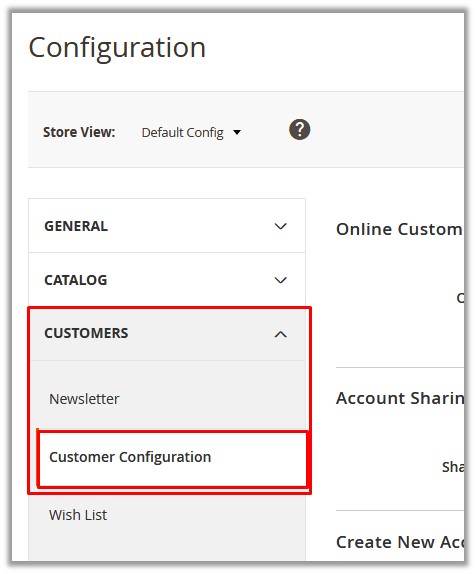
- In the left navigation panel, click the CUSTOMERS menu, and then click Customer Configuration.
As shown in the following figure:
- In the right panel, the Create New Account Options tab is expanded and the relevant fields appear.
- Scroll down to the Create New Account Options tab.
The page appears as shown in the following figure:
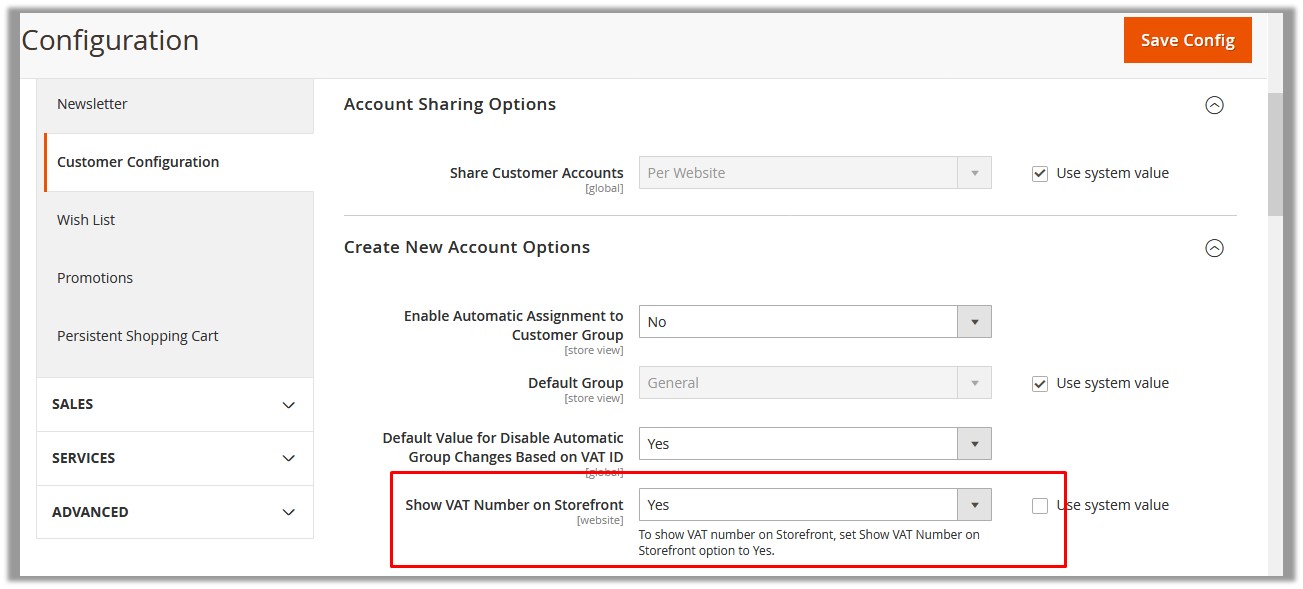
- In the Show VAT Number on Storefront list, select Yes. Select Yes to show VAT number on the front-end view.
- Scroll down to the Name and Address Options tab.
The page appears as shown in the following figure:
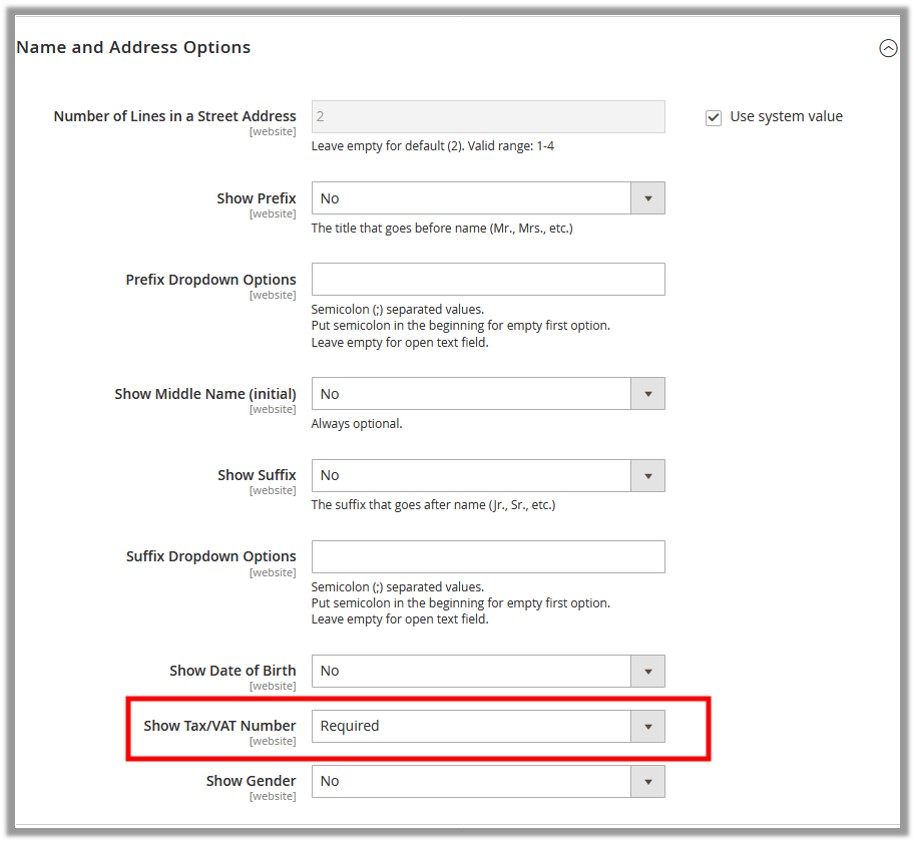
- In the Show Tax/VAT Number list, select the required option.
- Click the Save Config button.
The configuration settings are saved.