Configuration Settings
To set up the configuration settings in the Prestashop Admin panel
- Go to the Prestashop Admin panel.
- In the left navigation panel, place cursor on the Vidaxl Dropshipping menu. The menu appears as shown in the following figure:

- Click on Configuration.
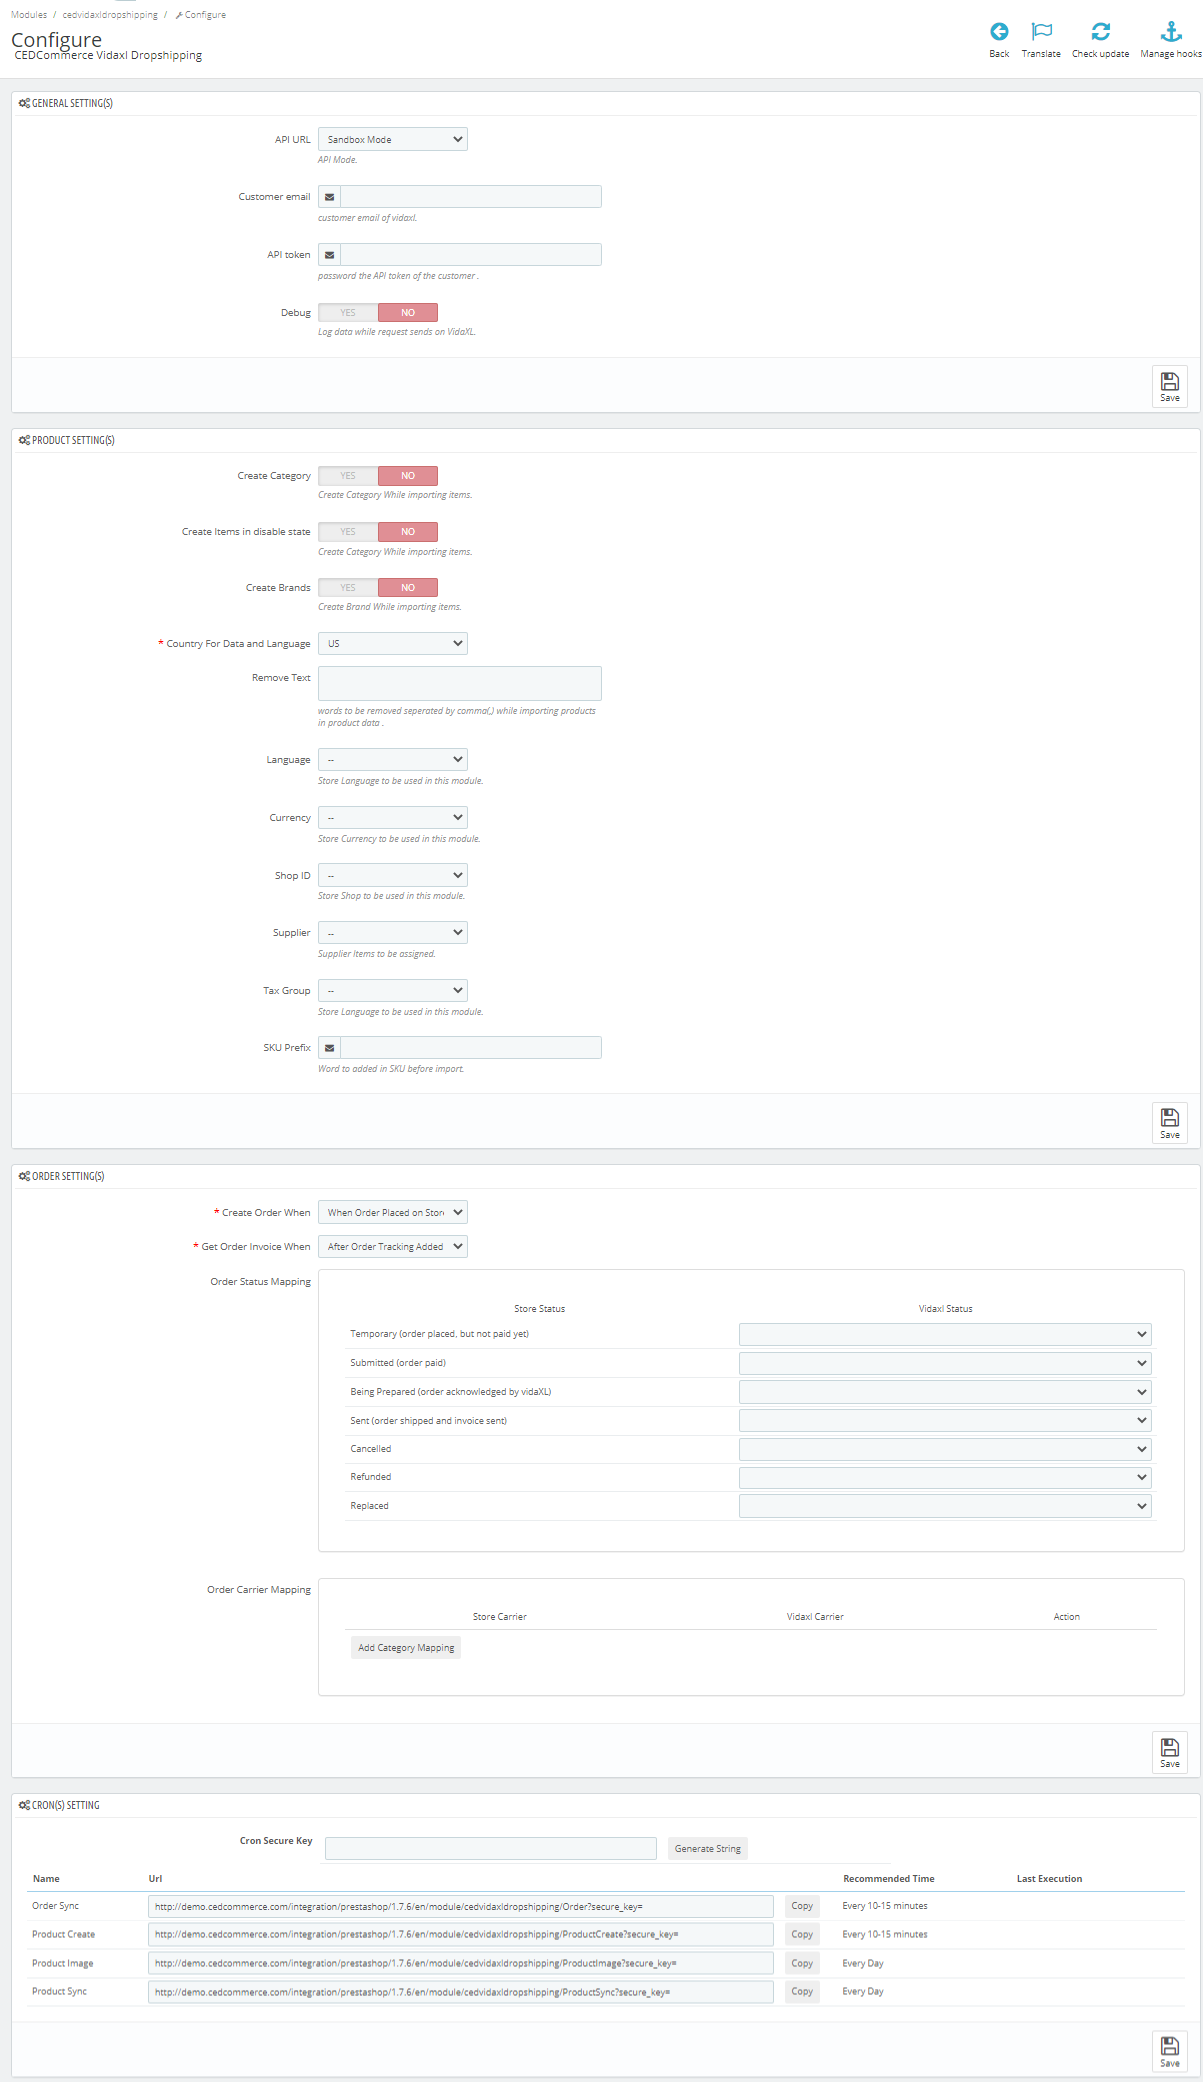
The Configuration page appears as shown in the following figure:

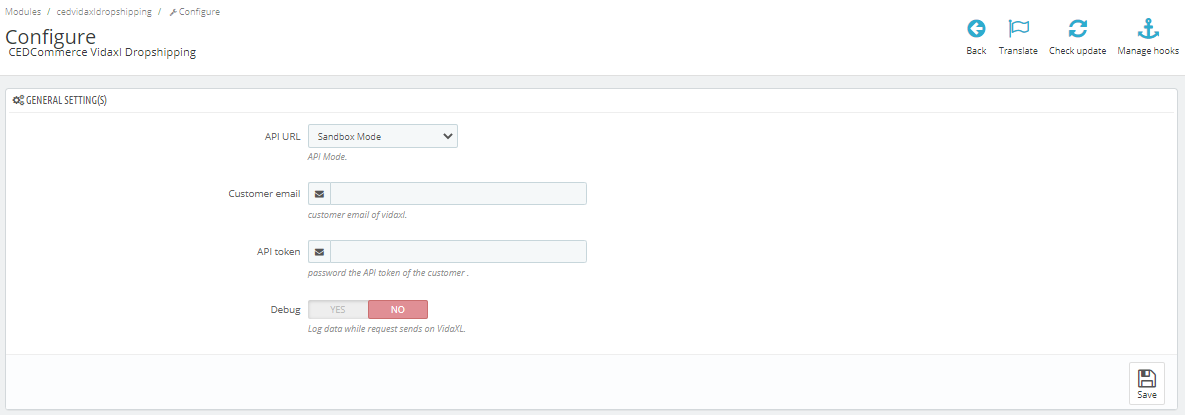
- Go to General Settings. The tab appears as shown below:

- In the General Settings, do the following information.
- In API URL, choose API mode Sandbox or Live.
- In Customer email, enter customer email of Vidaxl.
- In API Token, enter the API token of the customer.
- In Debug mode, click on "Yes' or 'No' to enable the debug mode.
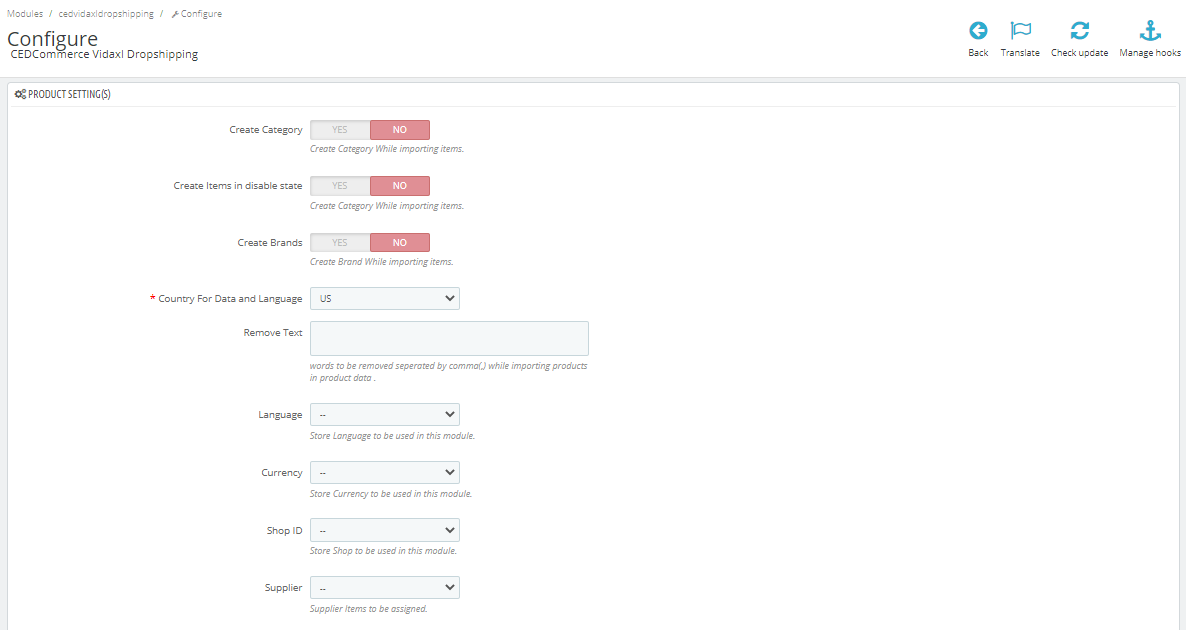
- Now Go to Product Settings, do the following information.
- The tab appears as shown below:

- In Product Setting, do the following steps:
- In Create Category, select 'Yes' to create category while product import from Vidaxl
- In Create Item In disable state, select 'Yes' to create items in disable state.
- In Create Brands, select 'Yes' to create brands while product import.
- In Country for data and Language, choose your store currency.
- In Remove text, enter word you need to remove while product import.
- In Language, choose the language you need to use for this module,
- In Currency, choose the currency you need to use for this module,
- In Shop ID, choose Shop id to be used for this module.
- In Supplier, choose supplier to which you want to assigned items.
- In Tax group, choose tax group to be used for this module.
- In Sku prefix, add word to be used in SKU while product import,
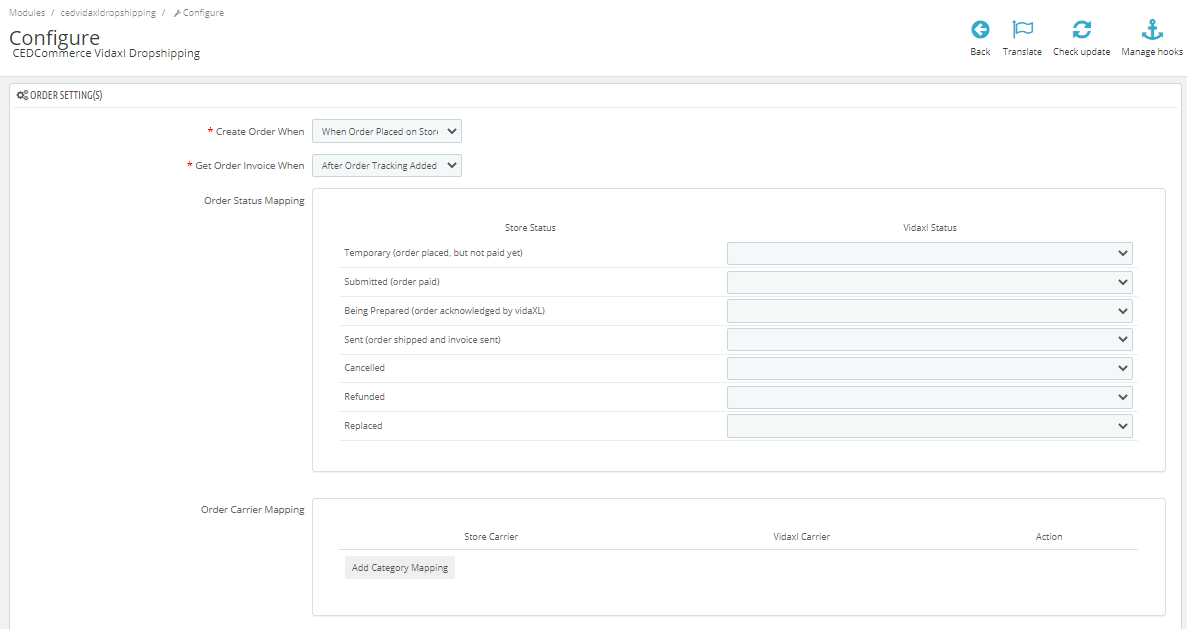
- Now Go to Order Setting, The tab appears as shown in figure:

- In the Orders setting, do the following steps:
- In the Create Order When, choose status when order create in store.
- In the Get Order Invoice when, choose the status when you get order invoice.
- In the Order Status Mapping, map Prestashop order status on the left side to the Vidaxl status on the right side.
- In the Order carrier Mapping, map and Add your store carrier with Vidaxl carrier on the right side.
- Now at last go to Cron settings.
The tab appears as shown in figure:

- In the Cron Settings, do the following steps:
- In Cron Secure Key, you can make a combination of secure key consisting of the alphabet, number, and special characters.
- You may see cron URL, name, and recommended time.
- Click the Save button and the configuration will be saved.
Related Articles
vidaXL Order Settings
To manage Orders Go to the Prestashop admin panel. In the left navigation panel, place the cursor on the vidaXL Droshipping menu. The menu appears as shown in the following figure: In this Order Settings, do the following steps: In the Vidaxl Order ...vidaXL Product Settings
To manage Products Go to the Prestashop admin panel. In the left navigation panel, place the cursor on the Vidaxl Droshipping menu. The menu appears as shown in the following figure: Click on Products The tab appears as shown in figure: In Product ...Overview: vidaXL Dropshipping Module
This dropshipping vidaXL Module helps you to import vidaXL products from your selected category into your store in bulk and create it as well as provide an order management system. Key features: Bulk Import Product: With the help of Vidaxl API ...Category Mapping
Category Mapping Go to the Prestashop Admin panel. In the left navigation panel, place cursor on the Vidaxl Dropshipping menu. The menu appears as shown in the following figure: Click on Category Mapping. The page appears as shown in figure:Extension Installation
To install the extension: Go to the Prestashop admin panel. On the left navigation bar, point cursor to the Modules and Services. The menu appears as shown in the following figure: Now click the Modules and Services menu, and you will come across a ...