Configuration Settings
Once you’ve retrieved the API Key, you may start the Configuration.
To configure the extension,
- Go to your Magento 2 admin panel.
- On the left navigation bar, Click on RueDuCommerce Integration.
The menu appears as shown below:
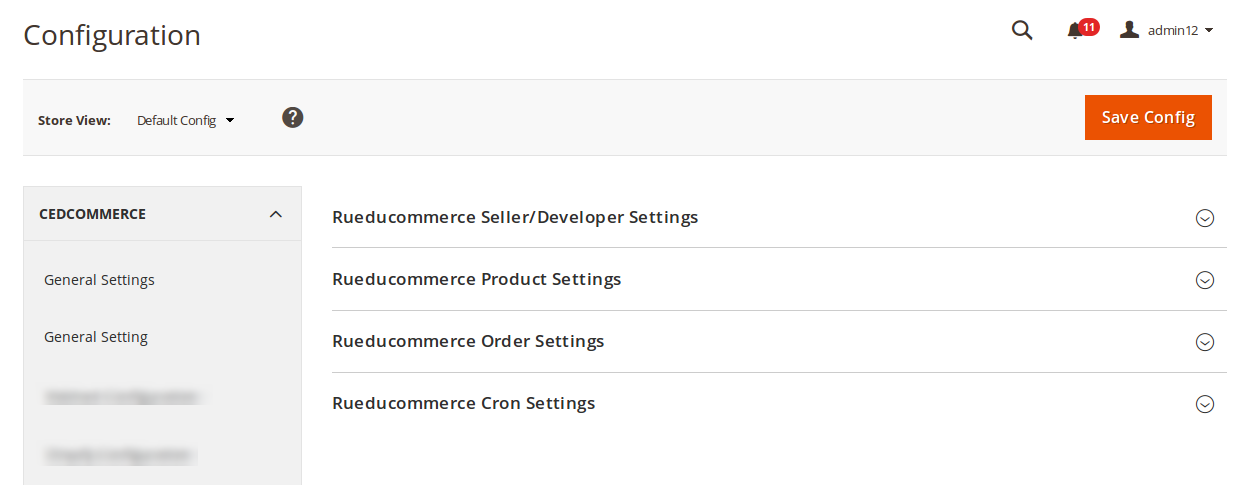
- Click on Configuration, and you will be navigated to the configuration page as shown below:
- Click RueDuCommerce Seller/Developer Settings and the section gets expanded as shown below:

- Under RueDuCommerce Seller/Developer Settings do the following steps:
- Select Yes as the status in the Enabled. The section gets expanded as below:
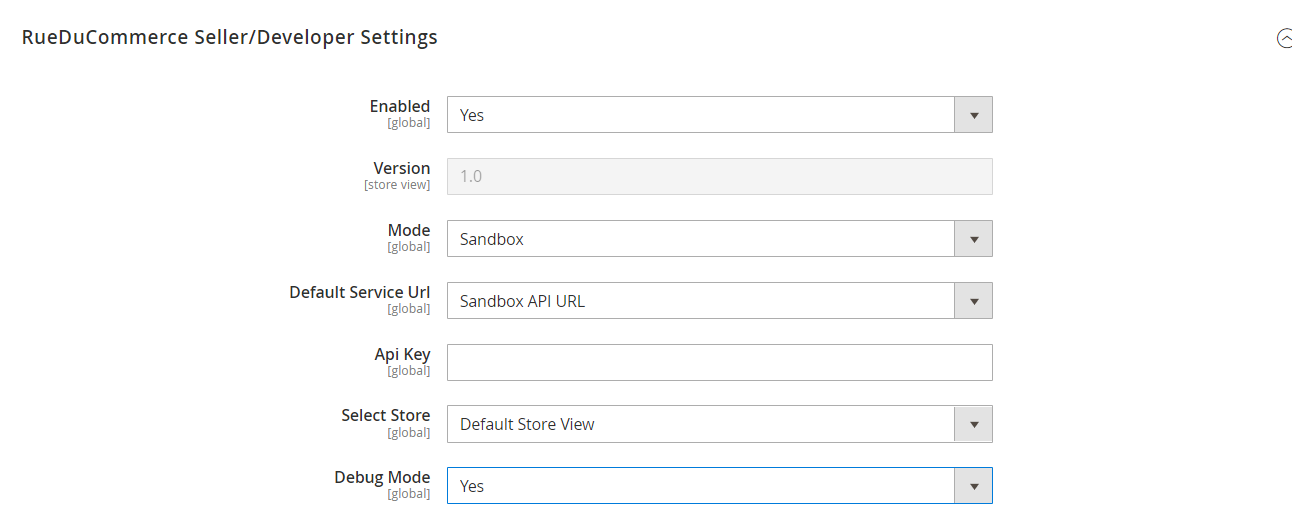
- In the Version field, the store view version will be displayed.
- In the Mode, select the store mode from the option.
- In Default Service Url, select the Live API URL option.
- In the API Key, enter the API Key that you retrieved from the RueDuCommerce seller panel.
- In the Api Key, enter the order Api key.
- In Select Store, select the store where you want to export your products to RueDuCommerce Marketplace. In other words, select the store which you want to integrate with RueDuCommerce.
- In the Debug Mode, select Yes to enable logging, or select No.
- Select Yes as the status in the Enabled. The section gets expanded as below:
- Now once you’re done with this section, click on RueDuCommerce Product Settings which gets expanded as shown below:
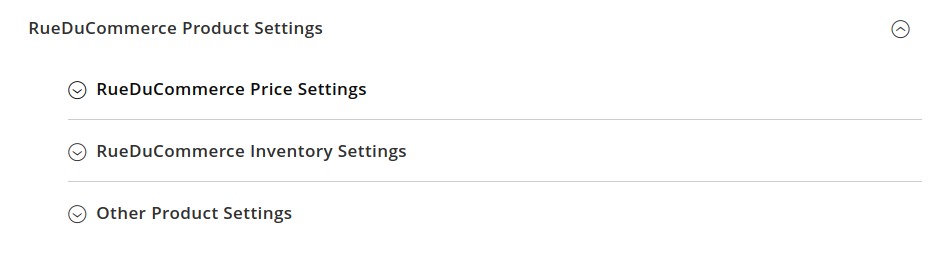
- Under RueDuCommerce Product Settings do the following steps:
- Click on RueDuCommerce Price Settings, and the tab is expanded as:
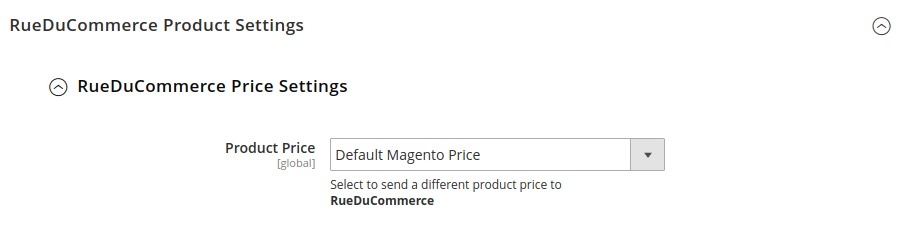
- Click on RueDuCommerce Price Settings, and the tab is expanded as:
- Under RueduCommerce Price Settings, do the following steps:
- In the Product Price list, select one of the following options:
- Increase by Fixed Price: If selected, then the Modify by Fix Price field appears.
- Increase by Fixed Percentage: If selected, then the Modify by Percentage Price field appears.
Enter the numeric value to increase the price of the RueDuCommerce, product price by the entered value % of Magento 2 price.
For Example,
Magento 2 price + 5% of Magento 2 price.
Magento 2 Price = 100
Select Increase By Fixed Percentage option
Modify by Percentage Price = 5
100 + 5% of 100 = 100 + 5 = 105
Thus, RueDuCommerce Product Price = 105 - Decrease by Fixed Price: If selected, then the Modify by Fix Price field appears.
- Decrease by Fixed Percentage: If selected, then the Modify by Percentage Price field appears.
Enter the numeric value to decrease the price of the RueDuCommerce product price by the entered value % of Magento 2 price
For Example,
Magento 2 price – 5% of Magento 2 price.
Magento 2 Price = 100
Select Decrease By Fixed Percentage option
Modify by Fix Price = 5
100 – 5% of 100 = 100 – 5 = 95
Thus, RueDuCommerce Product Price = 95
- In the Product Price list, select one of the following options:
- Now Click on the tab RueDuCommerce Inventory Settings and the following steps:
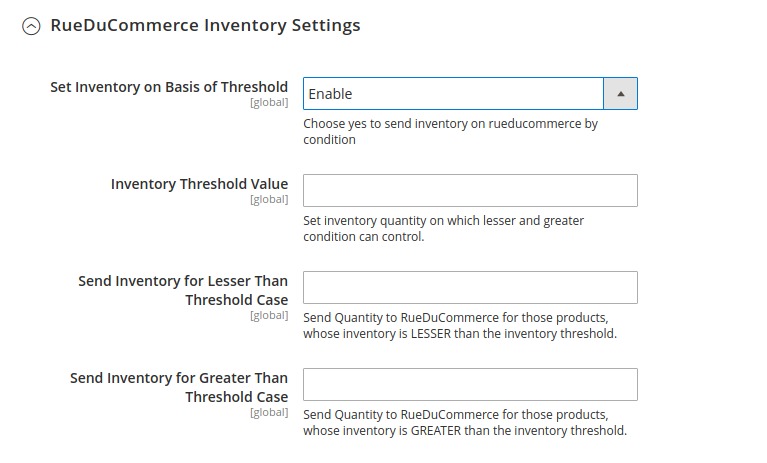
- Under RueDuCommerce Inventory Settings do the following steps:
- In the Set Inventory on Basis of Threshold list, select the Enable option if required to set the inventory based on a threshold.
- In the Inventory Threshold Value box, enter the required value.
- In the Send Inventory for Lesser Than Threshold Case box, enter the required value.
- In the Send Inventory for Greater Than Threshold Case box, enter the required value.
- Now click on Other Product Settings tab and do the following steps:
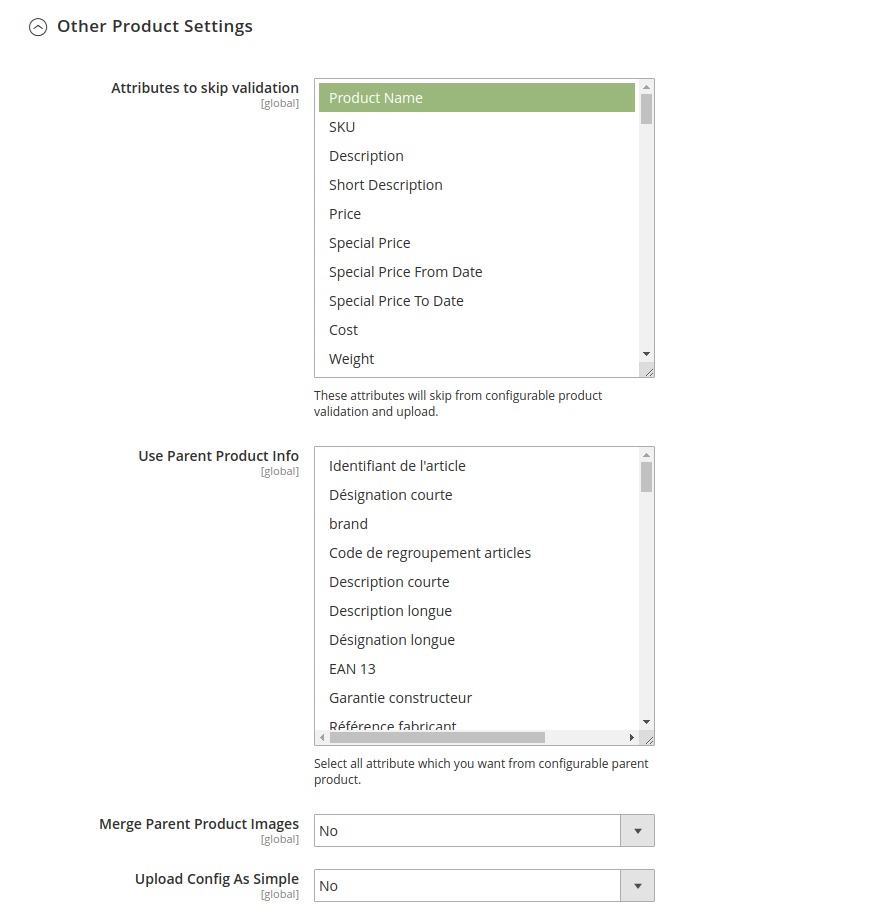
- Under Other Product Settings, do the following steps:
- In Attributes to Skip Validation, select the attributes from the list that you want to skip for validation.
- In Use Parent Product Info., select the attributes from the configurable parent product.
- In Merge Parent Product Images, select Yes if you want to merge the image.
- In Upload Config as Simple, select Yes if you want to upload a configurable product as simple.
- Under RueduCommerce Price Settings, do the following steps:
Click on RueDuCommerce Order Settings and the section will get expanded as shown below:
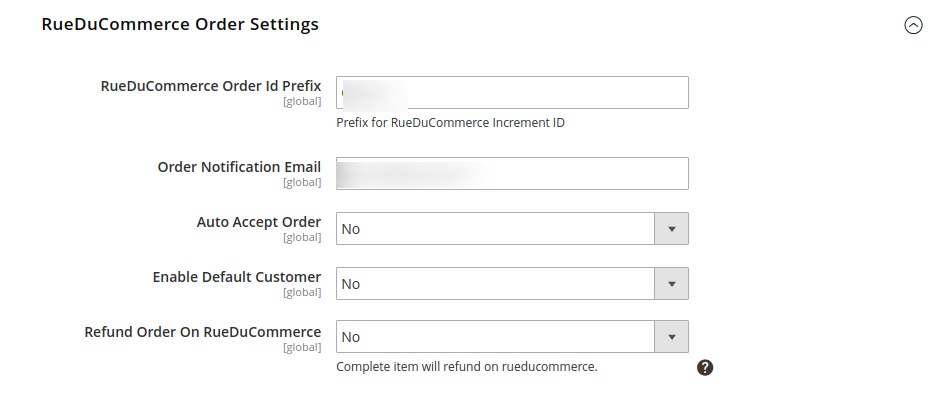
- Under RueDuCommerce Order Settings, do the following steps:
- In RueDuCommerce Order Id Prefix, enter the prefix which will be added to all the orders that will be placed for your products on RueDuCommerce Marketplace.
- In Order Notification Mail, enter the mail on which you want to get notifications about the orders placed for your products on RueDuCommerce.
- In Auto Accept Order, select Yes to accept orders automatically.
- In the Enable Default Customer list, select the Yes option to enable the default customer.
- In Refund Order on RueDuCommerce, select Yes for the refund.
Now click on RueDuCommerce Cron Settings, and it will expand as shown in the image below:
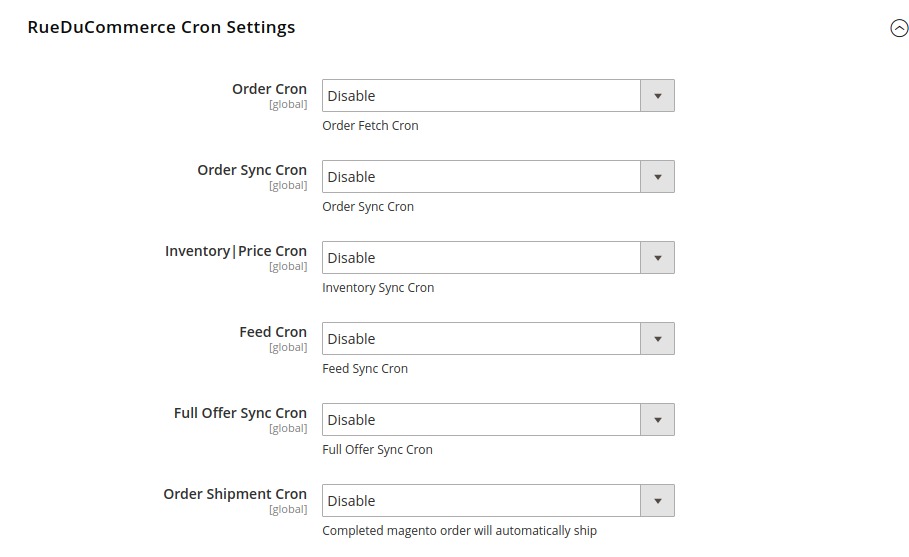
- In Order Cron, select Enable if you want to enable the order fetch cron.
- In Order Sync Cron, select Enable if you want to enable the order synchronisation cron.
- In Inventory/Price Cron, select Enable if you want to enable the inventory cron.
- In Feed Cron, select Enable if you want to enable the feeds cron.
- In Full Offer Sync Cron, select Enable if you want to enable the full offer sync cron.
- In Order Shipment Cron, select Enable if you want to enable the shipment cron.
- Click the Save Config button on the top right side of the page and the configuration will be saved.
Related Articles
Retrieving API Key
To start the integration, you need to have the API Key which will be needed while doing the Configuration. To Retrieve the API Key, Go to RueDuCommerce seller panel. Login to your seller panel and the dashboard will appears as shown below: Click on ...