Configuration Settings
A STEP BY STEP GUIDE FOR HOW TO USE THIS SETTING BY ADMIN.
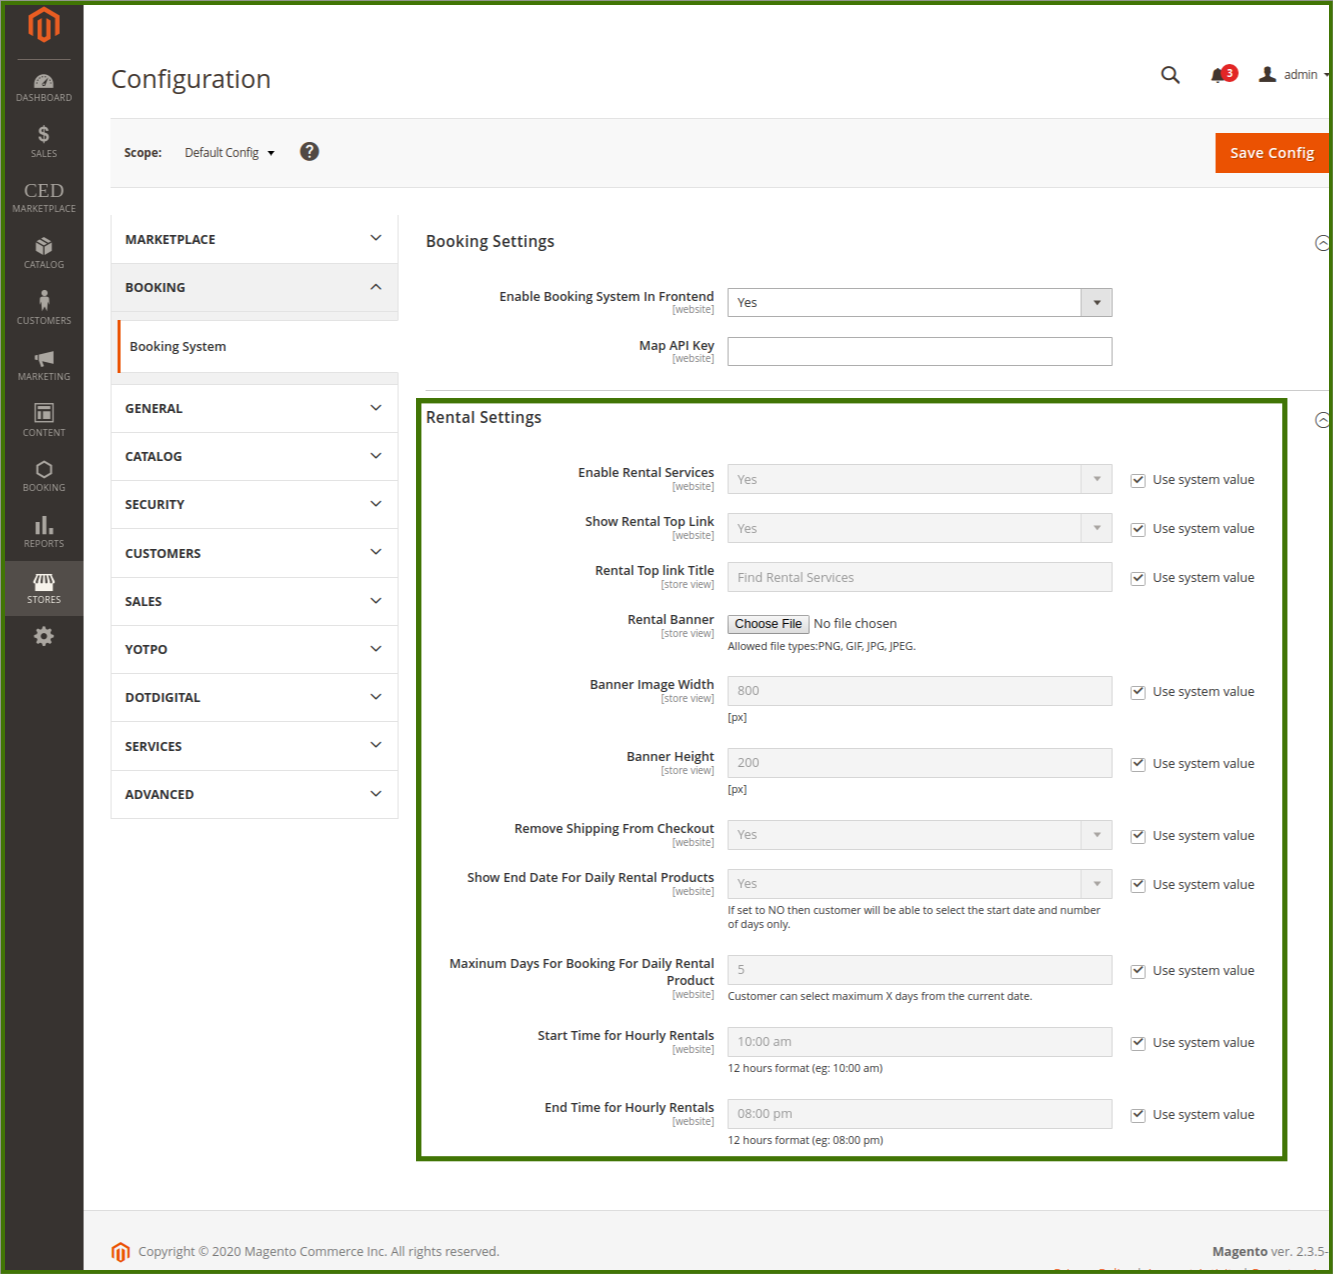
LOGIN TO ADMIN DASHBOARD-> GOTO-> BOOKING->SETTINGS->BOOKING SETTINGS->ENABLE BOOKING SYSTEM IN FRONTEND->YES->ENABLE RENTAL SERVICES->YES
OR
LOGIN TO ADMIN DASHBOARD-> GOTO->STORES-> CONFIGURATIONS->BOOKING->BOOKING SYSTEM->ENABLE BOOKING SYSTEM IN FRONTEND->YES->ENABLE RENTAL SERVICES->YES.
This enables the booking settings so that customer can book their choice of product/services listed by the Admin/seller, Refer to below images;
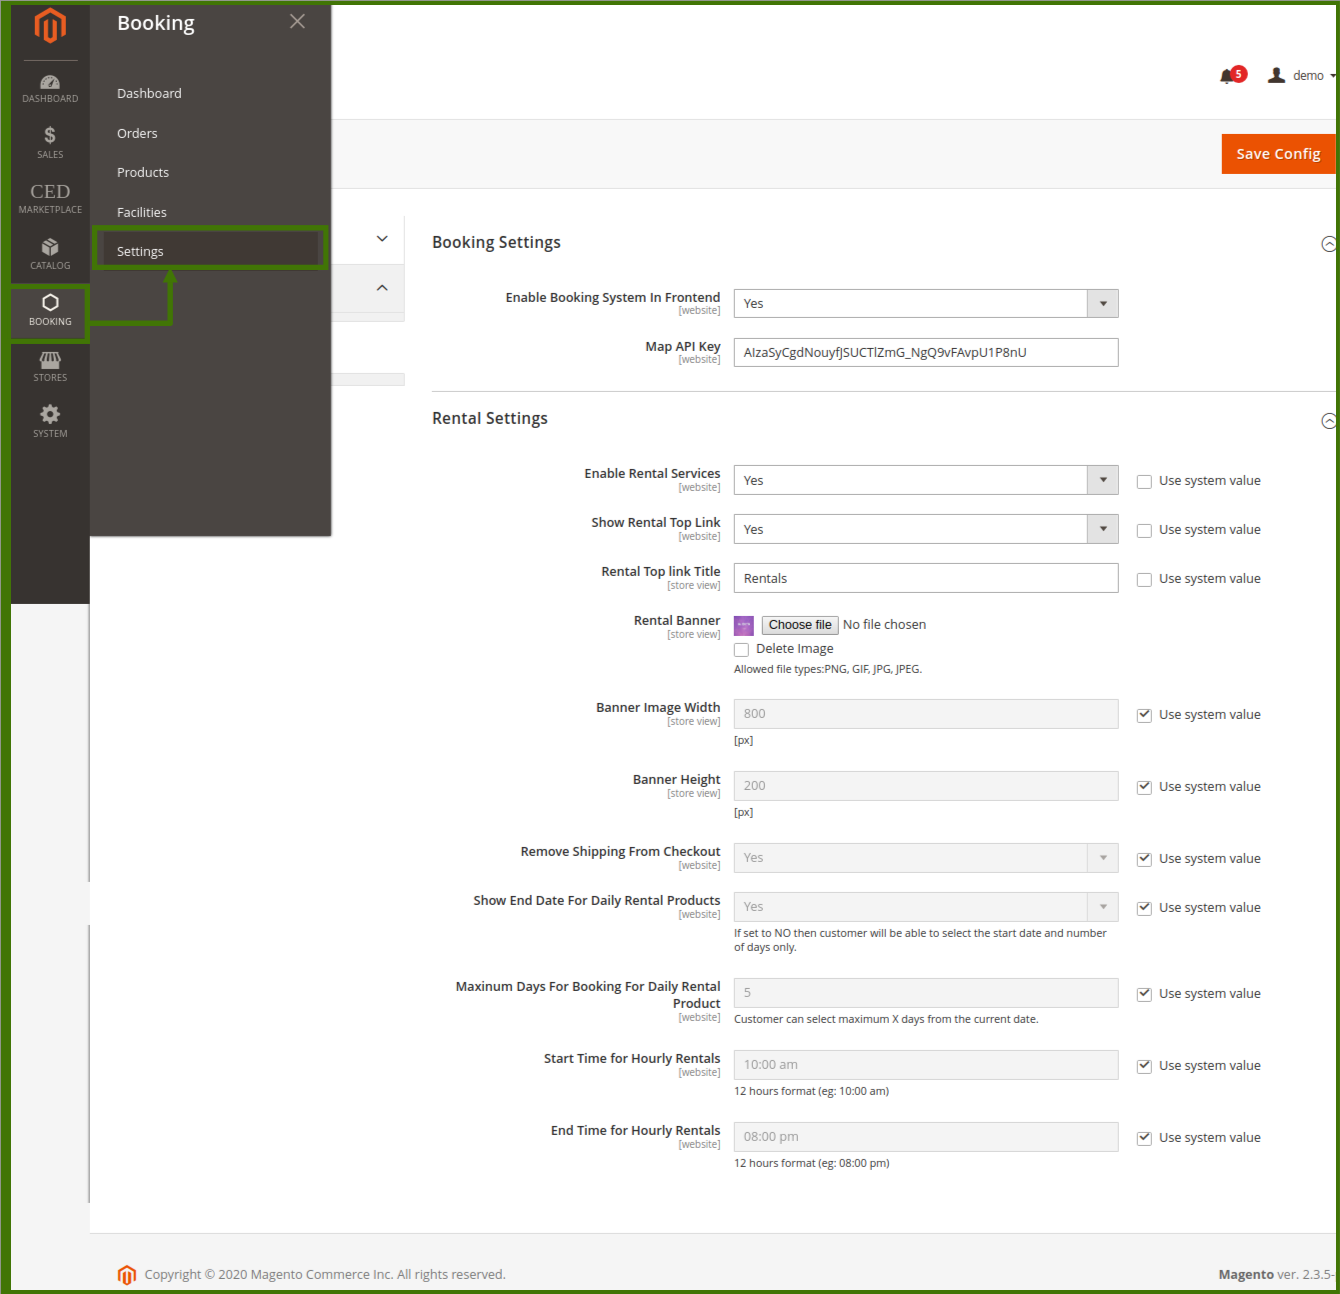
OR,
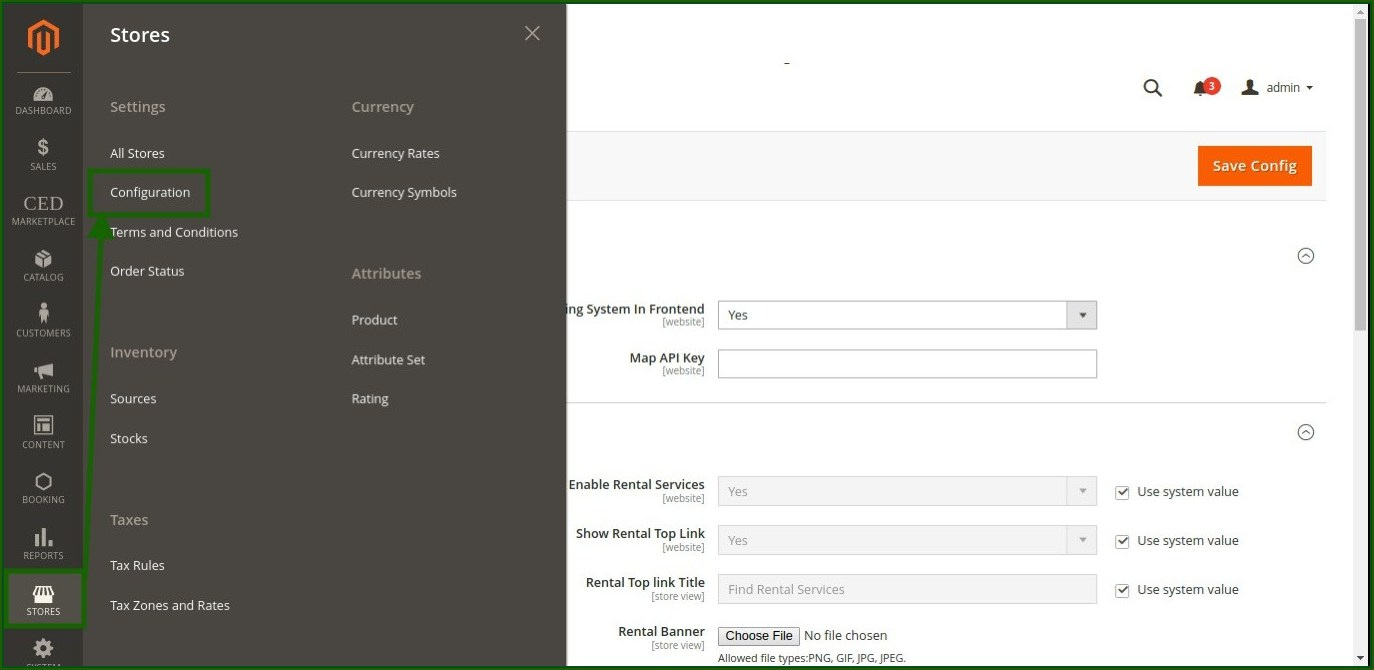
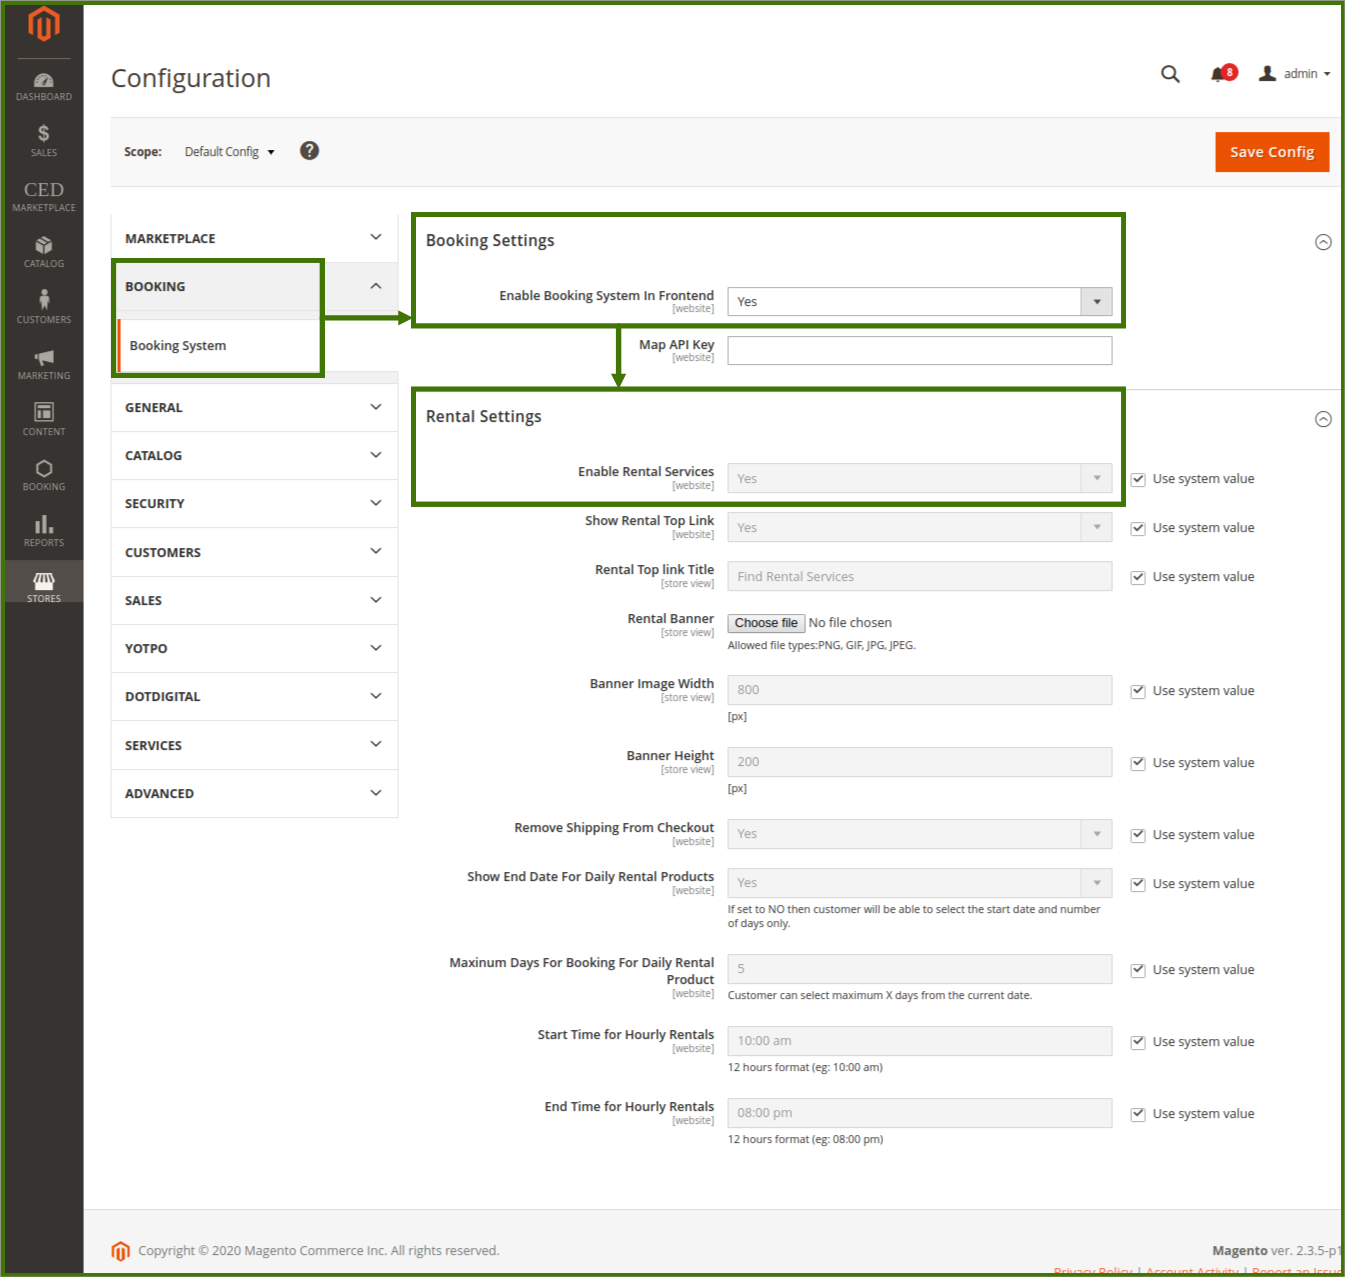
BOOKING SETTINGS:
1-Enable booking System in front-end:
This feature allows the admin to enable the booking on the website for the product available.
2-Map API key:
This feature allows the admin to add the API key of the map to locate on google map.
For google map API key: https://cloud.google.com/maps-platform.
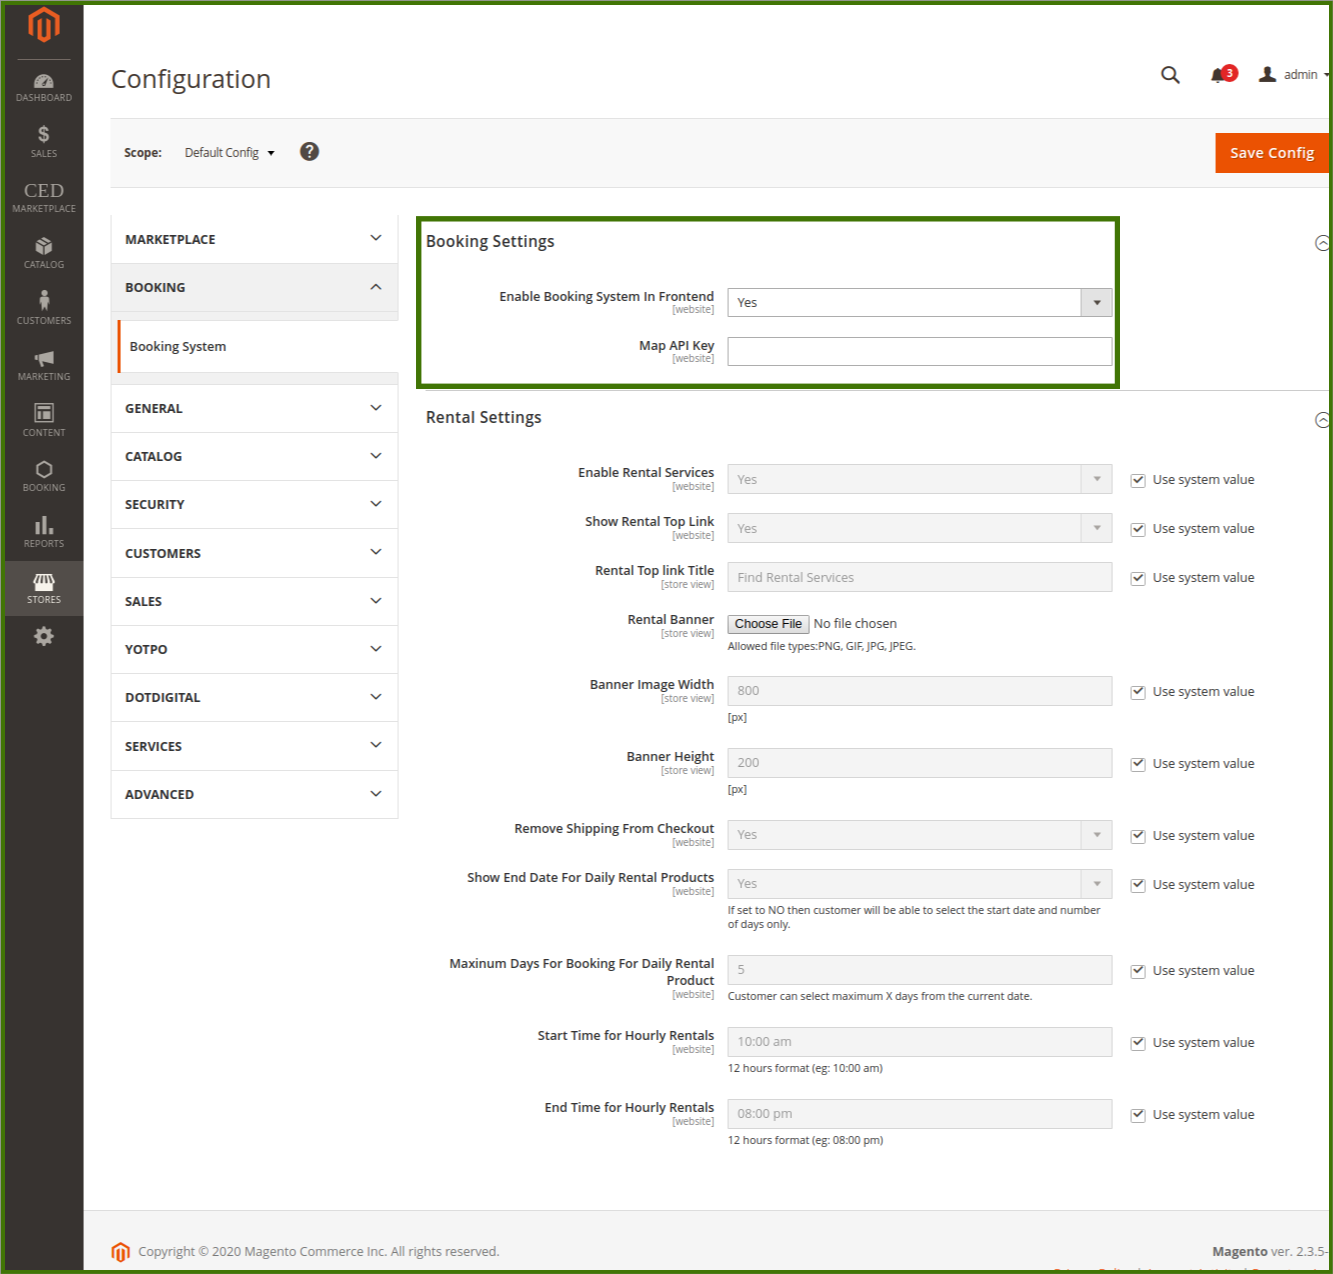
RENTAL SETTINGS:
1-Enable Rental Services: YES/NO
These features allow the admin to decide whether rental services to be enabled or not if it is enabled then the admin will be able to rent the product on the marketplace, and on the other side customer will be able to choose the product and avail the services.
2-Show Rental Top Link: YES/NO
This feature allows the admin to show the rental booking link on the top, which helps easy to navigate and access the content.
3-Rental Top Link Title:
This feature allows admin to decide the name of rental from this section which will show on the frontend customer side and the customer will be able to select and redirect to the rental page and select the product and services.
4-Rental Banner:
A banner is something heading or advertisement image appearing on the webpage in the form of a bar, column, slider, or a box which is the first eye impression for the content. This feature allows the admin to add images supported to PNG, GIF, JPG, and JPEG from their system.
Admin can change, delete, and add new images whenever required. To Change a banner click on choose file, a new window will open and ask the image path to select and upload.
5-Banner Image Width:
This feature allows the size of the width of the banner on display and can be changed to default by their own choice.
6-Banner Height:
This feature allows the size of the height of the banner display and can be changed to default by their own choice.
7-Remove Shipping From Checkout:
Shipping means the transport of goods and product from the warehouse to the customer location, this option helps admin to remove any kind of shipping method from the checkout page depending upon the product and shipment.
8-Show End Date For Daily Rental Products:
This option allows admin to enable the end date for a particular rental product to yes/no, if it is not enabled to No then the customer will be able to select only the start date and the no of days only.
9- Maximum Days For Booking For Daily Rental Products:
This feature allows the admin to set the maximum day for rental products from the current date for which the customer has paid.
10- Start Time For Hourly Rental:
This feature allows admin to set time the time for products and services available on the website, the start time should be in 12 hours format and use A.M, P.M for segregation of day and night. e.g.; 10 am.
11- End Time For Hourly Rental:
This feature allows the admin to set the time for the end of the product and services available on the website, the end time should be in 12 hour format and use A.M, P.M for segregation of day and night. e.g; 10 pm.
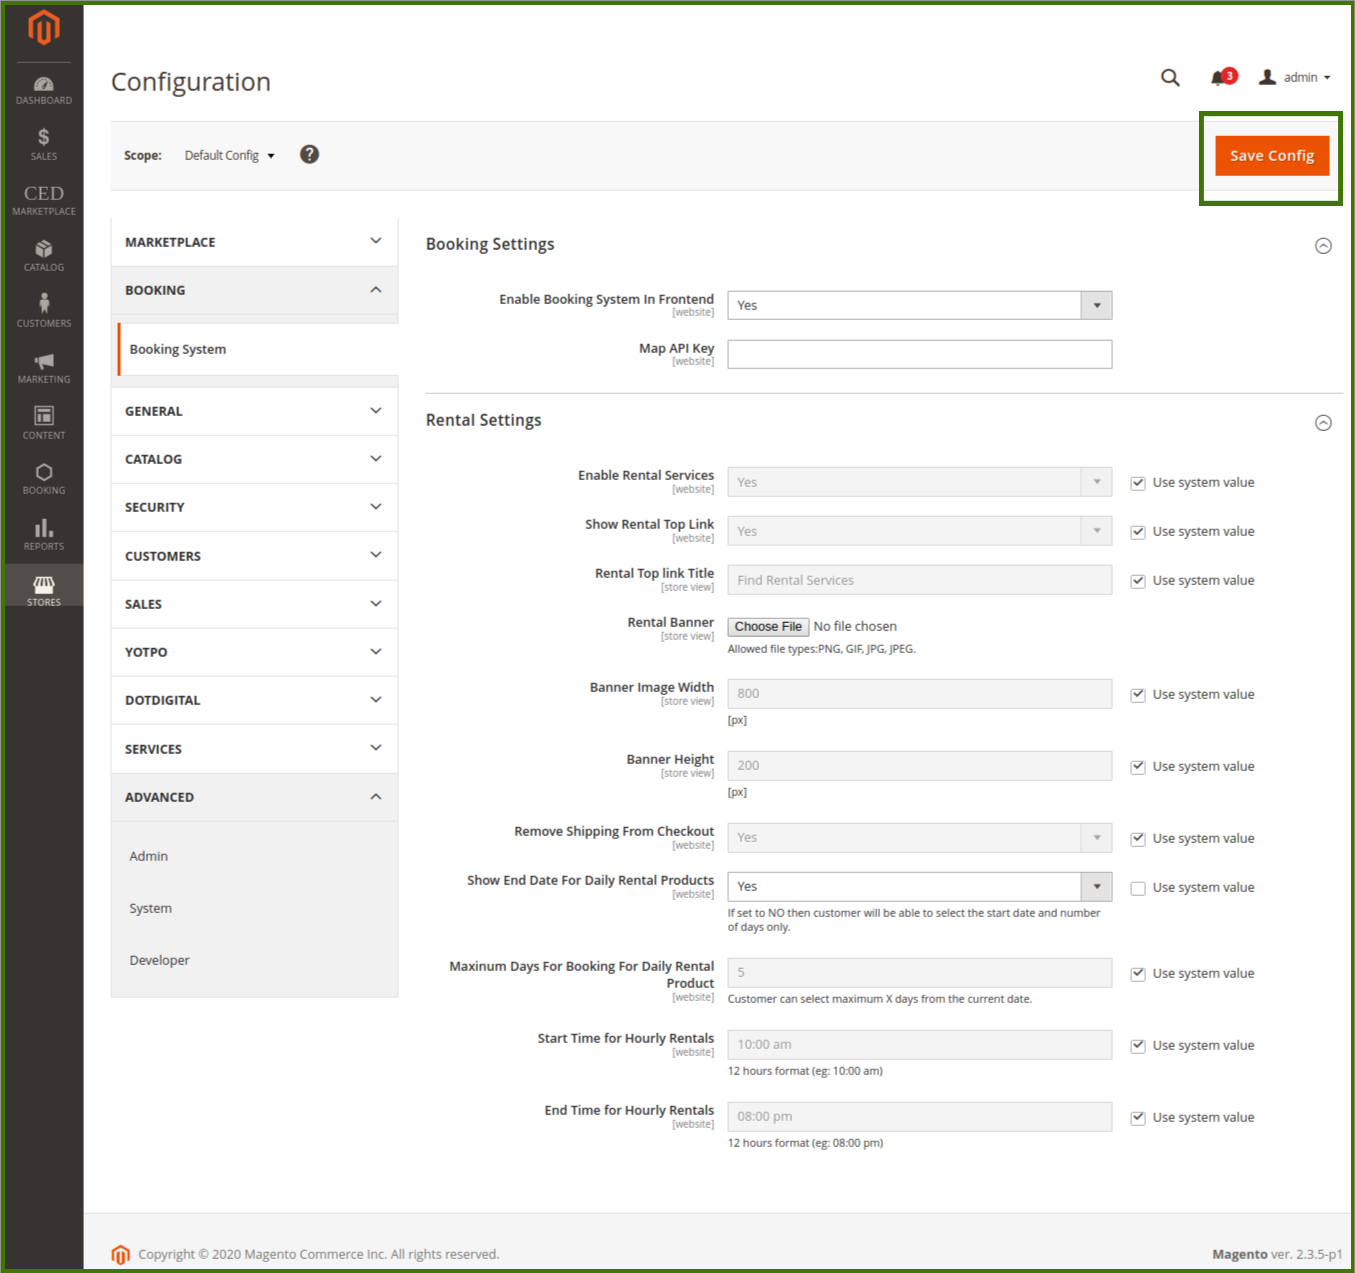
After all the changes and updates in configurations and settings, click on the Save button on the upper right corner of the page to see the changes.
Any Modification in settings can be checked by the admin on the frontend/customer view page.
Related Articles
Booking Dashboard
In this section, the admin will be able to see all the status of the bookings, amount, and sales revenue on the default Magento panel, an admin will be able to swipe up between the dates to see the status of booking, Total Pending Amount, Total ...Overview
Our Rental Booking System comes with a full range of features that help you take reservations, manage your inventory and grow your rental business — whether you rent out electronic devices, clothes, accommodation, or anything else. This document will ...Product Management
Adding/Editing and Managing a Product. Goto Admin Panel->Login->Booking->Product->Manage Booking Products. New Product: Add Product: This option helps the admin to add new product in the profile, by clicking on the drop-down, Add Product then select ...Facilities Management
FACILITIES: In this section, admin can choose the available facility, view status, edit, delete and also Add New Facilities e.g. costume, swim-suit availability on swimming pool or site. Admin can add facility, by click on Add facility a new window ...Place an Order
Customers can place an order by login to the customer account/signup to account on the main website. Steps are as follows, 1- Sign in/Sign-up to the account 2- Browse and Select the product/service. 3- Fill the required information related to booking ...