Configuration Settings
To Set up the Configuration Settings,
- Go to the Magento 2 admin panel.
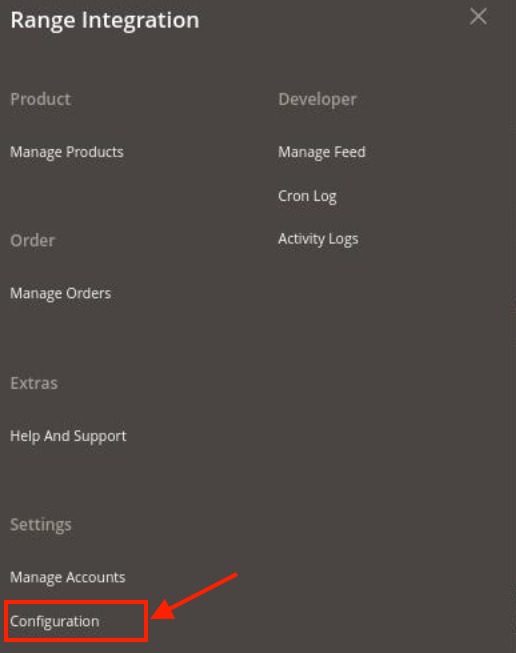
- On the left navigation bar, click on the Range Integration menu.
The appears as shown below:

- Click on the Configuration.
The Configuration page appears as shown below:

- n the right panel, click the Range Settings tab.
The Range Settings tab is expanded and the relevant fields appear as shown in the following figure:

- Under Range Settings, do the following steps:
- In the Enabled, select Yes to enable the settings.
- In Primary Account, select the account that you want to set as primary.
- Now scroll down and click on Range Cron Settings. The section is expanded as:

- Under Range Cron Settings, do the following steps:
- In the Order Cron, select Yes if you want to enable the orders through cron.
- In Order Cron Time, select the duration at which the order cron will run.
- In Inventory Cron, select Yes if you want to enable the inventory sync through cron.
- In Inventory Cron Time, select the duration at which the inventory cron will run.
- Scroll down and click on Range Product Settings. The section is expanded as shown below:

- Under Range Product Settings, do the following steps:
- In the Product Auto Inventory Sync, select Yes if you want to sync the products inventory automatically.
- Now Scroll down and click on Range Product Settings, the section is expanded as:

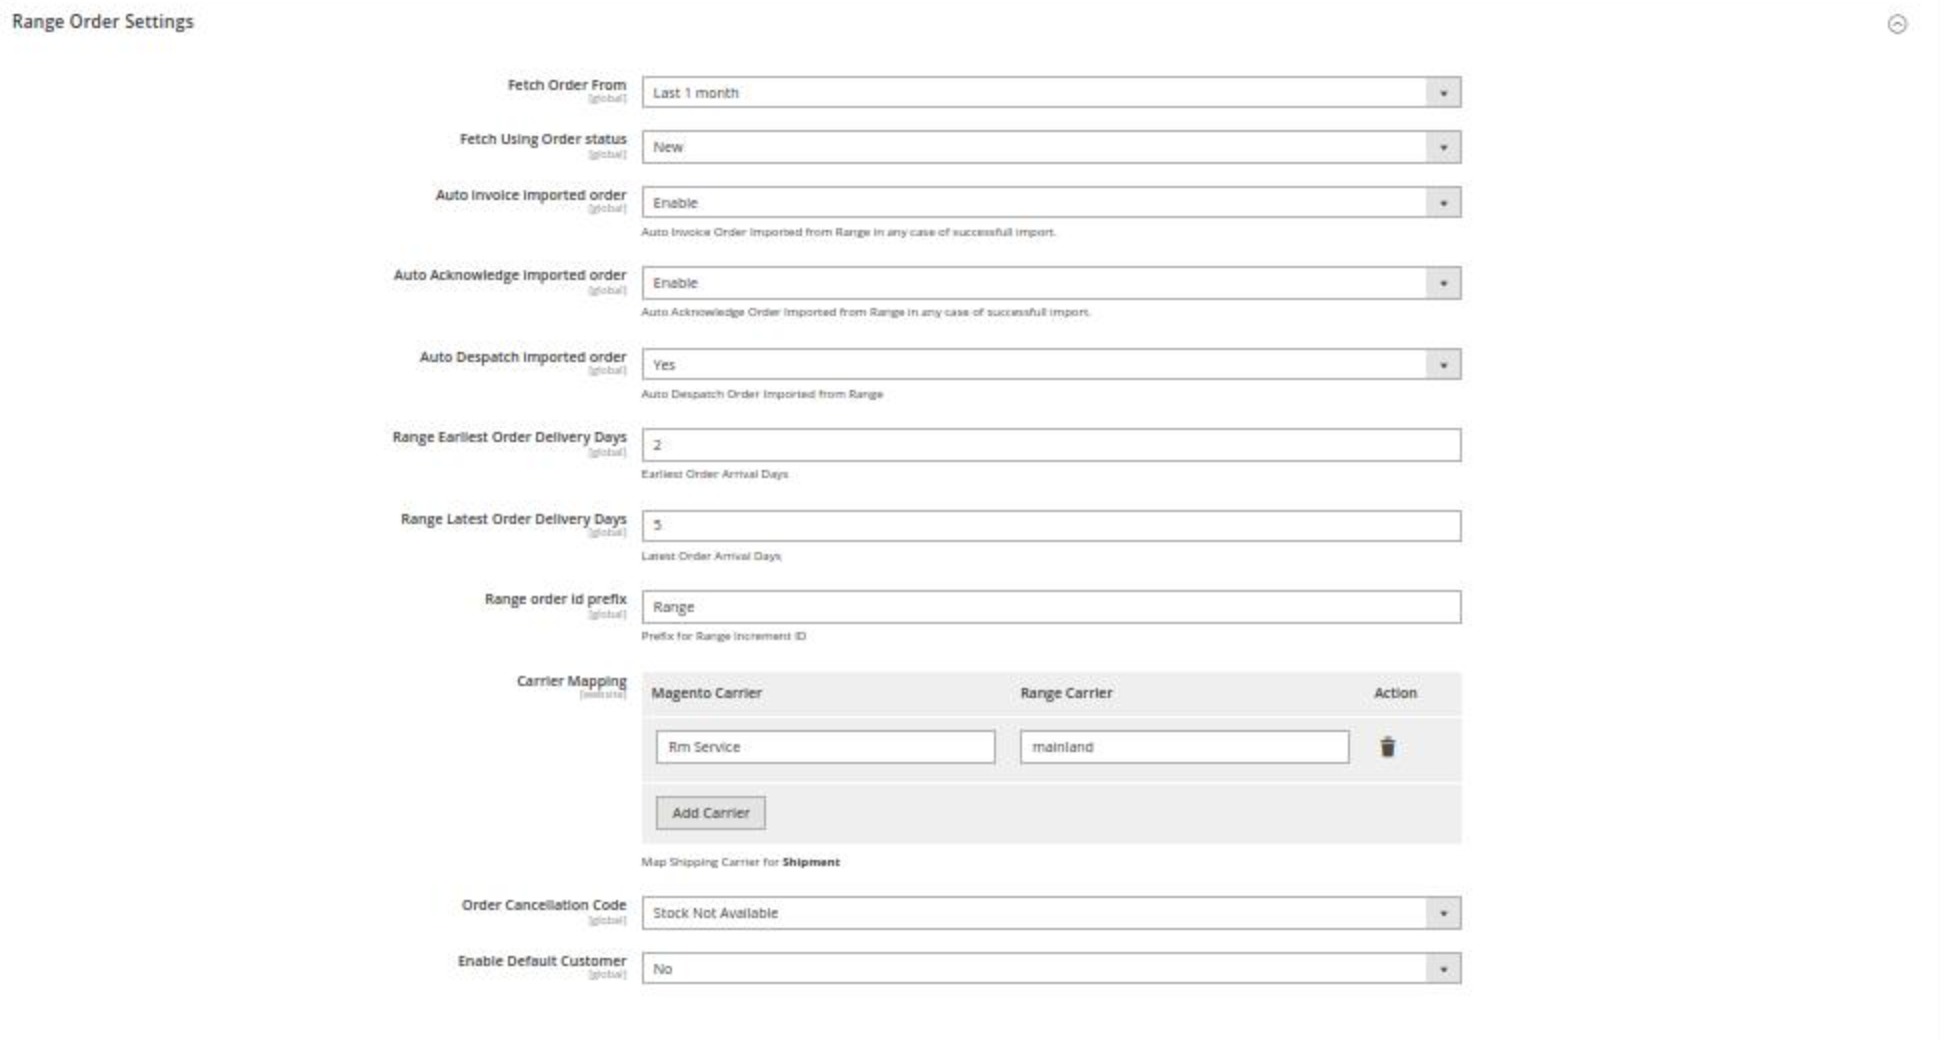
- Under Range Product Settings, do the following steps:
- In Fetch Order From, select the duration from which you want to fetch the order.
- In Fetch Using Order Status, select the option from the dropdown if you want to fetch order based on its status.
- In Auto Invoice Imported Order, select Enable if you want to use seller information & seller address will set to order shipping address.
- In Auto Acknowledge imported order, select Enable if you want to acknowledge imported orders automatically.
- In Auto Despatch imported order, select Yes if you want to automatically dispatch the imported order.
- In Range Earliest Order Delivery Days, enter the number of days for early order arrival.
- In Range Latest Order Delivery Days, enter the latest order arrival days.
- In your Range order id prefix, enter the prefix id for order.
- In Carrier Mapping, map the Magento carrier with Range carrier.
- In Order Cancellation Code, select the reason for order cancellation.
- In Enable Default Customer, select Yes if want to create a default customer for the orders.
- Click the Save Config button to save the entered values and information. The configuration will be saved.
Related Articles
The Range Extension Installation
To install the extension Upload and extract the Range package file inside the app/code/Ced/ directory and run the below command php bin/magento setup:upgrade php bin/magento setup:di:compile php bin/magento setup:static-content:deploy -f php ...Manage Products
To manage products, Go to the Magento 2 admin panel. On the left navigation bar, click on the Range Integration menu. The appears as shown below: Click Manage Products. The Range Products Listing page appears as shown in the following figure: All the ...Overview
The Range was established back in 1989 as an offline store, and today, it is one of the fastest-growing online marketplaces in the UK. This retailer has around 190 stores across the country and is famous for offering high-quality Home, Leisure, and ...Manage Feeds
To manage feeds, Go to the Magento 2 admin panel. On the left navigation bar, click on the Range Integration menu. The appears as shown below: Click on Manage Feed. The Feeds page appears as shown below: The feeds will be displayed here along with ...Manage Accounts
To manage multiple accounts, Go to the Magento 2 admin panel. On the left navigation bar, click on the Range Integration menu. It appears as shown below: Click on Manage Accounts. The Manage Account page appears as shown below: To create a new ...