Configuration Settings
To set up the configuration settings,
- Go to the Magento Admin Panel.
- On the left navigation panel, click on Dropshipzone Extension.
The menu appears as shown below: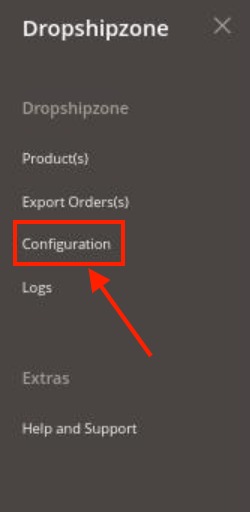
- Click on Configuration.
The Configuration settings page appears as shown below: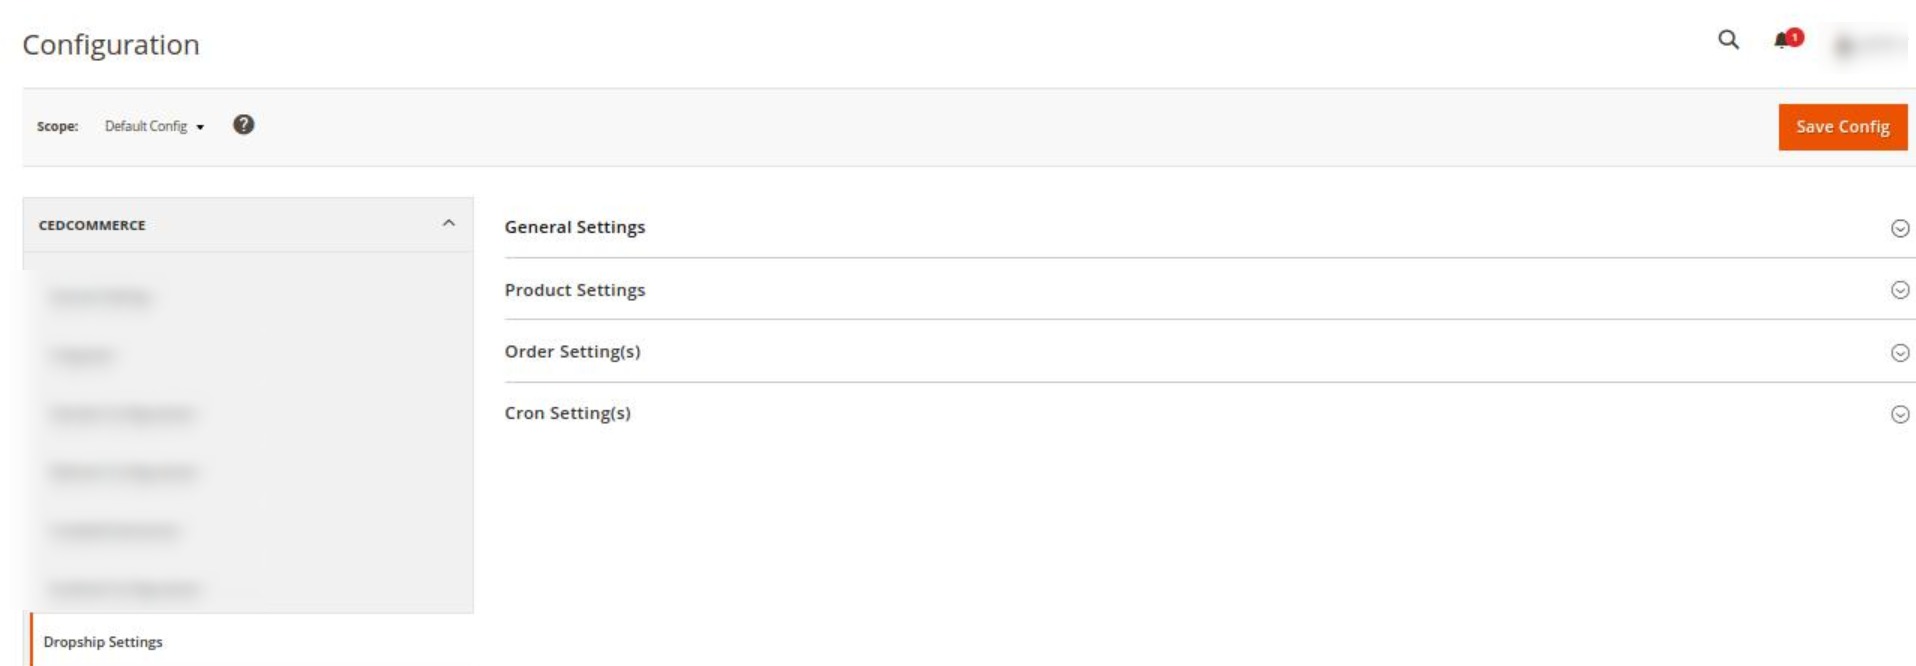
- In the right panel, click on General Settings, the section is expanded as shown below:
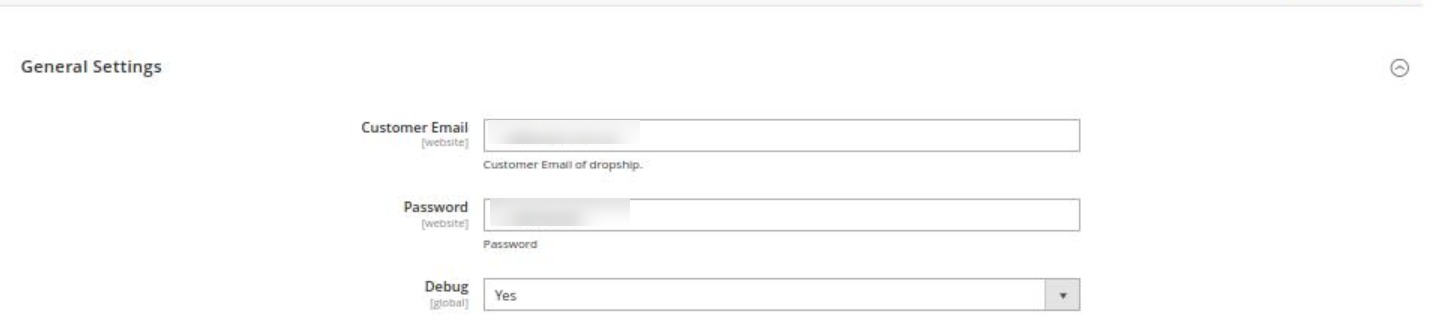
- Under General Settings, do the following steps:
- In Customer Email, enter the email id of the customer for the item to dropship.
- In Password, enter the unique password according to you for the store.
- In Debug, select Yes if you want the logs to create. This setting is for the developers.
- Scroll down and click on Product Settings, the section is expanded as shown below:
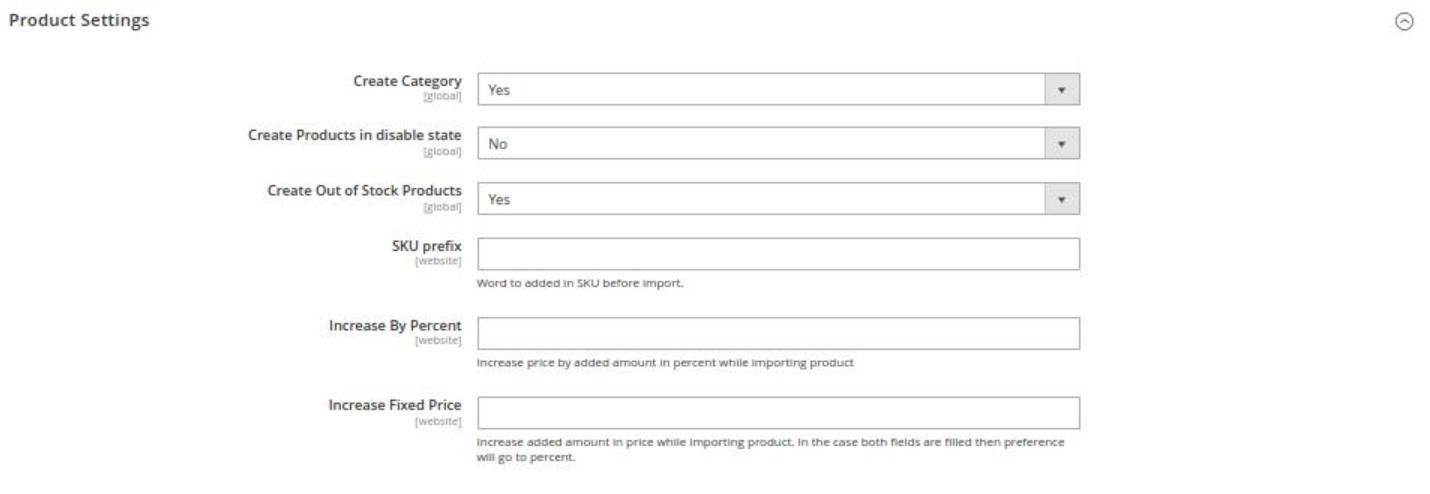
- Under Product Settings, do the following steps:
- In Create Category, select Yes if you want to create a category for the products you are importing.
- In Create Products in Disabled State, select Yes if you want to import the products that are disabled.
- In Create Out of Stock Products, select Yes if you want to create the products that are zero in quantity.
- In SKU Prefix, enter the unique prefix code that will be added along with the SKU.
- In Increase by Percent, enter the Increase price by the added amount in percent while importing the product.
- In Increase Fixed Price, enter the increased added amount in price while importing the product.
Note: If you enter Percent and Fixed Price both then in this case Increase by Percent Price will be considered as the priority is given to the percent.
- Now scroll down and click on Order Settings. The section is expanded as shown below:

- Under Order Settings, do the following steps:
- In Create Order When, select the status when you want the order to be created for importing.
- In Customer Comment, enter the Customer comment in and order request to be sent to Dropshipzone.
- Scroll down and click on Cron Settings, the section is expanded as:

- Under Cron Settings, do the following steps:
- In Enable Product Cron, select Yes if you want to import products automatically through the crons.
- In Batch Id, enter the amount for the batch of products that you want to import.
- Click on the Save Config button.
The configuration settings will be saved.
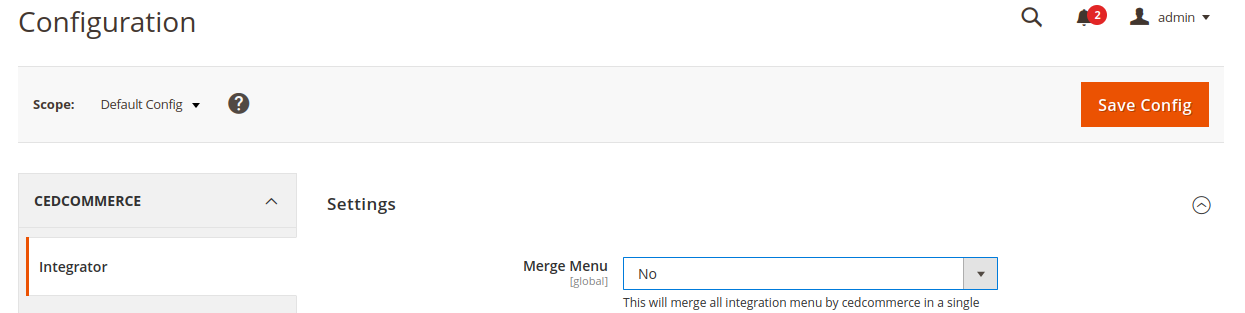
Note: The DROPSHIPZONE tab will come under the CEDCOMMERCE INTEGRATOR tab when admin enable Menu Merge option. You need to follow the steps to enable the extension- Cedcommerce Integrator -> Configuration -> Merge Menu -> Yes. Below images show the process:
As you select the status as Yes, it will be displayed in the menu as shown below: