Configure Merchant Account
To configure your Merchant Account Please visit http://console.cloud.google.com/apis/credentials link to configure it with your merchant account,
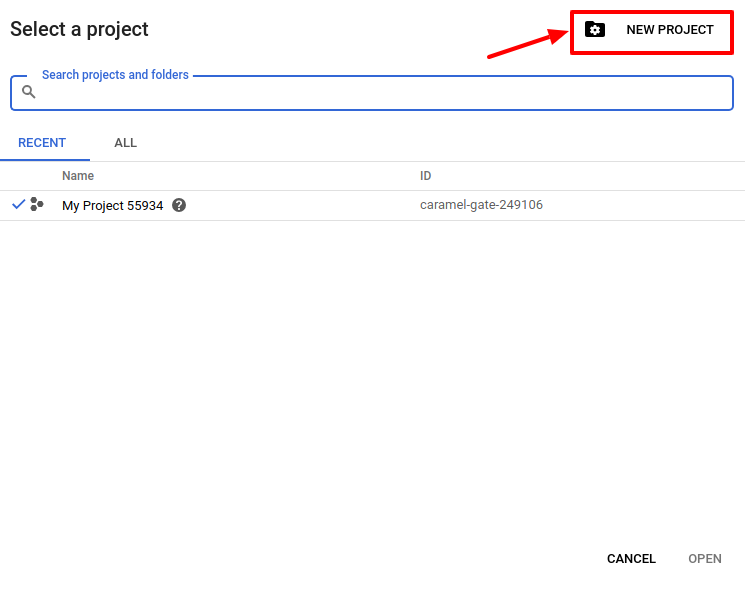
- Go to above link Create a new project,
- Select OAuth consent screen.
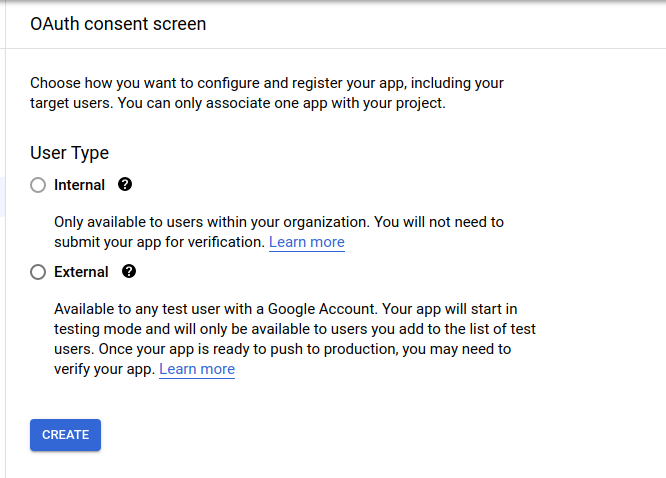
- In User Type select External. The tab appears as shown in the following figure:


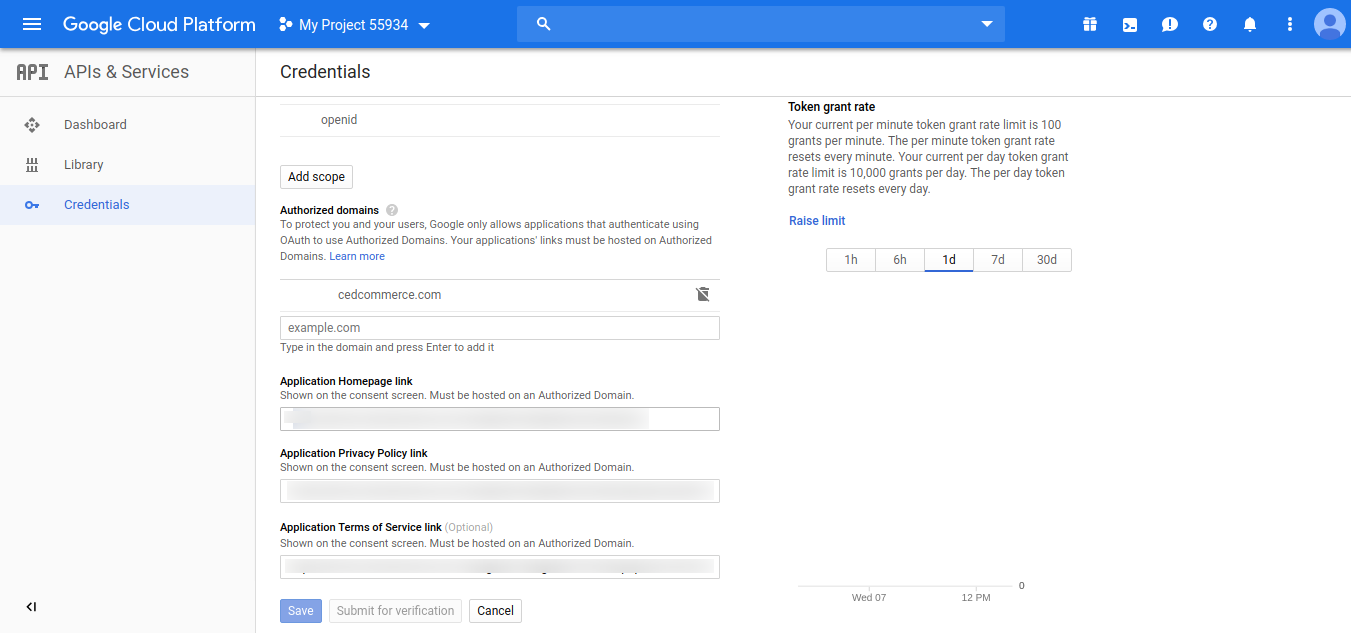
- In the OAuth Consent Screen, do the following steps:
- In the Application Name box, enter your shop name or domain name of your store,
- In the Application Logo box, upload your application logo that will help to recognize your app.
- In the Support Email box, enter your support email.
- In the Authorized Domain box, enter your website domain. Example: cedcommerce.com
- In the Application Homepage link box, enter your store homepage link.
- In the Application Privacy Policy link box, enter your store application privacy policy link.
- In the Application Terms of Service link box, enter your store application terms of service link.
- In Developer Contact Information, the seller can enter multiple email Id.
- Then click on the Save button to save the OAuth consent screen information.
- Then comes to the Credentials Tab & click on Create Credential Button & select OAuth Client ID The tab appears as shown in the following figure:
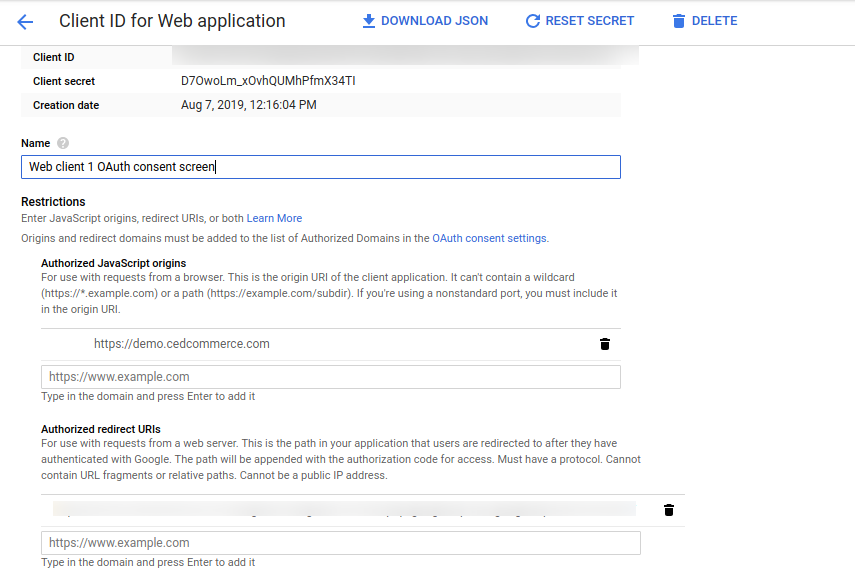
- In the Credentials sections, do the following steps:
- In the Name section, enter the name of OAuth Client ID name.
- In the Authorized JavaScript origins box, enter your store application domain name.
- In the Authorized redirect URIs box, do the following steps:-
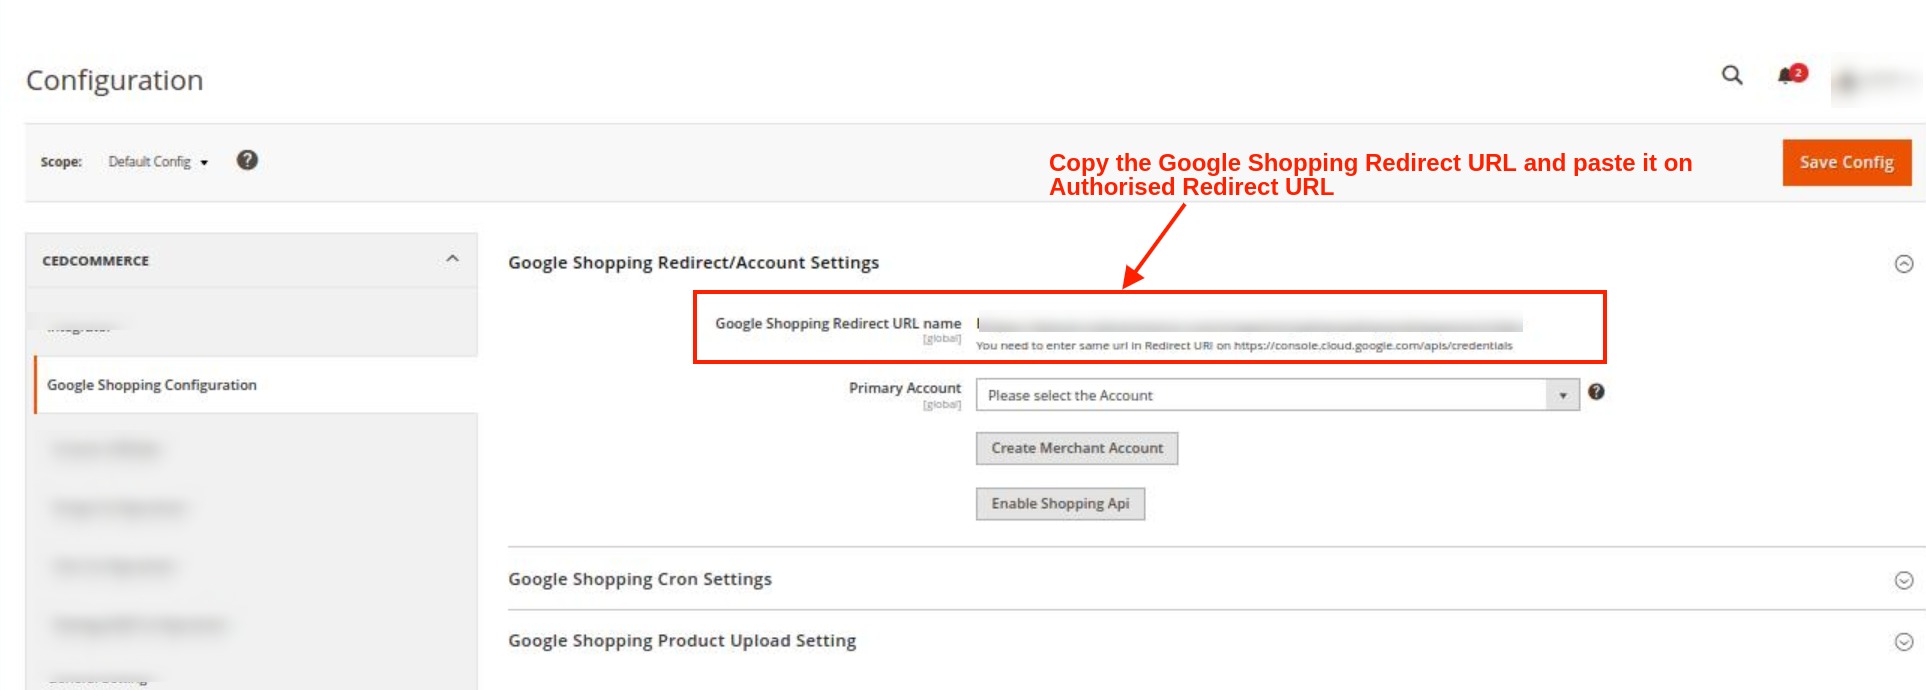
- Go to the Magento Admin Panel
- Then go to Google Shopping Actions Configuration Settings
- Copy the Redirect URL and Paste it on Authorized redirect URIs The tab appears as shown in the following figure:
- Then click on the Save Button to save the Credentials information.
- Once you Save it then you can download the JSON file from there which you can use as a secret key file.
The tab appears as shown in the following figure:
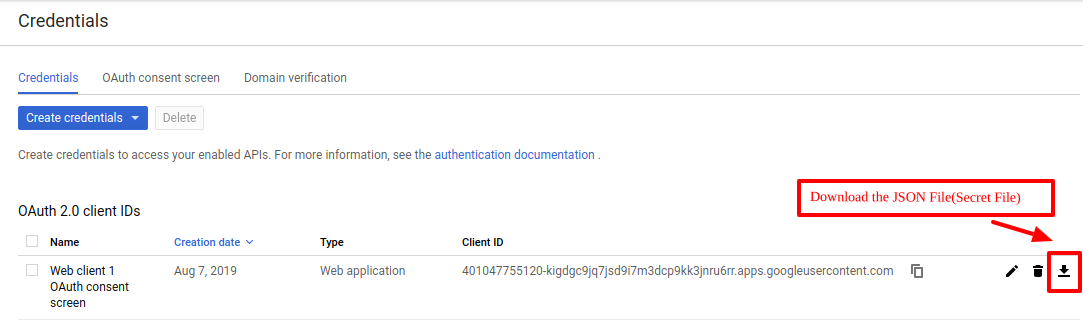
- Once you download the JSON File (Secret File). Go to the Magento Admin Panel.
- Go to Google Shopping Actions Configuration Settings.
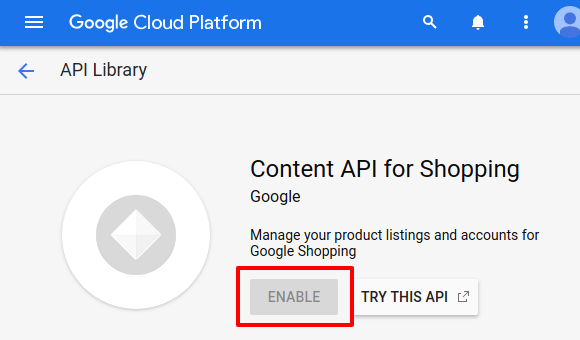
- Then Client needs to Enable Content Shopping API. The tab appears as shown in the following figure:
- Click on Enable Shopping API section, to enable the Google Shopping API. The tab appears as shown in the following figure:
Related Articles
Manage Google Shopping Feed Account
To Manage Accounts Go to the Magento 2 admin panel. On the left navigation bar, click on the Google Shopping Feed Integration option. The menu appears as shown below: Click on Manage Accounts. The Manage Account page appears as shown below: Click on ...Configuration Settings for Google Shopping Feed
To set up the Configuration Settings, Go to the Magento 2 admin panel. On the left navigation bar, click on the Google Shopping Feed Integration option. The menu appears as shown below: Click on Configuration. The Configuration page appears as shown ...Help & Support
To view the Help & Support Section Go to the Magento 2 admin panel. On the left navigation bar, click on the Google Shopping Feed Integration option. The menu appears as shown below: Click on Help & Support. The Help and Support page appears as shown ...How to Add New Profile?
To Add New Profile Go to the Magento 2 admin panel. On the left navigation bar, click on the Google Shopping Feed Integration option. The menu appears as shown below: Click on Profile Manager. The Manage Profile page appears as shown below: Note: You ...Overview of the application
Google Shopping is a service by Google allowing customers to search, view, and compare products. It was launched as Froogle on February 12, 2002. Google Shopping is a service and program that allows customers to search, compare and shop for physical ...