Configure your Merchant Account
To configure your Merchant Account Please visit http://console.cloud.google.com/apis/credentials link to configure it with your merchant account,
- Go to the above link Create a new project,

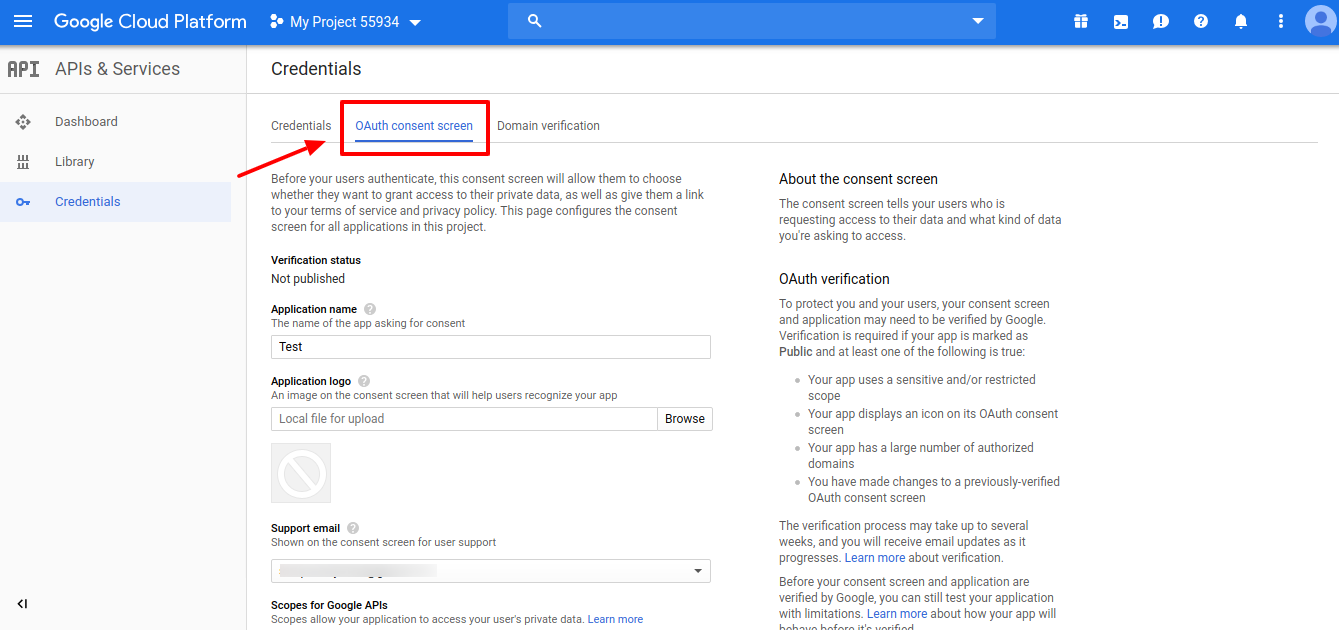
- Select OAuth consent screen. The tab appears as shown in the following figure:


- In the OAuth Consent Screen, do the following steps:
- In the Application Name box, enter your shop name or domain name of your store,
- In the Application Logo box, upload your application logo that will help to recognize your app.
- In the Support Email box, enter your support email.
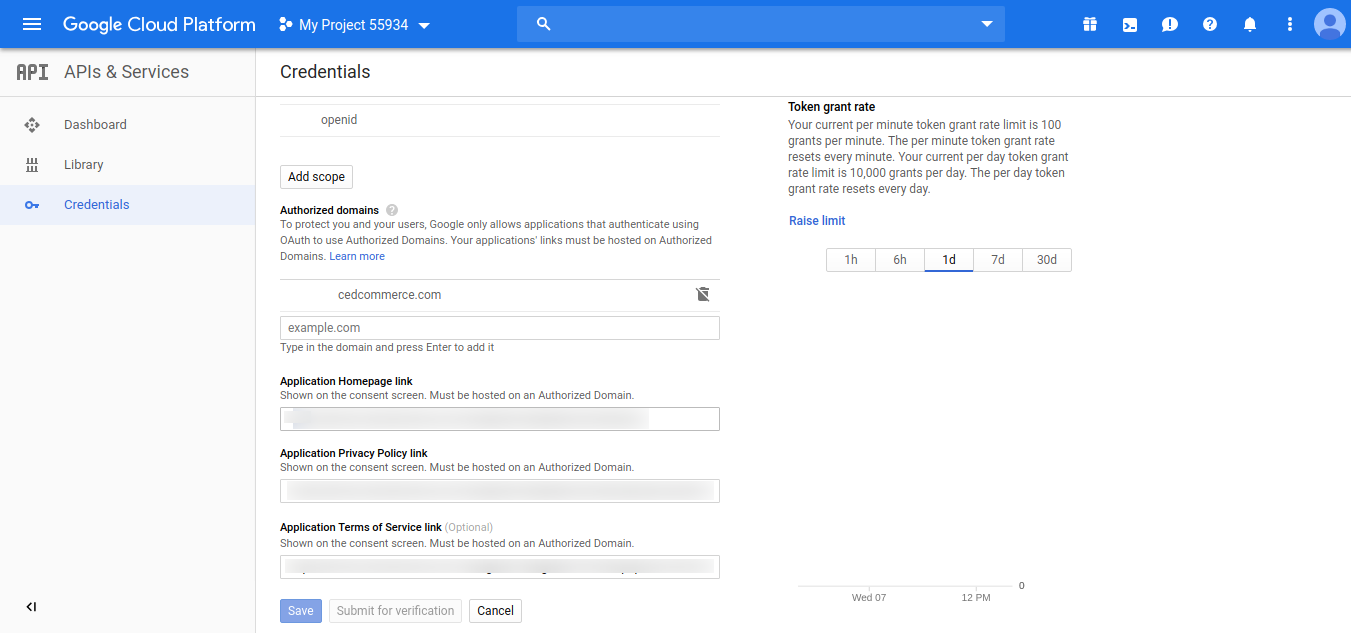
- In the Authorized Domain box, enter your website domain. Example: cedcommerce.com
- In the Application Homepage link box, enter your store homepage link.
- In the Application Privacy Policy link box, enter your store application privacy policy link.
- In the Application Terms of Service link box, enter your store application terms of service link.
- Then click on the Save button to save the OAuth consent screen information.
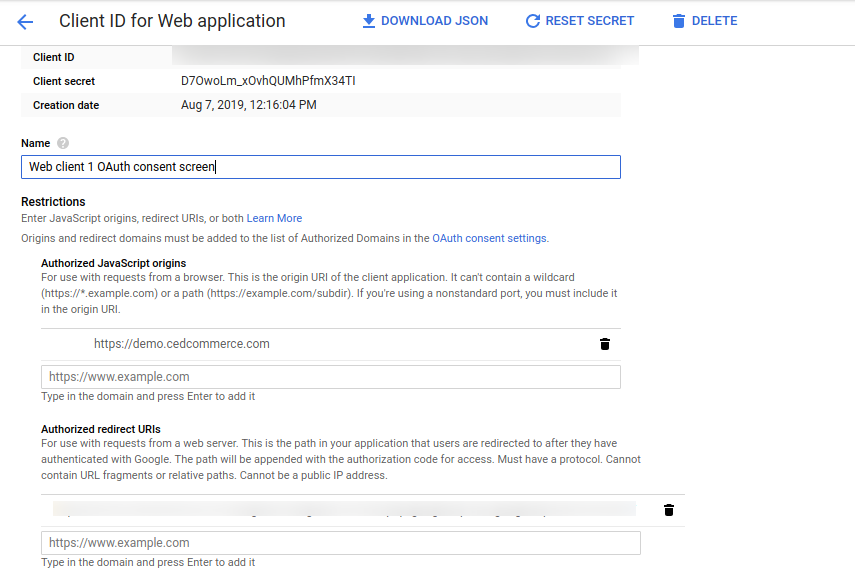
- Then comes to the Credentials Tab & click on Create Credential Button & select OAuth Client ID The tab appears as shown in the following figure:

- In the Credentials sections, do the following steps:
- In the Name section, enter the name of OAuth Client ID name.
- In the Authorized JavaScript origins box, enter your store application domain name.
- In the Authorized redirect URIs box, do the following steps:-
- Go to the Magento Admin Panel
- Then go to Google Shopping Actions Configuration Settings
- Copy the Redirect URL and Paste it on Authorized redirect URIs The tab appears as shown in the following figure:

- Then click on the Save Button to save the Credentials information.
- Once you Save it then you can download the JSON file from there which you can use as a secret key file.
The tab appears as shown in the following figure:

- Once you download the JSON File (Secret File). Go to the Magento Admin Panel.
- Go to Google Shopping Actions Configuration Settings.
- Then Client needs to be Enable Content Shopping API.
- Click on Enable Shopping API section, to enable the Google Shopping API. The tab appears as shown in the following figure:

Related Articles
Retrieve API Credentials from Google Shopping Actions
Once the extension is successfully installed on the Merchant’s store, the Google Shopping Actions menu appears in the Magento Admin Panel. The merchant has to fill in the API credentials in the Google Shopping Actions Configuration page of the admin ...Help & Support
To view the Help & Support section, Go to the Magento Admin panel. On the top navigation bar, click the Google Shopping Integration menu. The menu appears as shown in the following figure: Click Help & Support. The Help and Support page appears as ...Configuration Setting
Once the extension is successfully installed on the Merchant’s store, the Google Shopping Actions tab appears in the Magento Admin Panel. The seller has to set up the configuration settings for establishing the connection between the Magento store ...Manage Google Shopping Actions Accounts
To Manage Account On Google Shopping Actions Go to the Magento 2 admin panel. On the left navigation bar, click Google Shopping Actions. When the menu appears, click Manage Accounts. On clicking it, you will be navigated to the page as shown below, ...Add a New Profile
To add a new profile Go to the Magento Admin panel. On the left navigation bar, click the Google Shopping Actions Integration menu. The menu appears as shown in the following figure: Click the Profile Manager menu. The Google Shopping Actions Manage ...