Create Campaign
This subsection allows you to create a ProductBoost campaign by filling in basic campaign details, choosing products for promotion, and setting the desired budget.
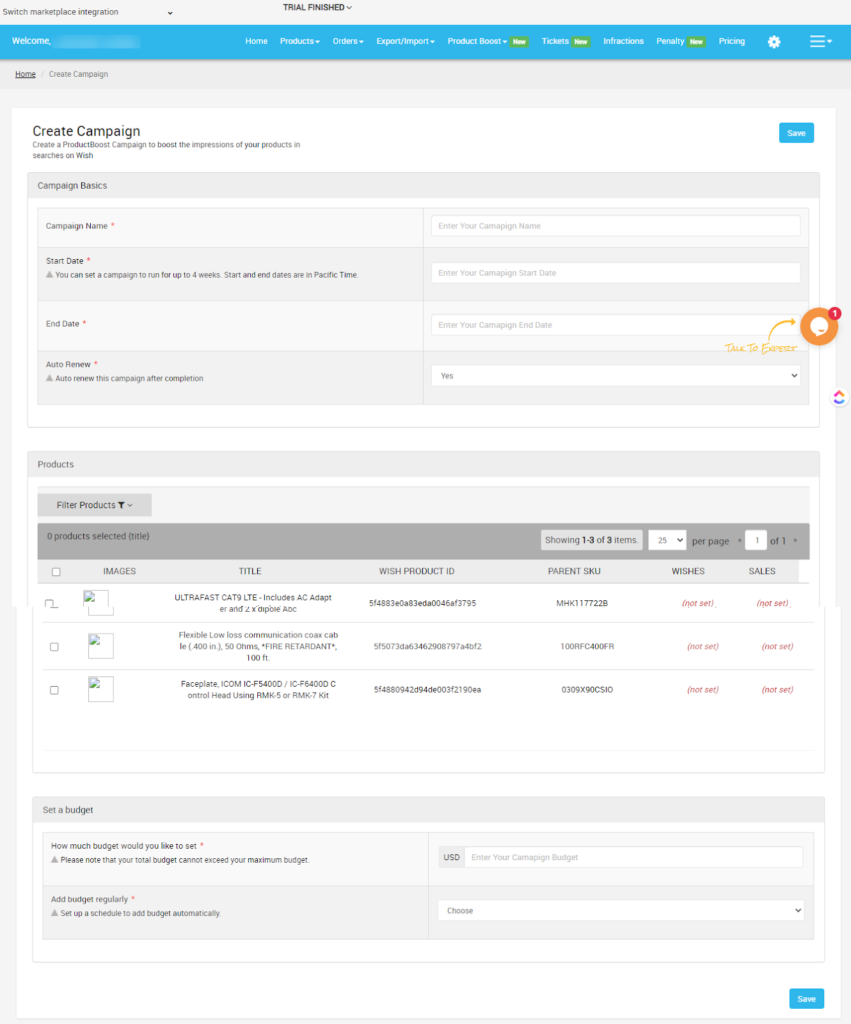
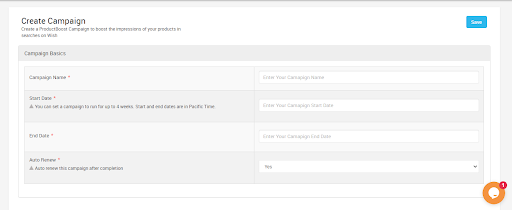
The ProductBoost’s “Create a Campaign” section looks as follows- 
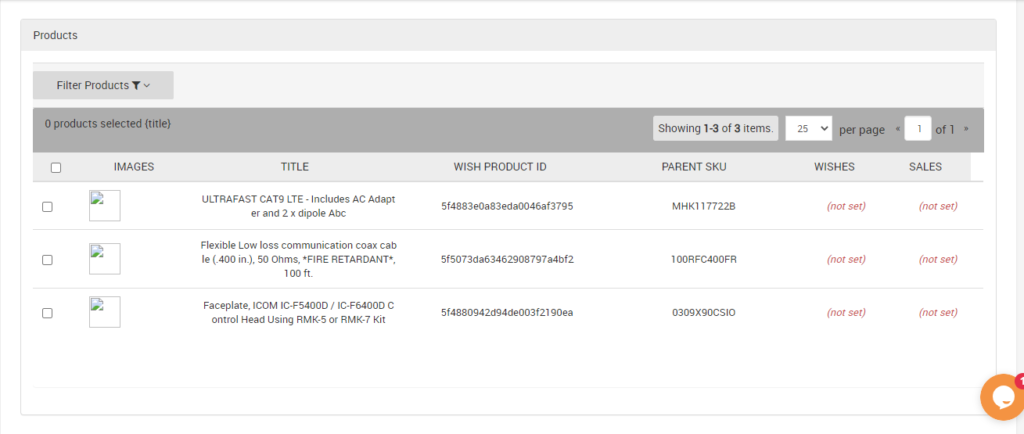
 Next, you need to select the products which you wish included in your campaign for promotion. For that, click on the “Product” tab, a list of product sheet will appear on your screen as shown in the image below.
  You need to tick the boxes of products you wish to promote and “Save” the changes. Or, you can filter your requisites by clicking on the “Filter Products” option.
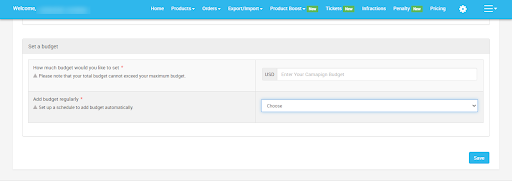
 The “How much budget would you like to set” allows you to enter a set amount for your campaign. And the “Add Budget regularly” option indicates that whether you wish to update your campaign budget regularly or not.

How to create a ProductBoost campaign?
To create a campaign for ProductBoost, sellers need to
- Log into your Wish Integration App’s admin panel
- Go to the “ProductBoost” tab on the left-side menu option
- Click on the tab and choose the “Create a campaign” option
- Now, you will be redirected to the Create a campaign page as shown in the image below
- In the “Campaign Basics” options, you need to fill in the campaign name, its start & end date, and you have to enable or disable Auto-renew and Intense Boost options.


- The third and the last step to creating a ProductBoost campaign is to set a budget. On clicking on the “Set a budget” option you will be provided with two options as given below.

Related Articles
Manage Ads
The app is compatible with the Product Boost feature. It has a separate section to create ProductBoost campaigns and keep track of all the campaigns. The ProductBoost feature helps you in promoting products across the marketplace. It is Wish’s native ...List Campaigns
The section displays the complete list of all the ProductBoost campaigns which you have created directly on Wish.com. You can click on “fetch campaigns” to get all the details. Each ProductBoost campaign carries this information Campaign ID - Each ...Overview: Wish-BigCommerce Integration
Founded in 2011, Wish.com is the most trusted marketplace for sellers willing to expand their reach to more than 300 million customers across the globe. With gross value ranging between 3.5 to 5 billion dollars, Wish is a mobile-based e-commerce ...Enroll Wish Returns
The Manage Returns section displays the list of all the products returned to the marketplace. Each product returned is displayed with its image, title, Wish product ID, enrolled, status, region, Warehouse, and actions. You can even filter to view ...Sync Modifier
For creating variations in the actions as per your needs, you simply need to choose this option. The Sync Modifier option allows you to create product variations according to the requirements. How to use Sync Modifier? Select the products which you ...