Create Profile
- Go to Profile > Create a profile
- Fill in all details, like set a unique profile name, so it’s easily identifiable.
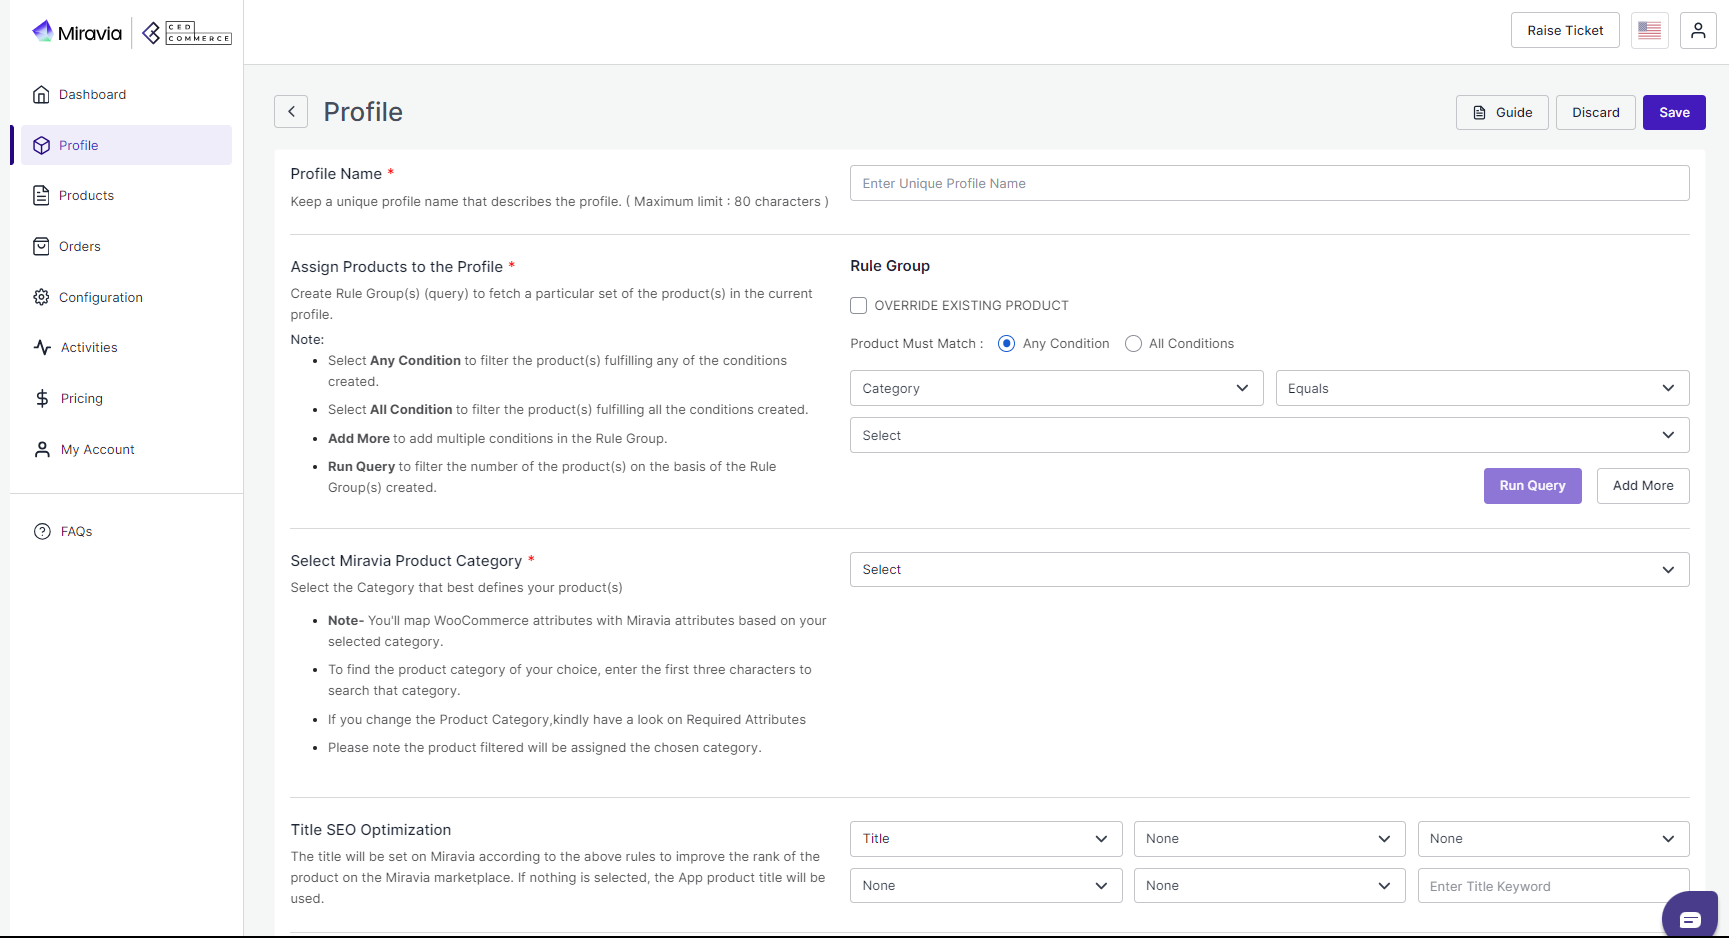
3. Further, you need to select & set “Rule Group” to fetch data from a similar set of products.
- Product Match: The rule is based on ANY and ALL conditions that define whether you want all the selected conditions to be fulfilled or any of them to be true.
- Filter & fetch products based on product type, attribute set, name, or category.
- Now select the value from equals and not equal.
- Once you have entered all values, click on “Run Query”. A list of all products containing the mentioned value will be fetched & displayed.

4. Now select the product category for the product. The Auto-Assign Category feature simplifies the process of categorizing your products on Miravia. By analyzing your product's title and description, Miravia automatically assigns it to the most suitable category. This helps save time by eliminating the need to manually assign categories to your products.

5. Map WooCommerce Attribute with Miravia attribute.
- First, map mandatory/ required attributes, i.e., EAN code, brand mapping attribute, product weight, length, height & width.
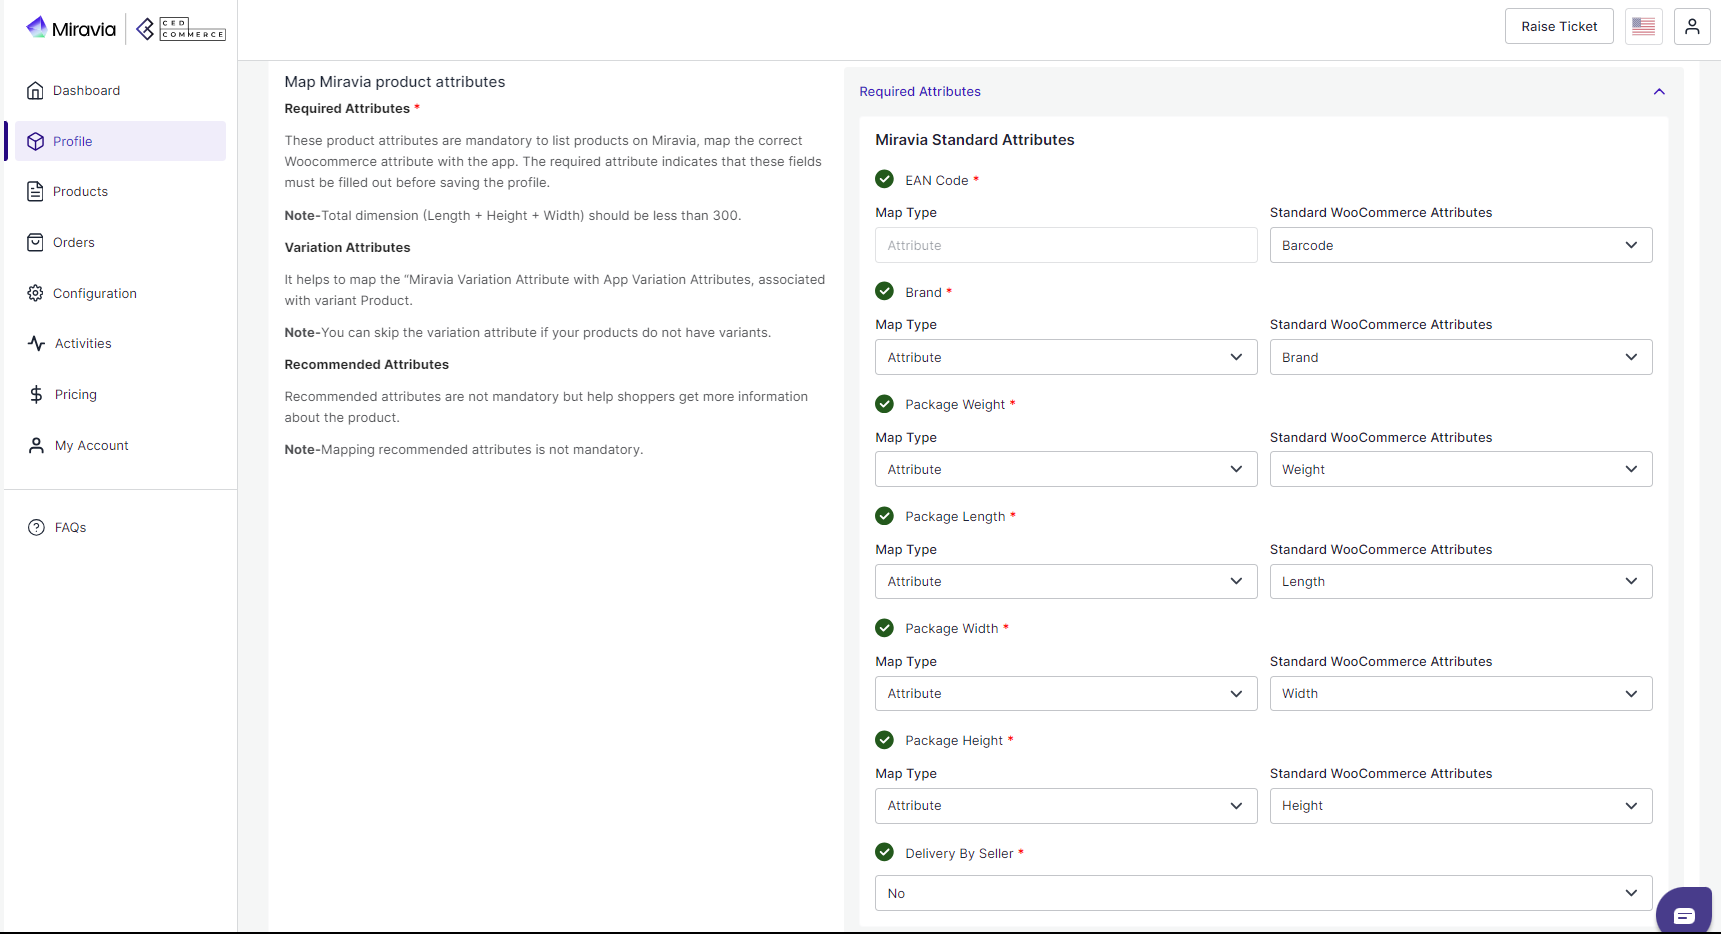
EAN Code: EAN code is a 13-digit bar code used to identify each product in an eCommerce store.
You must map the WooCommerce attribute (that contains the value of the EAN code) with Miravia.
For example, if an attribute is named “GSTIN” in the WooCommerceStore, you can map it with an EAN code attribute in the app.
Brand Mapping: With brand mapping, merchants have the option to map the WooCommerce store brand with Miravia Brand. For example, if the attribute named “XYZ” has the value ‘brands name” on WooCommerce, you can map it with Miravia. You can choose the attribute from the drop menu, just remember to select attributes whose value should be that of Brand on Miravia.
(Note: The brand value entered in your WooCommerce store must be supported by Miravia.)
- Now Map product variant attribute, i.e., size & color.
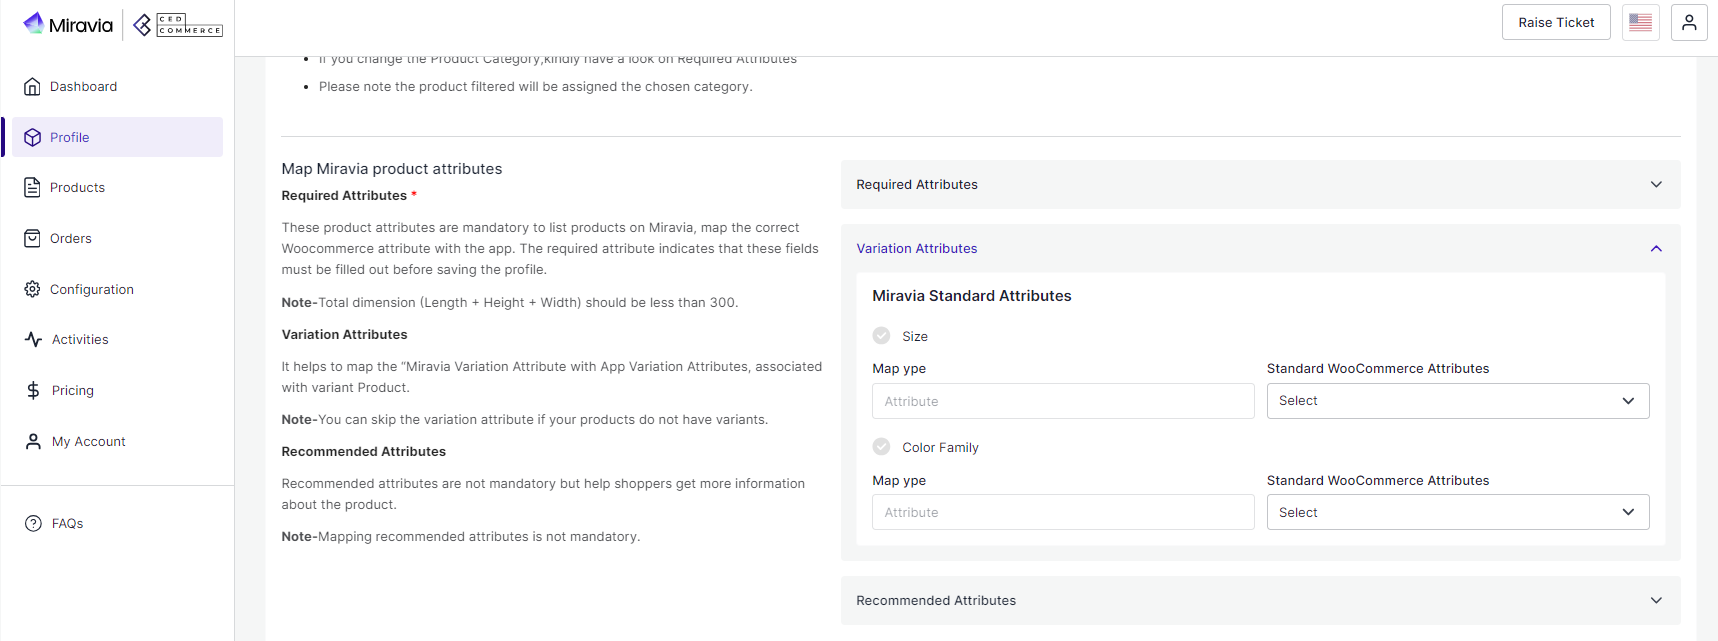
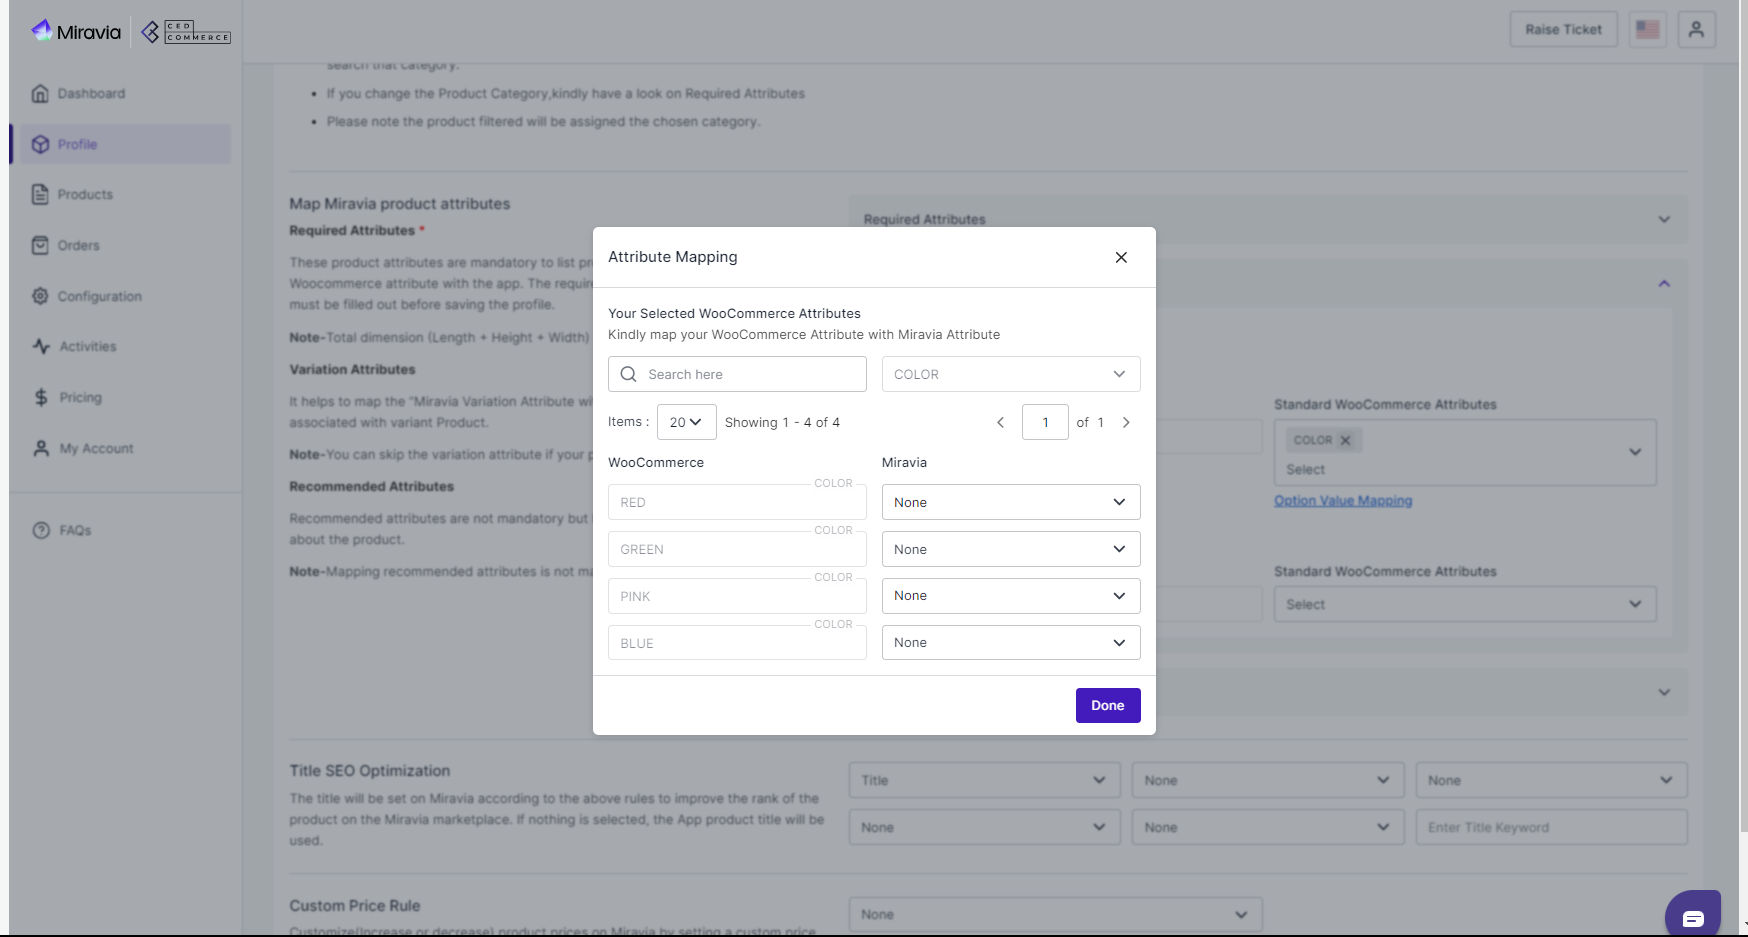
For size or color mapping, choose an attribute from the drop-down menu and click on “Option Mapping.”
A pop-up will appear where you can choose a particular Miravia size with WooCommerce Size. For example, you can map M of WooCommerce with M or S of Miravia. And same follows for the color family too.
- Thirdly, set recommended attributes, which are not mandatory but will help your product rank better on Miravia.
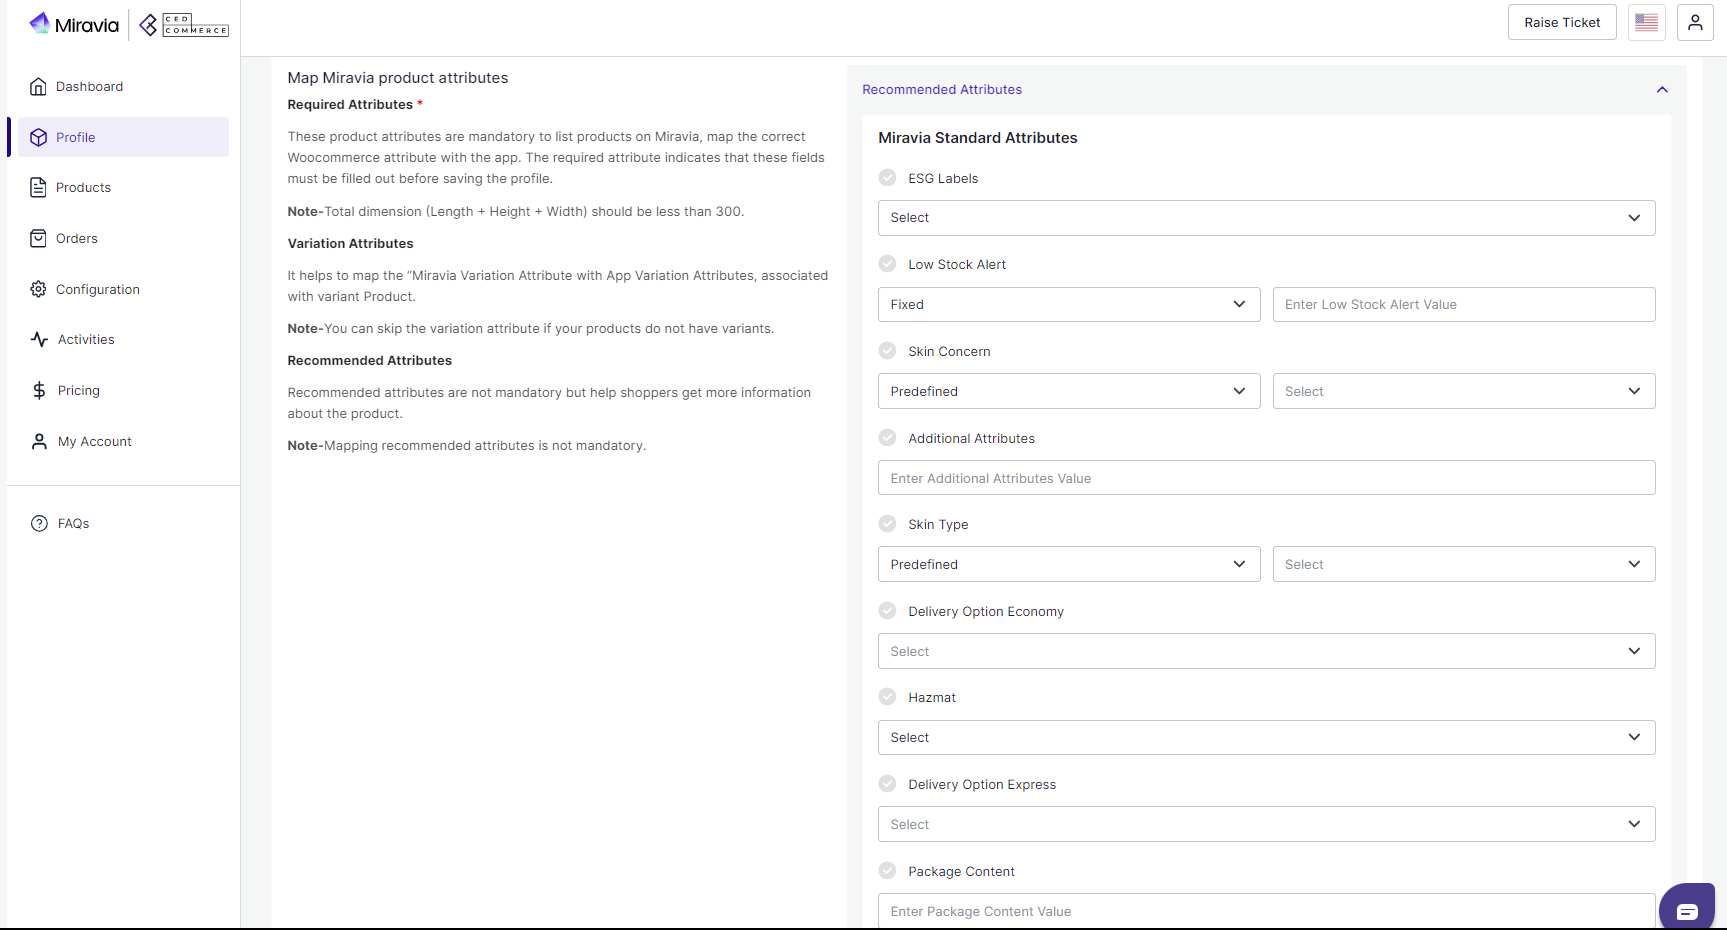
Note: Variation and recommended attributes may differ from category to category.
6. Now, choose the product title for listing products on Miravia.

7. Lastly, set the price rule for the products falling under this profile. The Custom Price Rule feature allows you to adjust product prices on Miravia by setting a fixed increment or percentage. You can choose to apply this rule to the regular price, sale price, or both. If the sale price becomes higher than the regular price after applying the rule, the regular price will be updated to match the sale price.

8. Save the settings, and now a profile is created successfully. You can view or edit them from the profile section.
Related Articles
Default Configuration
Once the profile data is saved successfully, proceed with the default configuration. Title Optimization: You can set product title rules here and before listing products on Miravia, the title is optimized accordingly. Custom Price Rule: You can set ...Profile Management
Product profiling is a means of categorizing similar products under a single category. This enables sellers to modify/edit all products under that profile in one go. With the help of Profiling, you can apply a certain set of rules and customization ...Miravia Connector Overview
Getting Started with the CedCommerce Miravia Connector for PrestaShop Welcome to the Miravia Connector by CedCommerce — your complete integration solution to manage products, inventory, pricing, and orders between your PrestaShop store and the ...Overview
The CedCommerce Miravia Connector is a robust tool that bridges the gap between your WooCommerce store and the vast marketplaces of Miravia and AliExpress. By automating product listings, syncing inventory, and managing orders, this connector ...Configuration
The Configuration section has been developed to help you manage your general configuration settings which you can edit anytime as per the requirement. Firstly, go to the “Configuration” section. Under the general setting, you can modify and update ...