G2A Configuration Settings
Once you retrieve the G2A Seller Account Identifiers and credentials, the store owner can use them while setting up the configurations through the WooCommerce store Admin panel.
To set up the configuration settings in the WooCommerce admin panel
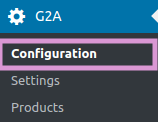
- Go to the G2A panel on the left side of the navigation bar.
- Click on a configuration below the configuration page of G2A.

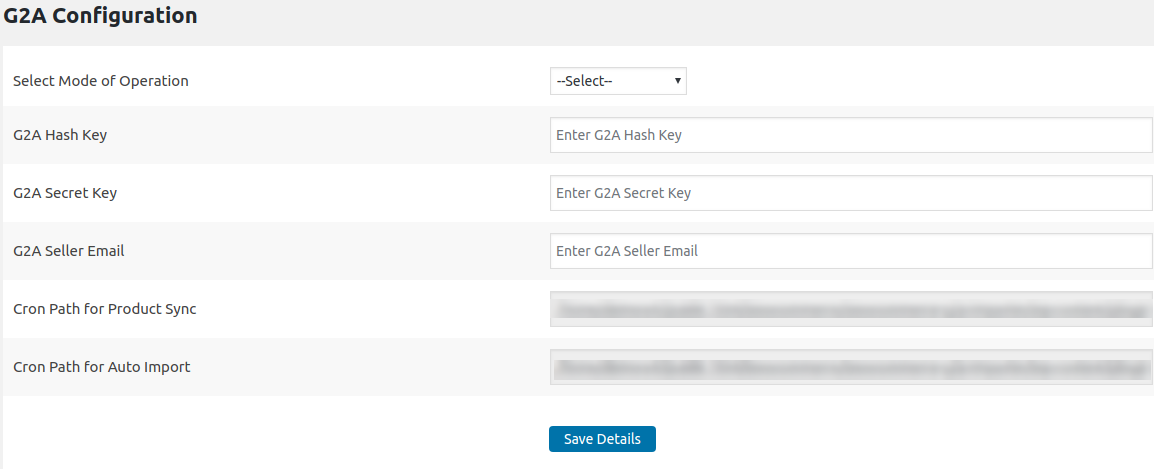
- Once you have clicked on configuration, it redirects you to the configuration page of G2A which will appear as shown in the image:

- In the configuration section, you have to fill some details like-
- Select the mode of operation from the dropdown menu.
- Enter the G2A Hash Key.
- Enter the G2A Secret Key.
- Enter the G2A Seller Email.
- Set the cron path for Product Sync.
- Set the cron path for Auto Import.
Once, you have provided all these details click on SAVE DETAILS to save your details.
Related Articles
General Settings
Once you have provided all the details in the configuration section, then in the general settings you have to perform some general settings. To set up the general settings in the WooCommerce admin panel 1. Go to the G2A panel on the left side of the ...G2A Products Importing
In the products section, you will select the product which you need to import. To import the products 1. Go to the G2A panel on the left side of the navigation bar. 2. Click on Products below the configuration page of G2A. 3. Once you have click on ...Overview
G2A is the world’s largest marketplace for digital products which is specialized for the resale of gaming products whose headquarters are in Hong Kong and they also serve in other regions such as Poland, Netherlands and China. It is one of the ...Onboarding Process on G2A Marketplace
To get seller account on G2A Importer You must meet the following requirements, as there are two criteria: Individual Sellers Business Sellers Requirements for an Individual Seller On this level, we require a set of basic information with proof of ...