Theme Settings Section
Once you have installed your app, you would first design the homepage that suits your brand image and preferences. With MageNative, you can perform customization seamlessly with minimum effort and view the changes in real-time.
Theme Settings
Click the ‘Let’s Get Started’ button from the dashboard.
After this you will be redirected to the ‘Store selection’ page where you can select the type of store you are running, just pick your desired store and click ‘Save & Next’.
Then go to the ‘Choose theme section’ where you can pick your favorite theme from a bunch of pre-built ones or build your theme. Then click on ‘save & next’ to move ahead.
Use components
Here You’ll find the list of components enabled on your home screen. Right next to it, you’ll see the mobile app where you can drag & drop the components and see the changes you make. Utilize these components along with the selected theme, and start customizing your app the way you want.
MageNative offers 9 components that you may utilize to design your apps:
Category circle
Banner slider
Product slider
Standalone banner
Category square
Collection grid layout
Product layout
Product grid layout
Collection slider.
Each component allows you to adjust its layout, color, or font and enables you to upload any item into it.
Banner Slider
A banner slider is the component of an app that lets you add banners to your app to make it look more appealing and enticing. Here you can adjust its layout, change colors, and fonts, and upload banners you want to add.
Collection Grid
An interactive grid presents users with a collection of products in an easy-to-search and customizable way. It lets you customize its color and layout and upload products/images. Customize however you want and click on ‘apply changes'.
In the same way, you can do it for other components too.
Once you are done with your app customization process, move on to branding by clicking on ‘Save & Next'.
Personalize Branding
MageNative lets you personalize your mobile app to suit your brand’s image and color. This personalization is essential for your loyal customers to connect with your app and feel comfortable utilizing it.
Head to the MageNative dashboard and glance around the Personalize Branding section!
Here you are required to fill in all the details of your app


1- App Name Here you need to enter the title of your app, which appears under the app icon on the home screen. So choose it wisely as per your business type and needs.
2- Theme color & secondary theme color of your app Here’s where you can give an appealing touch to your app the way you want. You can adjust the theme color and secondary theme color of your app. All you need to do is hover over the color, and you can pick out the hex codes of the respective colors.
The overall theme color refers to the overall color scheme of your app.
3- Maintenance Mode Maintenance mode lets you display a message to your users when your app is temporarily out of service or is in the under-development phase.
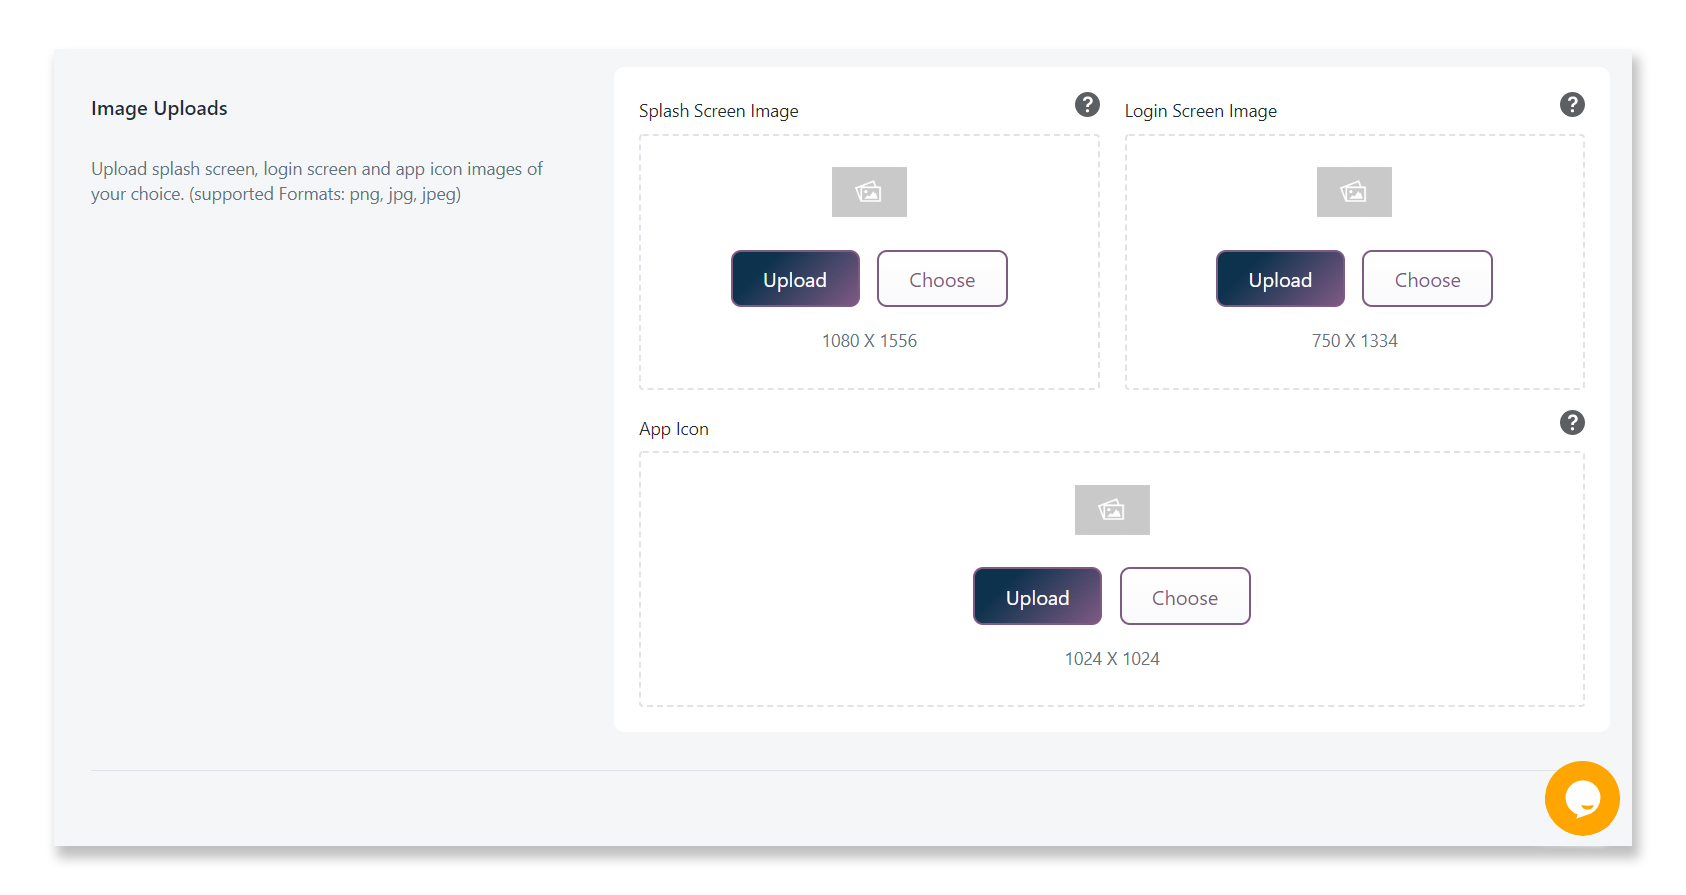
4- Upload Images
Splash screen image- The minimum requirement for splash screen image is 1080px * 1556px.
- Login screen image- An ideal size for a login screen image would be 750px * 1334px.
- App icon- The app icon image needs to be 1024 px * 1024 px size for the icon to be visible clearly.
Save the changes you’ve made and preview them in real-time by clicking on the ‘preview’ button on the top right corner of the page.
Click on the ‘Launch’ button to proceed with the launching process of your mobile apps to the App Store and Play Store.
Related Articles
Theme Components Section
Start customizing your mobile app in the theme settings section. Just drag and drop the component you want to add to your mobile app and preview the changes happening in real-time on the mobile screen next to it. In the right-hand corner, you can ...How to make Products/Collections available for Mobile App Builder
How to make Products available for Mobile App Builder-MageNative Log in to your Shopify Admin Go to the Products -> All products Select the Product(s) that you want to make available for the Mobile App Builder-MageNative Click on More Actions and Add ...Overview Section
The MageNative Shopify Mobile App extension is very useful to build the mobile app easily and in a very flexible manner. With the help of the MageNative Shopify Mobile App extension, the store admin can convert the Shopify website into a featured ...Preview Your Apps Section
Preview Your Mobile Apps Congratulations on completing the first step which is the Theme Setting. You can now preview your fully functional and featured Android and iOS apps and make changes in real-time. Follow these simple steps to view your mobile ...How to Enable App-only Discounts
Offering discounts and rebates on purchases is an effective way to attract customers to your store. 93% of U.S. shoppers cite discounts and offers as important factors when deciding whether or not to purchase from a retailer or brand. Moreover, ...