How to assign SKUs to shipping templates?
Once the templates are ready and uploaded on Walmart.com, you need to assign the SKUs with the template in order to update the Shipping information on Walmart.com. The mapping of the SKUs can be done on the profile level or the product level.
Steps to Map the SKUs at the Profile Level
Follow the steps given below to map the SKUs at the Profile level:
- Go to Profiling.
- Click on Manage Profiles.
- Select the profile on which you want to assign the Shipping template.
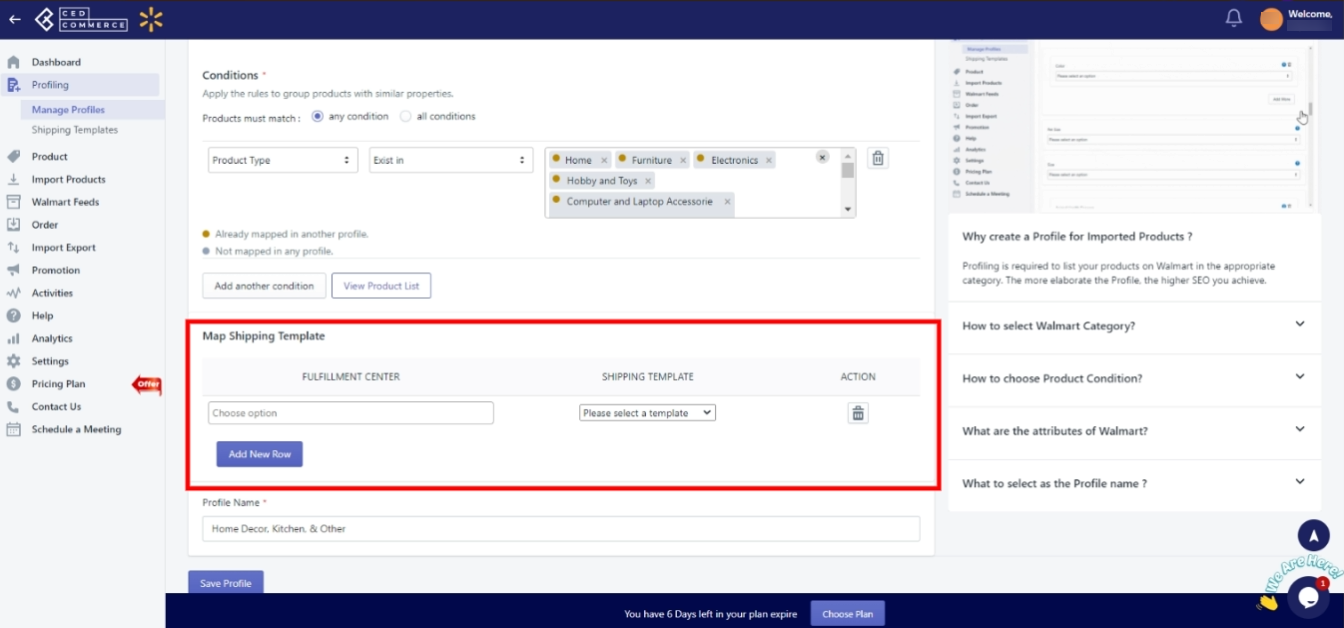
- Scroll down the page to the Map Shipping Template section.

- Click on Add New Row.
- Select the Fulfillment Center and Shipping Template you want to assign with the profile.
- Click SAVE.
The products associated with the profile are now mapped with the assigned Templates. You need to send this to the Walmart Seller Center.
Before sending the mapped SKUs to Walmart, let’s take a look at the steps of mapping SKUs with the Shipping template at the Product level.
Steps to Map the SKUs at the Product Level
Follow the steps given below to map the SKUs at the Product level:
- Go to Product.
- Click Manage Products.
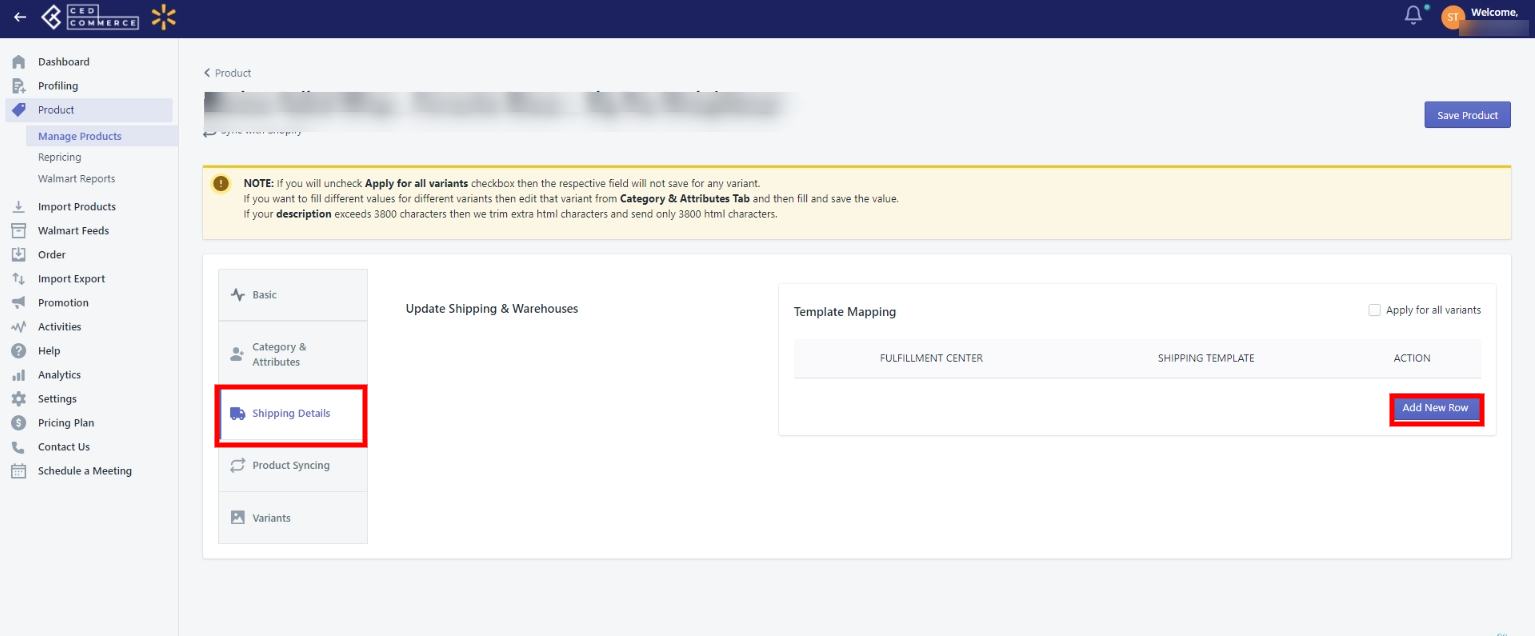
- Click on the Edit icon under the Action column. A page appears wherein you need to click on the Shipping Details. The following page will appear:

- Go to Shipping Details.
- Then click on Add New Row button.
- Select the Fulfillment Center and the Shipping Template you want to assign with the product.
- Click the Save Product button available on the top right, to save the changes.
Let’s check out the steps to send the mapped SKUs to the Walmart Seller Center.
Send the mapped SKUs to Walmart Seller Center
Follow the steps given below to send the mapped SKUs to the Walmart Seller Center:
- Go to Product.
- Click Manage Products.
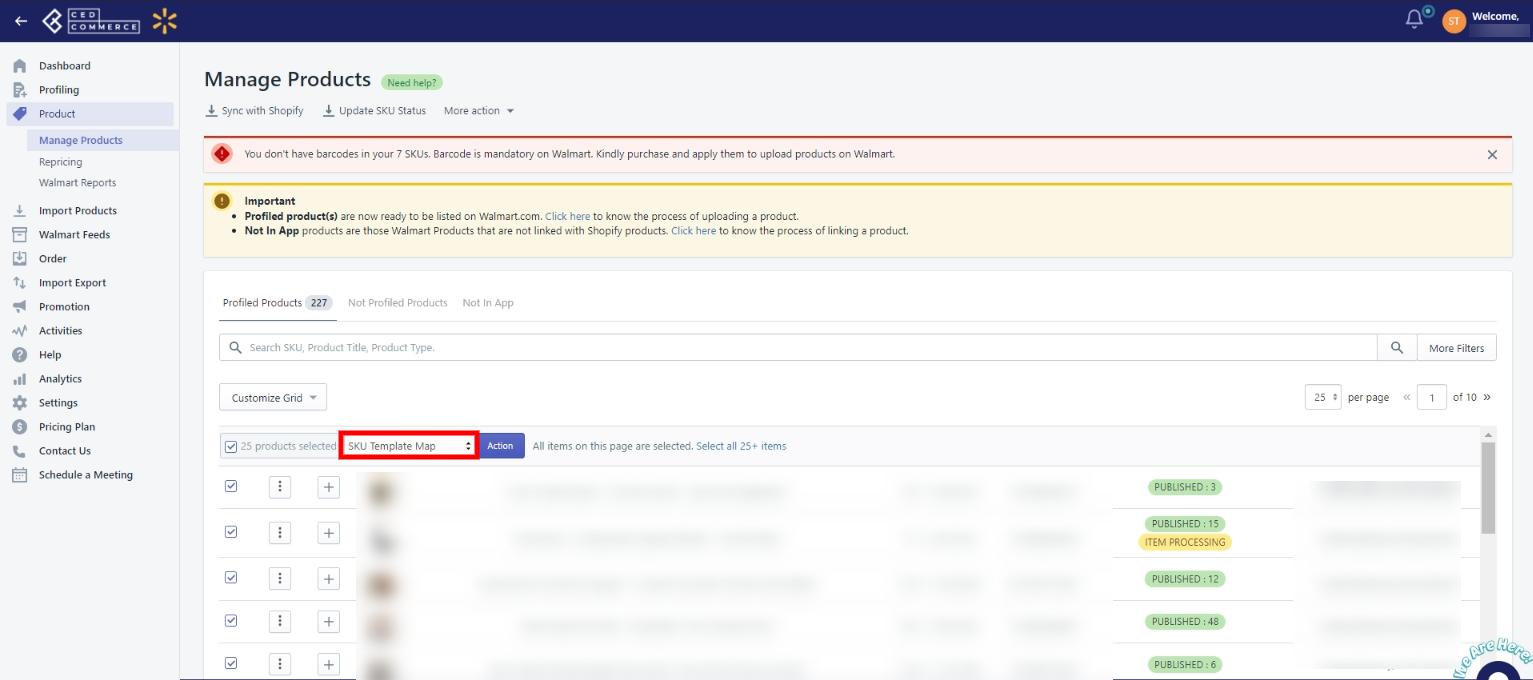
- Select the products for which you have done the mapping. Then, Select SKU Template Map from the Select Bulk Action dropdown. A page appears as shown below:

- At last, click Action.
Now, the SKUs along with the Shipping Template will be sent to Walmart.
Related Articles
Shipping Templates
Walmart simplifies this process by introducing Shipping Templates for all the shipping methods. Shipping templates let you manage your shipping settings across several products at once (e.g., service levels, shipping regions, transit times, and ...Walmart Order Management
Order Configuration The order management section helps you manage and configure order-related settings for your Walmart products. To configure order management, go to the Walmart Integration app and click Order management under the Settings menu. The ...Shipping Template Feed
To view and update the Shipping Template Feed status, follow the steps given below: Go to the Walmart Integration App. Click Walmart Feed menu. The Walmart Item Feed page opens up, as shown in the following figure: Click Shipping Template Feed. ...Manage Product
On the Left Navigation Bar, under Products, you can see Manage Product. The Manage Product section allows you to view all the Shopify store products imported during the app’s configuration. These products are divided into two parts, as follows: ...Fulfillment Centers
Fulfillment Centers allow you to set up multiple facilities in order to provide the best shipping estimates to your customers. How to get the Fulfillment Centers in the app? Follow the steps given below to set up fulfilment centers in the app: Open ...