How to Create or Edit Category Template
Creating a new template is easy. Remember to fill in the details carefully. 


Let’s see how to create a new template.
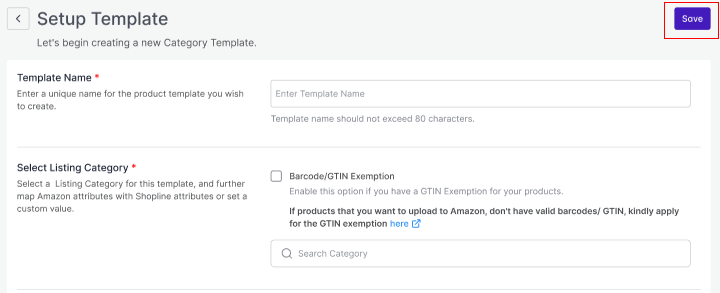
Template Name
Begin with naming your template per your listings requirements.

Select Listing Category
Here you can tick the setting for all your products that do not have Barcode. Additionally, select your listing Category from the drop-down that best defines your products.

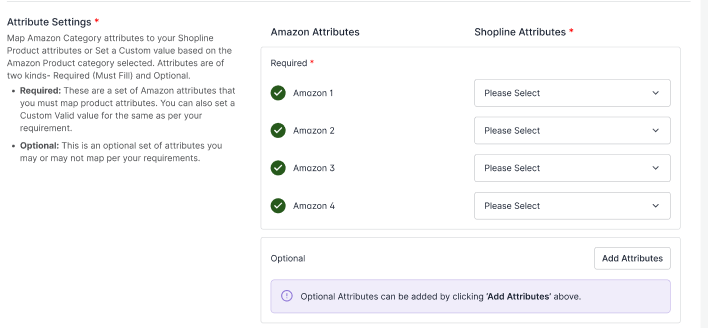
Attribute Settings
Map Amazon attributes with Shopline attributes for seamless syncing of products on Amazon. You select between Amazon’s recommended attributes or create custom attributes. Moreover, to enhance your listings, you can also map optional attributes.

There are three kinds of attributes:
- Required Attributes: These are a set of attributes that you must fill in. You can also set valid custom values for the same as per your requirements.
- Amazon Recommended Attributes: If you don’t have any relevant attributes on Shopline to map with Amazon, you can choose to go with recommended attributes that Amazon provides.
- Optional Attributes: You can also add optional attributes for better listing enhancements.
- Note*: Based on your listing category, you may or may not get optional attributes to map.
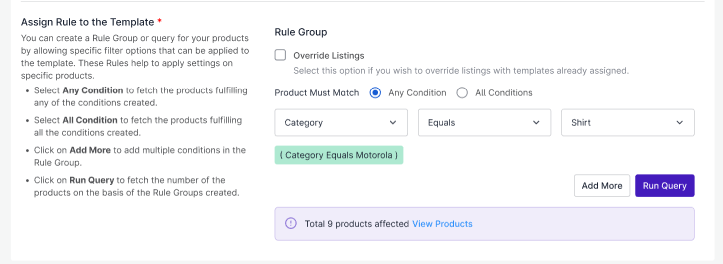
Setting Rule Groups
In order to apply specific conditions to certain products using a particular template, rule groups are crucial.

To retrieve products that meet certain conditions, you can
- Select "Any Condition" to fetch products that meet at least one of the conditions created.
- Select "All Condition" to fetch products that meet all conditions.
- You can add multiple conditions to the Rule Group by clicking "Add More."
- To retrieve the number of products based on the Rule Groups created, click on "Run Query."
Override Listings
Enabling the "Override Listings" option allows the app to assign a specific template to products that already have a template assigned. This means that if this option is enabled for a particular template, a product may have multiple templates assigned to it.
Once done, just click on Save on your top right.

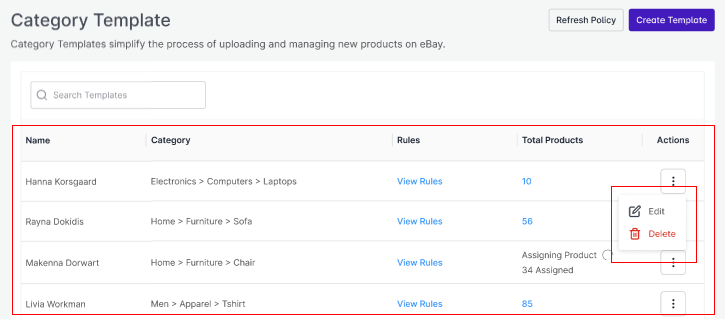
Once you are through creating a template, you will find it added to the main Category Template window. In case you want to edit or delete a template. you can click on ‘Actions’ and choose to delete or edit your existing template.

Related Articles
Category Template
Category Templates simplify the process of uploading and managing new products on Amazon. They allow you to apply price settings, map attributes, and create custom settings for your listings all in one place. The tab contains two sections Setup ...Overview: CedCommerce Amazon Integration
About CedCommerce CedCommerce is a leading multichannel enabler that helps online merchants expand their business to international marketplaces like Amazon, Amazon, Walmart, and Google via secure, optimized, and scalable integration tools and ...How to create Custom Payment Method in Shopline?
One of the outstanding features of the integration is to help merchants streamline and sync orders from marketplace to Shopline. To successfully create Orders on Shopline from marketplace via app, you must ensure creating and updating a Custom ...Product List
Product List lets you manage and sort all your Amazon listings, including bulk syncing and importing actions with your Shopline store. Let’s take a closer look at each section: Product Status Product status helps you get no. of listings under ...Order List
Order settings enable you to instantly fetch orders from Amazon Marketplace and create them on your Shopline store. Additionally, the feature helps you fetch all the orders with a real-time update at an interval of 15 minutes. Let’s understand each ...