How to update your Pixel ID
Here are the steps to update your Pixel ID:
- Go to the Setting tab. And then select Accounts.
- All the connected accounts will appear on the screen.
- Click on the Edit option next to Pixel ID.
- An Edit Pixel confirmation screen will appear.
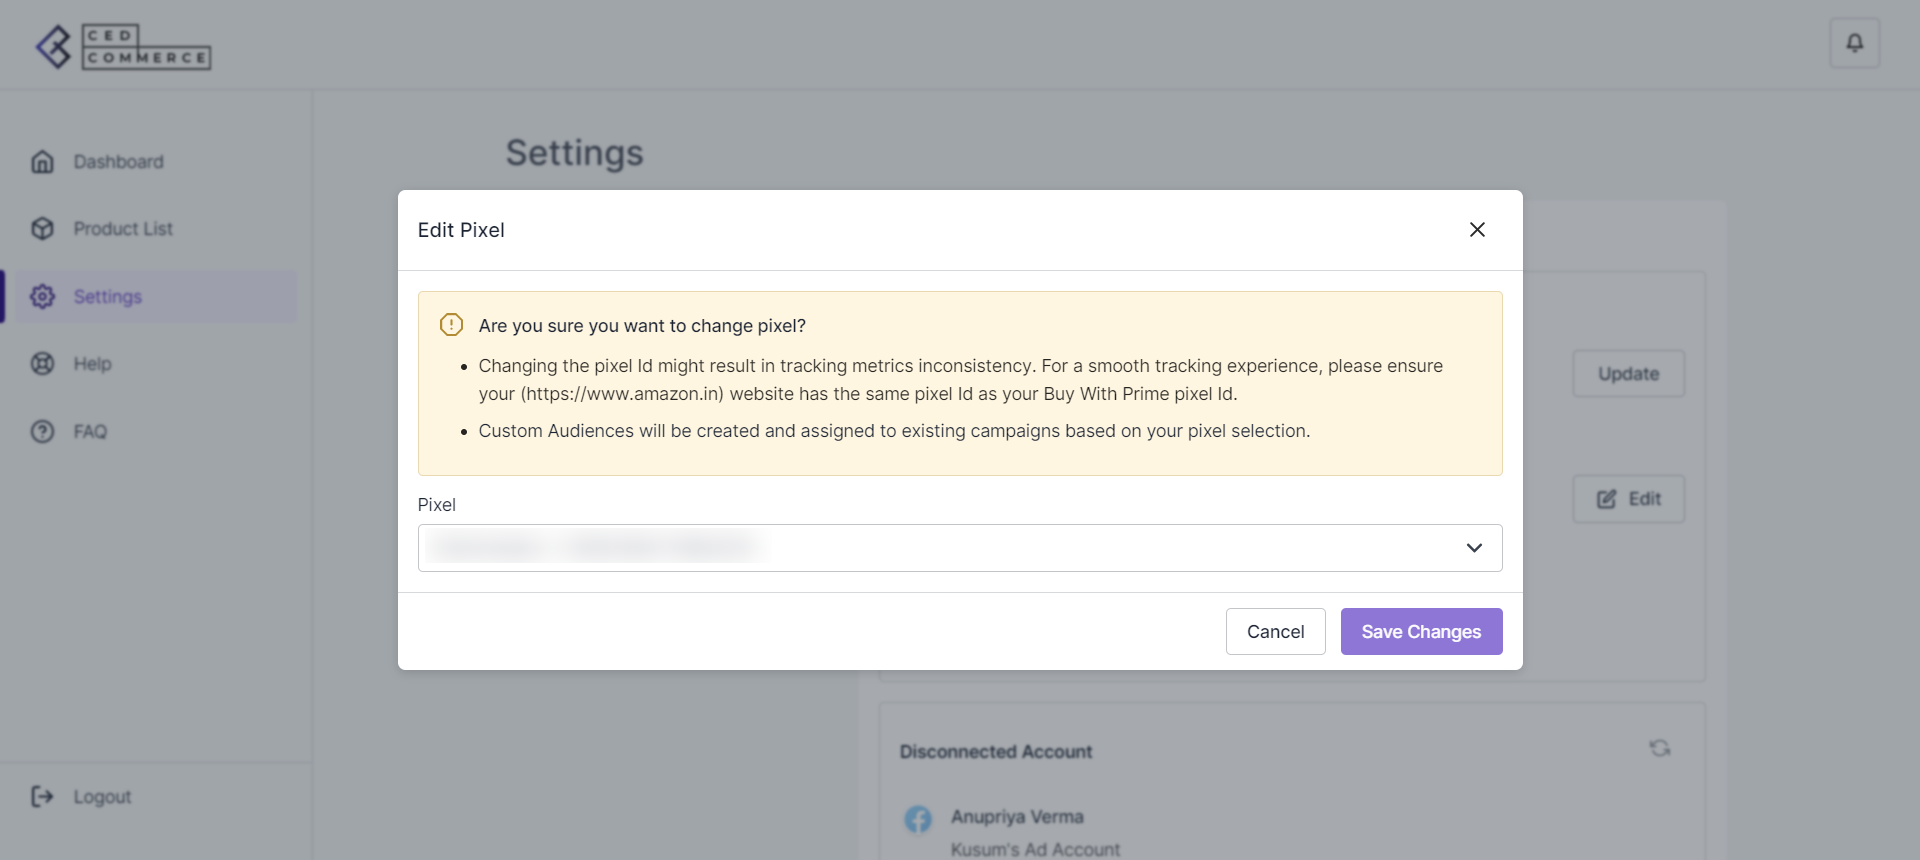
- A complete drop-down list of all the Pixel IDs will appear. Select the Pixel ID you want.
- Click on ‘Save Changes,’ and your Pixel ID will be successfully updated.
Note: Please make sure that you have selected the same Pixel ID for your Buy with Prime console, website, and app.
Related Articles
How to Update your Current Password
Here are the steps to update your current password: Go to the Settings tab, and select Password. A Password Reset Screen will appear. Enter your current password. And then create your new password. Confirm your newly created password, and click on ...How to Update/Connect Your Instagram Account
Here are the steps to connect/update your Instagram account: Go to the Setting section. And then, select the Accounts tab. Your connected Instagram account will appear on the screen. Click on the Update button next to the connected Facebook account. ...How to Update Your Facebook Account
Before you begin to update your Facebook account, please note that if you wish to connect to a different Facebook account than the one you are currently using, all your current campaigns on the Social Ads for Buy with Prime will get disconnected. ...How to Update your Store/Brand Name
Here are the steps to update your Store/Brand Name: Go to the Settings tab, and select General Details. A General details screen will appear. Click on the Edit button beside Store/Brand Name. An Edit Store/Brand Name dialog box will appear. Add a new ...Frequently Asked Questions
This is a collection of the most commonly asked questions, problems, and nuggets of knowledge about Social ads for Buy with Prime. If you are stuck in the middle, you can obtain assistance from these. Question 1: What are the different product ...