Manage Wish Profiles
To set up the Wish Profile settings in the PrestaShop Admin panel
- Go to the Prestashop admin panel.
- In the left navigation panel, place cursor on Wish Integration menu. The menu appears as shown in the following figure:

- Once you click on Wish Profile, The following page appears:

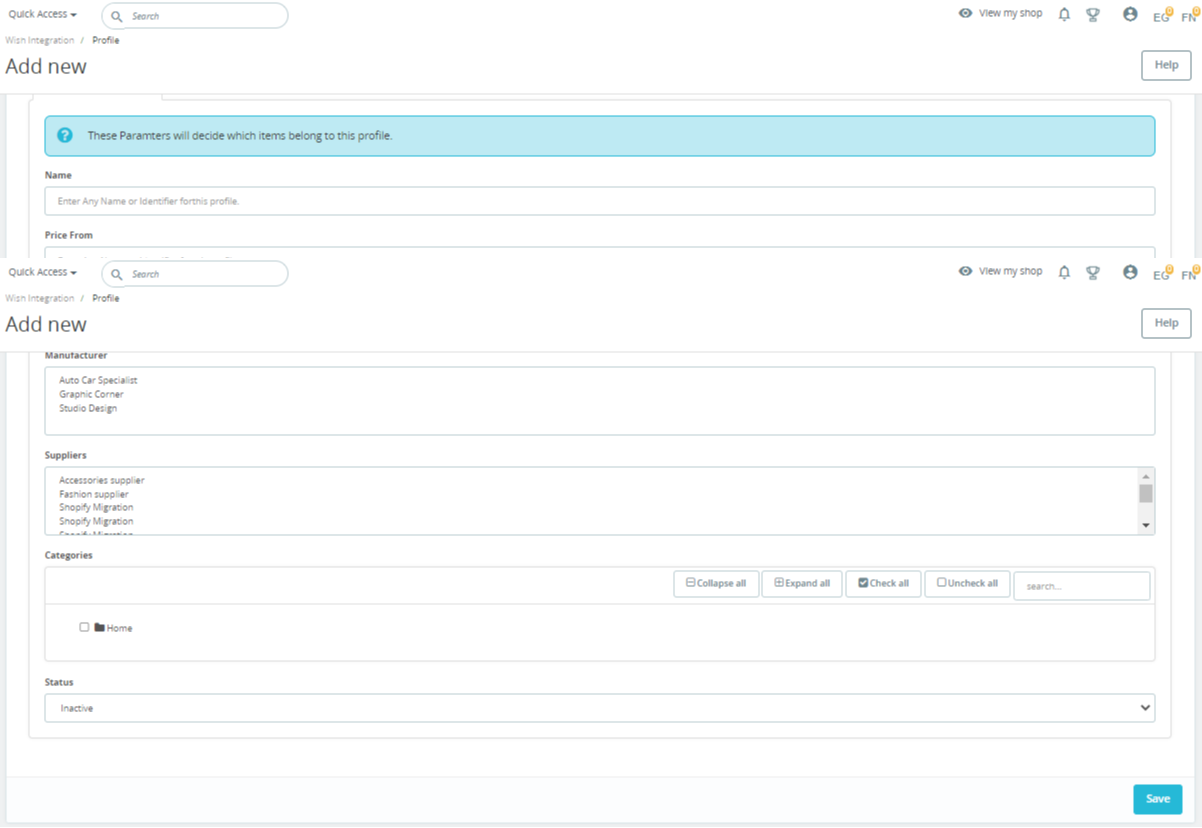
- Now click on Add New Profile. You will be taken to the page as shown below:

- In the name, enter the name of the profile.
- In the Price From, you can set the price range of products from.
- In the Price to, enter the price range product to.
- In the Manufacturer, You can see the manufacturer list available in your store.
- In the Supplier, you can see the list of suppliers available.
- In the Categories, you can choose your Prestashop Category.
- In the Status, choose actively to activate the profile.
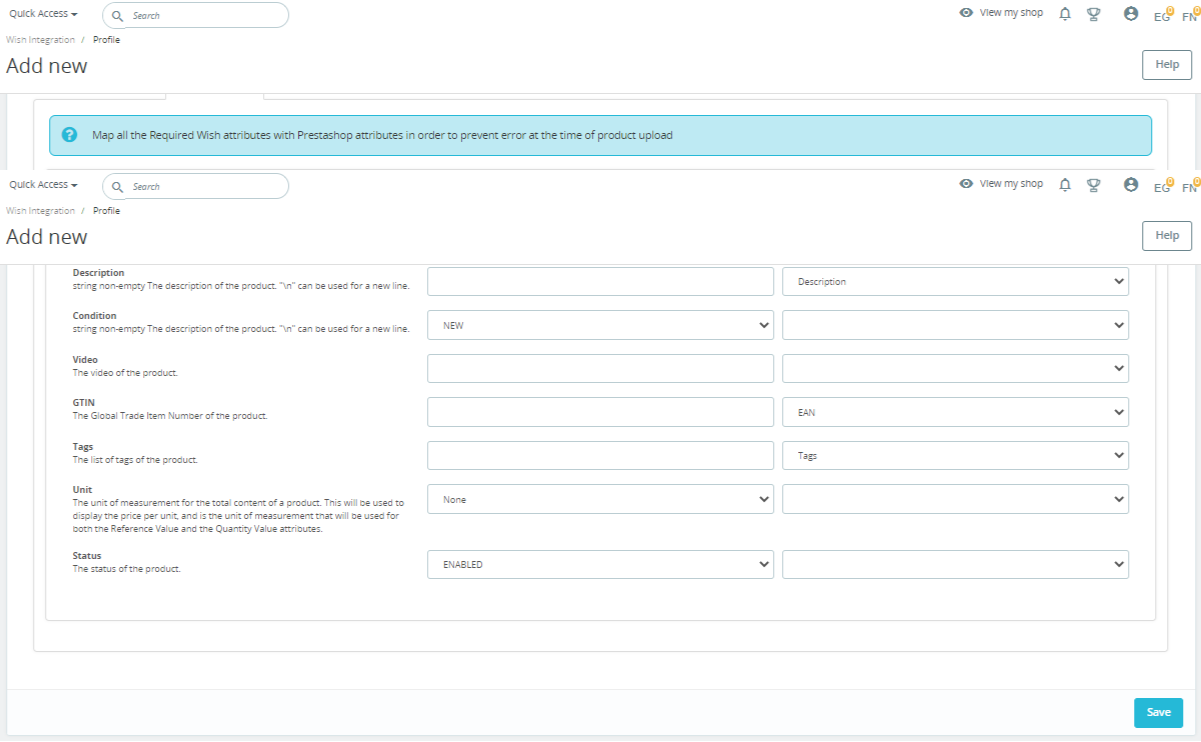
- Now Click on Attribute mapping, the tab appears as shown below:

- In this tab, map the relevant attributes of the product profiles with the of attributes of items on Wish.
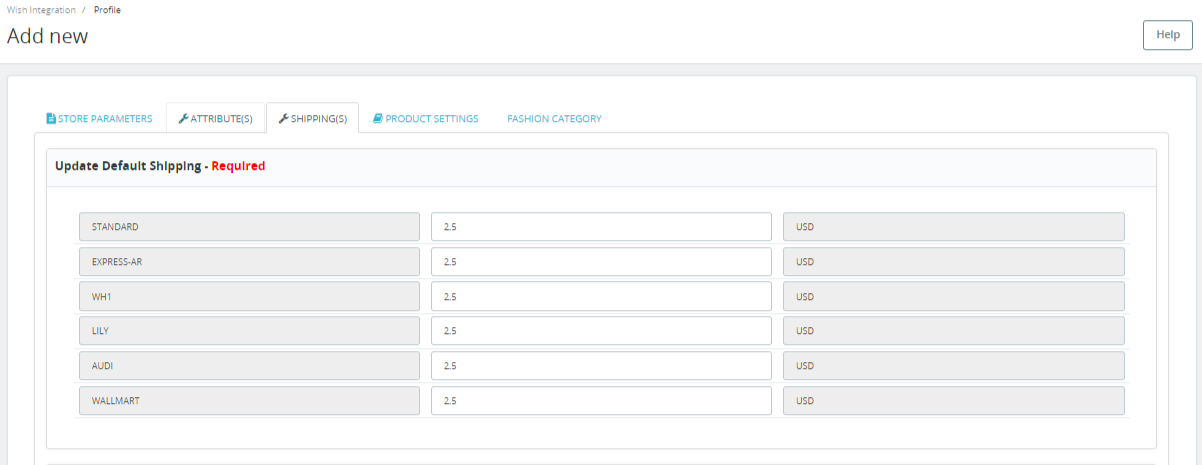
- Now move to the next Shipping, The tab appears as shown below:

- In this Shipping, do the following steps:
- In the Wish Default Shipping, you may add the default shipping price by entering a price and choosing currency. You may do so by clicking on Add Shipping.
- In the Warehouse to Shipment, you can choose countries on which you need to ship, Enter the price of shipment, Choose wish currency and enter the max delivery days and put 'Enabled' status.
- In the Shiping Overrides, you can choose countries on which you need to ship, Enter the price of shipment, Choose wish currency and enter the max delivery days and put 'Enabled' status.
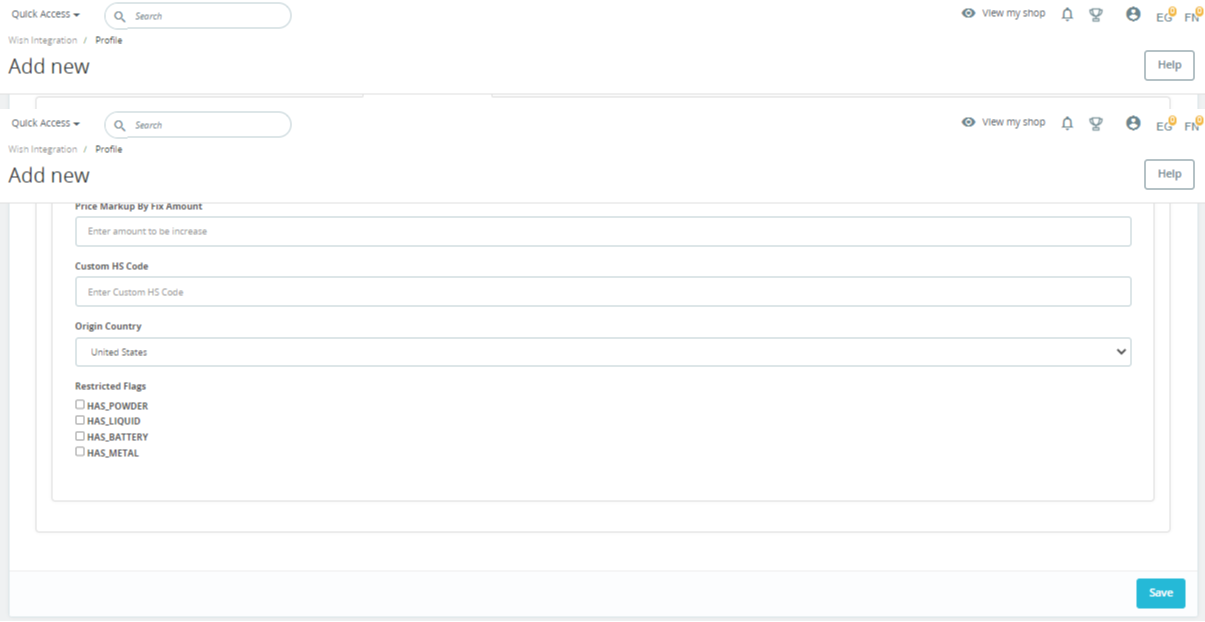
- Now at last Product Settings, the tab appears as shown below:

- In the Product Markup by Perentage: You may use this option if you want the price of your PrestaShop product to be increased by percentage on Wish.
- In the Product Markup by Fix Amount: You may use this option if you want the price of your PrestaShop product to be increased by percentage on Wish.
- In the Custom HS code, enter the custom HS code.
- In the Origin country, choose origin country.
- In the restricted Flags, you can choose the checkboxes and restrict them.
- Once done click on Save button to save the above profile information.
Related Articles
Overview
Wish is a mobile and web E-Commerce platform that was founded in the year 2011. Headquartered in San Francisco, USA, it operates worldwide with a major presence in the regions of North America, Europe, Brazil, and China. It is the sixth largest ...Manage Wish Products
To manage Wish Products. Go to the Prestashop admin panel. In the left navigation panel, place the cursor on the Wish Integration menu. The menu appears as shown in the following figure: Click on Product(s) The tab appears as shown in figure: In the ...Manage Wish Orders
To manage Wish Orders: Go to the Prestashop admin panel. In the left navigation panel, place the cursor on the Wish Integration menu. The menu appears as shown in the following figure: Click on Order(s) The tab appears as shown in the figure: In the ...Manage Option Mapping
To manage Color Mapping: Go to the Prestashop admin panel. In the left navigation panel, place cursor on Wish Integration menu. The menu appears as shown in the following figure: Click on Color Mapping The tab appears as shown below: Now click on Add ...Wish Prestashop Integration Extension Installation
To install the extension: Go to the Prestashop Admin panel. On the left navigation bar, point cursor to the Modules and Services. The menu appears as shown in the following figure: Now click the Modules and Services menu, and you will come across a ...