Manage Returns
The Manage Returns section displays the list of all the products returned to the marketplace. Each product returned is displayed with its image, title, Wish product ID, status, and so on.

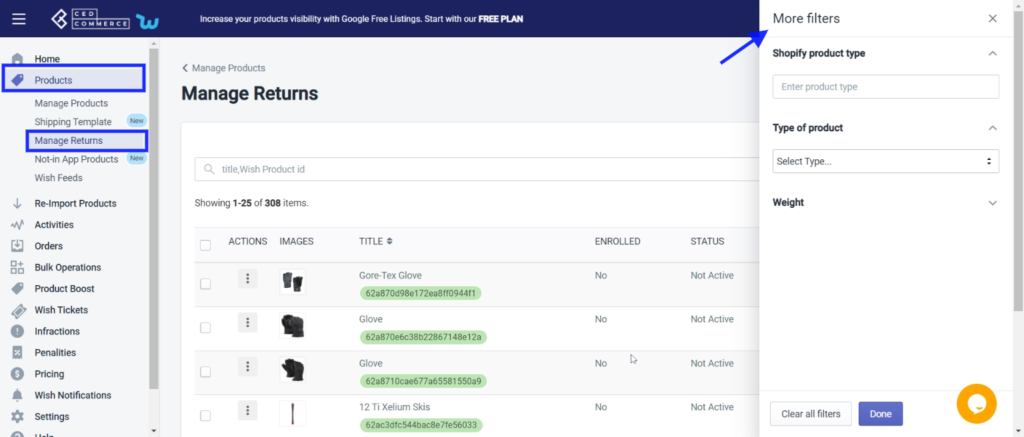
You can even filter to view returned products of your preference by clicking on the “Filter” button. The Filter tab displays the following options-
- Shopify product type – select the type of Shopify product that you wish to see. Pumps, fixed-gear bicycles, tools, apparel, etc., are a few options found in this filter.
- Type of product – Choose from the option Simple/Variant
- Weight- Filter the product on the basis of the weight of the product.
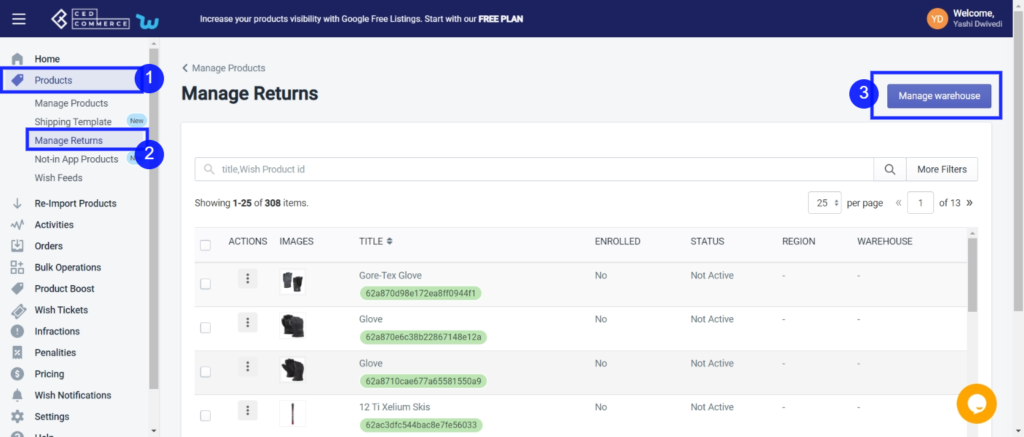
The “Manage Warehouse” button on the top-left corner of the section allows you to view the complete list of return warehouses available in your store.
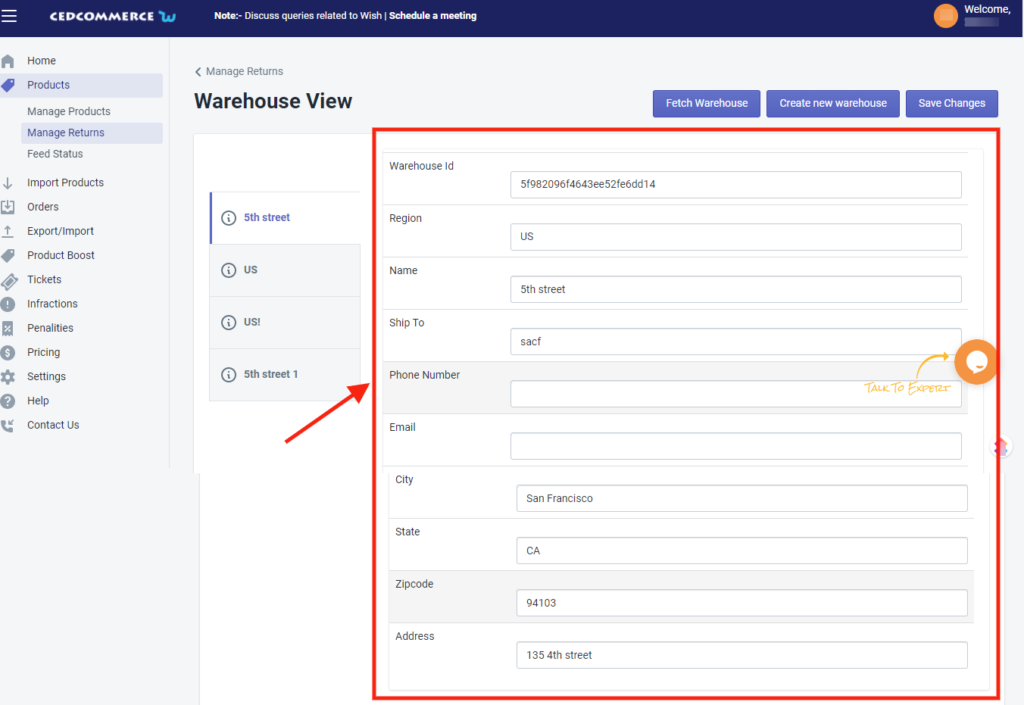
When clicking on the “Manage Warehouses” button, you will be redirected to the Warehouse view page. Here you will find details like region, name, Warehouse ID, phone number, email, etc., of each Warehouse here. The page will look like the image given below:
You will also find “Fetch Warehouse” and “Create new warehouse”. The page will look like the image given below.
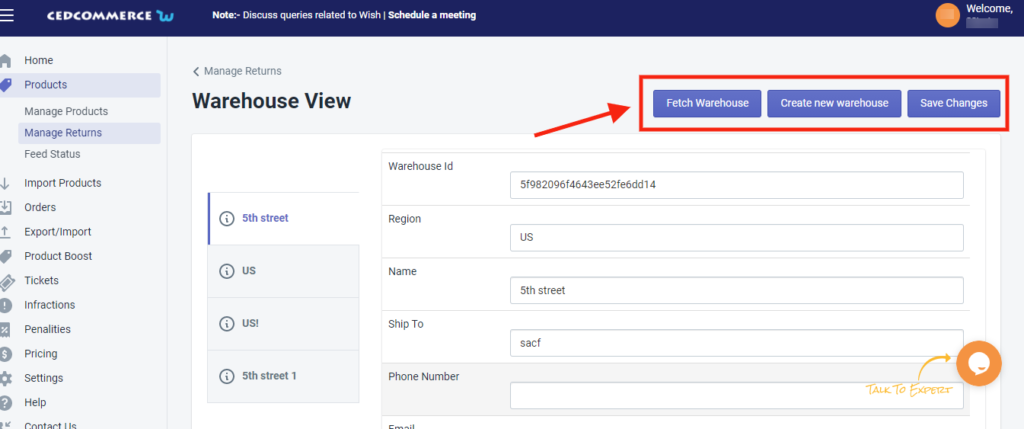
The Fetch Warehouse option displays the list of all recently created return warehouses on your store.
While the Create new warehouse option enables you to create a new warehouse in your store.
And lastly, the “Save Changes” option allows you to save all the recent changes made in the return Warehouse section.
To Create New Warehouse, you simply need to click on the given button, a pop-up page will appear on the screen as shown below:
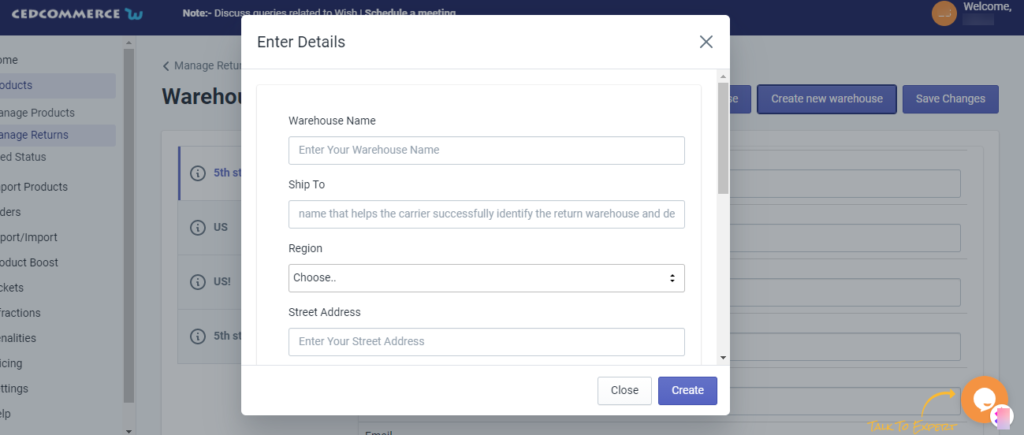
To create a new warehouse, you need to enter the following details in this pop-page-
- Warehouse name -The name of the warehouse you wish to create
- Ship to – enter the name that helps carrier successfully identify the retain warehouse
- Region – choose the desired region for your warehouse
- Street Address – enter your new warehouse street address here
- City – enter the city name your new warehouse will be
- Zipcode – enter the zip code of your new warehouse locality
- State – enter the name of the state where your new warehouse is
- Country – the country your new warehouse is located
- Email address – enter your email address
- Phone number – enter your phone number here.
After filling in all the details, click on the “Create” button to save the details you’ve provided and create a new warehouse.
Related Articles
Manage Product
The Manage Product section helps you edit and manage products in bulk as well as in singularity. Each product in this section is listed with product details like product ID, images, titles, prices, no. of inventories, and so on. Under Products Tab, ...Manage Product - Filter Options
Filter out your preferences to view the details of your desired products by clicking the “Filter” button. The Filter section shows the following options- Shopify product type– the option lets you select different types of products such as pumps, ...Product Section
The product section deals with all product-related activities on Wish. You can manage Shopify products that you have imported to the app. You can also view the Product Details like Title, SKU, product price, etc, perform bulk actions (that can be ...Overview
Wish is an online marketplace launched to bring an affordable and entertaining mobile shopping experience to billions of consumers worldwide. Through it, third-party merchants can sell their products to the platform’s customers around the world. Wish ...Wish Fashion Experience
Wish fashion experience includes listing and showcasing women’s clothing to your Wish Store. If you are already dealing with women’s clothing or planning to start a new line of products, then this is the right time to do so. You can list women’s ...