Managing the Configuration Settings
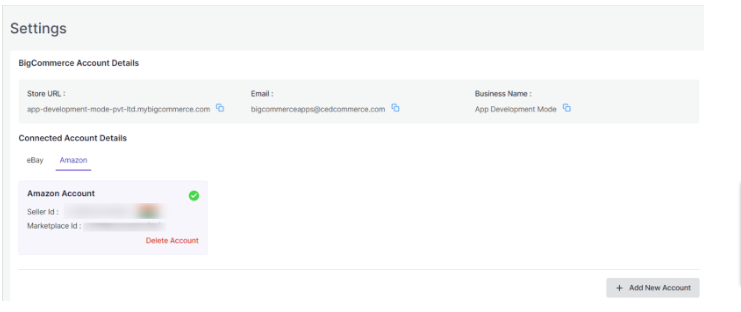
The Setting section allows you to view the details of the connected account and also enables you to manage the settings by adjusting the marketplace settings, inventory rules and order management for a smoother selling experience.
Actions you can perform on Settings:
- Add New Account
- Connected Account Details
- Delete Connected Account
- Marketplace settings
- Inventory rules
- Order Management
- Currency Setting
8.1. Add New Account
Step 1: Go to the Setting and click on it. Step 2: After clicking a new page opens where you can see all the accounts connected to the app. 

Step 3: Click on the Add Account button, enabling you to connect your Amazon account to the app. Step 4: Fill in all the details, click on the Save button. This action will create a new Account in the module.
8.3. Connected Account Details
Step 1: Go to the Setting and click on it. Step 2: A new page opens where you can view the details of the account connected to the app.
8.4. Delete Connected Account
Step 1: Navigate to the Settings and click on it. Step 2: You will be taken to the Settings page where you can go to the Connected Accounts and click on the Delete tab. This action will delete the account connected to the app.
8.5. Marketplace Settings
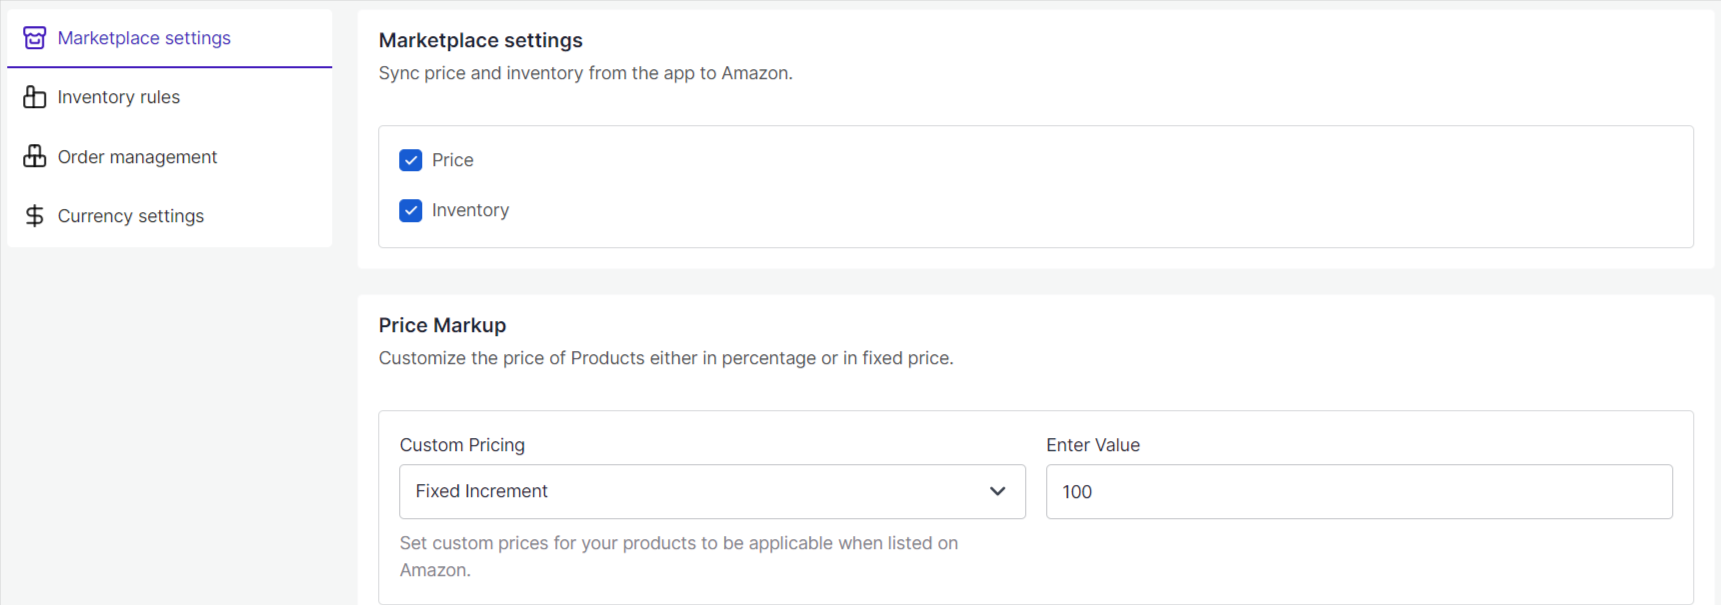
Step 1: Click on the Settings and you will be directed to the settings page. Step 2: In the left grid, go to the Marketplace Settings tab. Using it you can sync price and inventory from the app to Amazon. 

Step 3: The Price Markup option enables you to customize the price of products either in percentage or in fixed price. Under the Price Markup, go to Custom Pricing and from the drop down box select the custom price of your products to be applicable to be listed either on Amazon. Step 4: Click on the Save button to save the changes.
8.6. Inventory Rules
Step 1: Select the Setting option, leading you to the settings page. Step 2: Move to the left grid and select the option of Inventory rules. This action will help you in configuring inventory settings for Amazon and streamline the inventory management. 

Step 3: Under the Inventory rules, you have to enter a Threshold value for your products. If the inventory limit reaches the threshold value then products will be “Out of Stock” on Amazon. Step 4: The second step under Inventory Rules in Custom Inventory. Enter a value in the box provided for Custom Inventory. This action will help set a custom inventory for those products that you want to continue selling despite the threshold limit being reached. Step 5: Save the changes by clicking on the Save option.
8.7. Order Management
Step 1: Choose the Setting option, and move to a new page. Step 2: Go to the left grid and select the Order Management. This action will help you in configuring order settings. 

Step 3: Enable or Disable the Auto Order Creation feature as per your need. This feature allows you to create new orders on BigCommerce for the orders placed on Amazon. Step 4: Enable or Disable the Failed Order Mails feature as per your requirement. This feature helps you in receiving instant email notification of orders that are not created on BigCommerce. Step 5: Archive the changes by clicking on the Save button.
8.8. Currency Settings
Step 1: Choose the Setting option, and move to a new page. Step 2: Navigate to the left grid and select your preferred Currency Settings . This action will help you in currency conversion from your BigCommerce store to Amazon currency. 

Step 3: Update the changes by clicking on the Save button.
Related Articles
Managing the Category Template
Under the Category Template section, you can categorize products with similar characteristics based on a query. When these products are listed on Amazon, they are associated with specific categories and attributes, providing clear and accurate ...Purpose of the guide
The BigCommerce Amazon Connector User Guide is an all-inclusive guide crafted for Amazon sellers. This guide is designed to simplify different facets of selling and provides an in-depth understanding of the functionalities of the app while ...