Map Shopify carriers to Amazon carrier codes
When a Shopify order is fulfilled with tracking, the app sends the shipment confirmation to Amazon. Amazon only accepts shipment confirmations with one of its predefined carrier codes (UPS, USPS, FedEx, DHL, Royal Mail, etc.). Shopify, on the other hand, lets you use any carrier name. If Amazon doesn't recognise the carrier code coming in from Shopify, the shipment is recorded against the carrier "Other" instead — meaning Amazon won't show carrier branding or built-in tracking on the order.
To make sure Amazon recognises the carrier on every shipment, set up carrier code mapping once.
Where to configure it
- Open Settings in the app's left navigation.
- Go to Order Settings → Shipment.
- Find Map Carrier Codes.
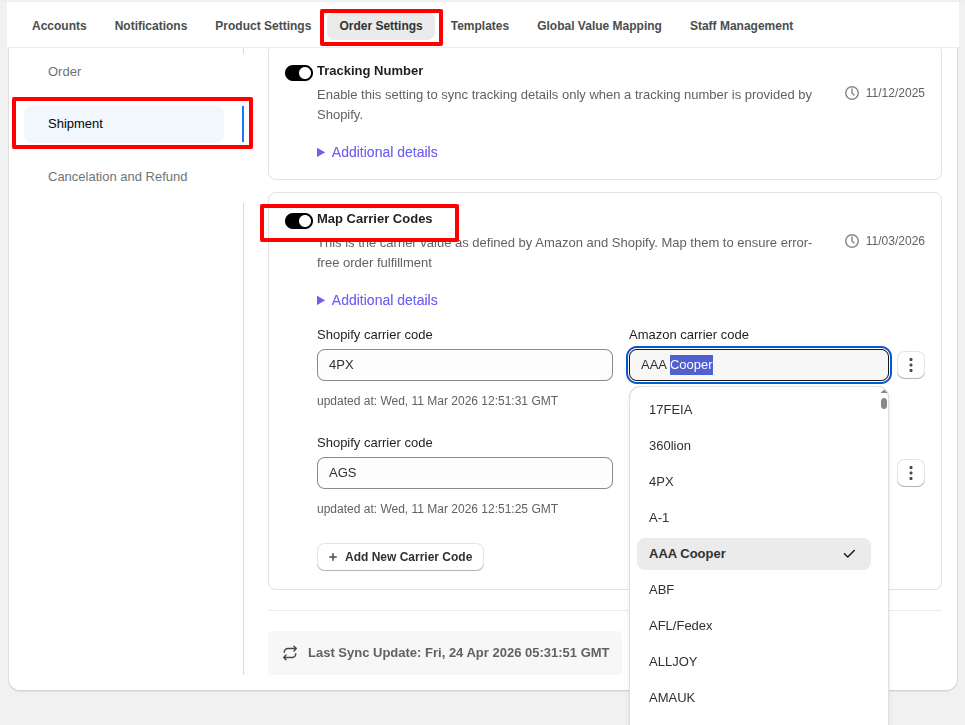
Add a mapping
Each row maps one Shopify carrier code to one Amazon carrier code.
- Click + Add New Carrier Code.
- Shopify carrier code — type the carrier code exactly as Shopify sends it (e.g.,
USPS,UPS,FedEx,Royal Mail). - Amazon carrier code — pick the matching Amazon-accepted code from the dropdown (e.g.,
USPS,UPS,FedEx,Royal Mail). - Repeat for every carrier you ship with.
- Click Save.
What happens during shipment sync
For each shipment the app pushes to Amazon:
- The Shopify carrier code on the fulfillment is looked up in your mapping.
- If found, the matching Amazon carrier code is sent — Amazon recognises it.