OnBuy Accounts
To start the integration, the first mandatory step for the admin user is to complete the Configuration.
Configuration:
Go to your WooCommerce admin panel and you will see the CedCommerce menu displayed in the left navigation bar.
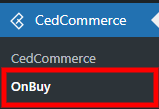
Click on the OnBuy section of the panel.
The following page will display the Seller Name, OnBuy Seller Id, Company Name, and Account Status.
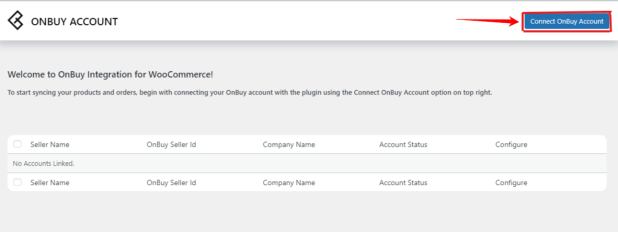
Click on the Connect OnBuy Account button and the next screen will prompt you to complete the form.
The admin user is required to provide the following details (as displayed below):
- Seller Id
- Consumer Key
- Secret Key
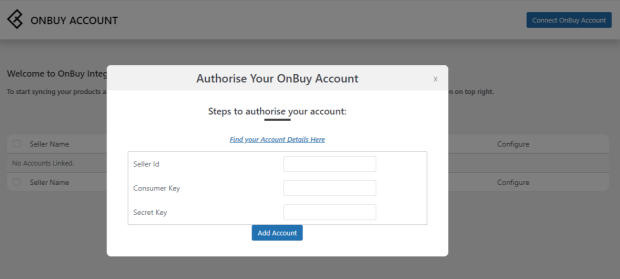
To retrieve the Seller Id, Consumer Key, and Secret Key, you will need to log in to your OnBuy seller panel.

Enter your seller credentials and log in. You’ll be redirected to the OnBuy seller homepage.
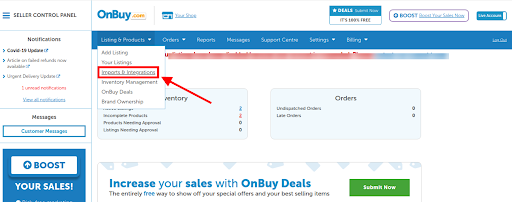
Click on Imports & Integration under Listings & Products.
The page appears as:
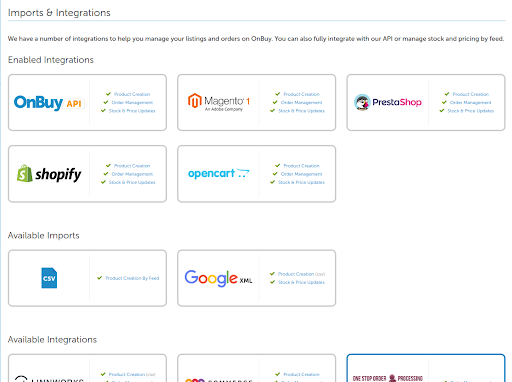
Now, to enable the WooCommerce integration, click on WooCommerce Integration under Available Integrations.
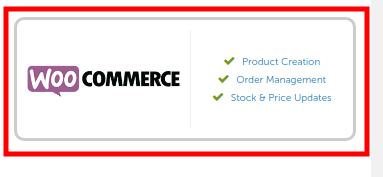
After clicking on WooCommerce Integration, you will be redirected to the page as shown below. Click the Enable Integration button to enable the extension.

Once the extension is enabled, it will be visible in the list of Enabled Extensions.
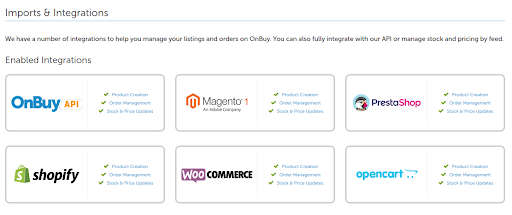
Next, under Enabled Extension, click on WooCommerce Integration.
You’ll be redirected to a new page as shown below:
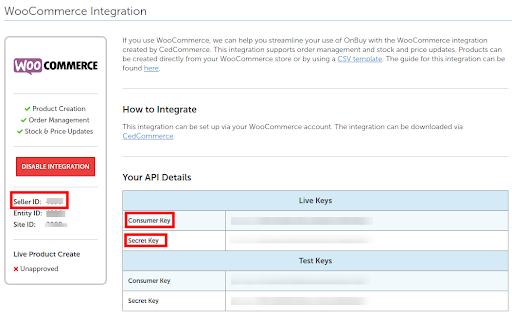
Retrieve all the necessary details from here and navigate back to the WooCommerce Seller panel.
Enter the Seller ID, Consumer Key, and Secret Key. Click the Add Account button to add the account.
Adding the account will reflect your Account with its Seller Name, OnBuy Seller Id, Company Name, and account status.

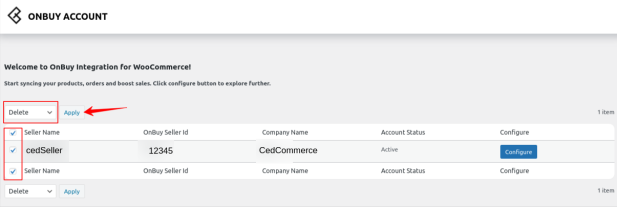
Also, you can delete your account just by selecting the checkbox placed before it, and selecting Delete from the dropdown as specified in the screenshot.
Related Articles
OnBuy Timeline
The Timeline log stores the information related to the following: Inventory Activity: Title: Reflects the name of the product for which the inventory update is processed. Operation: Operation under the inventory activity will be stated under the ...Overview
The OnBuy Integration for WooCommerce assists in syncing your items from your WooCommerce store to OnBuy and managing your OnBuy orders. The direct API integration enables the WooCommerce store owner to synchronize the price, inventory, order, and ...Order Settings
You can easily sync your OnBuy order with the orders on your WooCommerce store under the order setting.Scheduler Settings
Scheduler settings sync the product data on your OnBuy store with your WooCommerce store. The scheduler feature further has various options for updating your data on both the store. The admin selects the time frame for each as per the requirement. a. ...Metakeys and Attributes
The Meta keys and Attributes List section will help you to choose the required meta key or attribute on which the product information is stored. These meta keys or attributes will further be used in “Product Export Settings” for listing products on ...