Other Settings
This section is basically for inventory syncing, inventory and price and auto fetching of orders.
To perform crons:
- Go to the WooCommerce Admin panel.
- On the left navigation bar, click the Qoo10 menu.
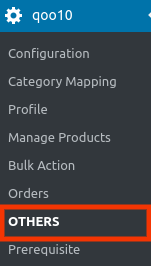
A Submenu appears below the qoo10 menu as shown in the following figure:
- In the right panel, click the Others tab.
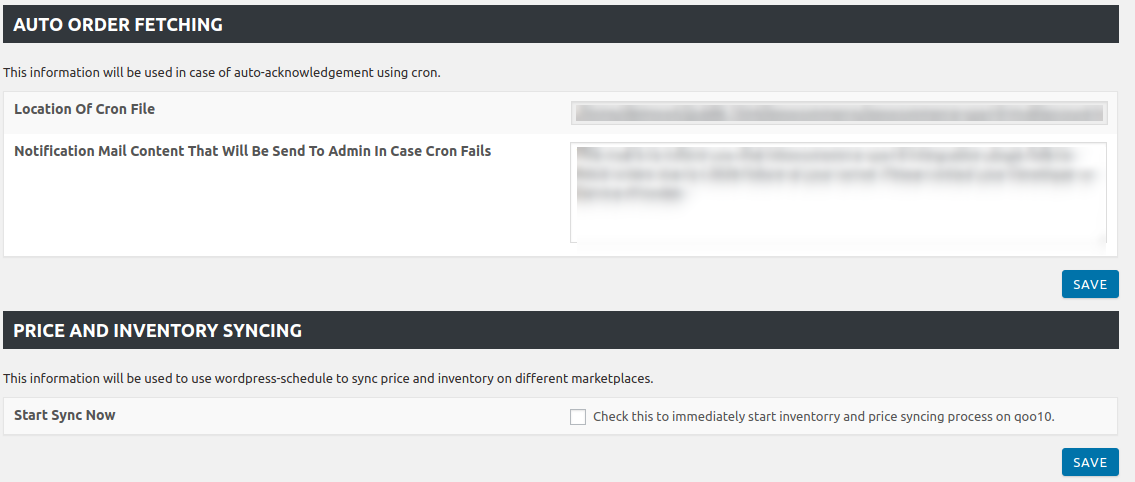
The page appears as shown in the following figure:
- In the AUTO ORDER FETCHING section, you will be able to view:
a) Location of Cron File.
b) Notification Mail Content that will send to admin if crons fails. - In the PRICE and INVENTORY SYNCING section, you can set the syncing for price and inventory by selecting the checkbox next to it.
- In the SYNC ALREADY EXISTING PRODUCTS, you just need to select the checkbox and then the auto-syncing of existing products will begin.
- The, SEND ERROR REPORTING TO DEVELOPER will allow you to send error reports to a developer in case of any API failure or CRON failure.

Related Articles
Configuration Settings
Once you have successfully installed this extension in the WooCommerce store, the Qoo10 menu appears on the left navigation bar of its Admin Panel. The merchant has to first create a seller account in the Qoo10 seller dashboard. Once the seller ...Overview
As eCommerce is increasing rapidly in Singapore, so the Qoo10 is probably the best of eCommerce marketplaces or you can say it is the home in Singapore for all your needs, every need, each day. It runs the online marketplaces crosswise over ...Order Management
To Fetch Orders: Go to the WooCommerce Admin panel. On the left navigation bar, click the Qoo10 menu. A Submenu appears below the qoo10 menu as shown in the following figure: In the right panel, click the ORDERS tab. The page appears as shown in the ...Prerequisites
To check Prerequisite: Go to the WooCommerce Admin panel. On the left navigation bar, click the Qoo10 menu. A Submenu appears below the qoo10 menu as shown in the following figure: In the right panel, click the Prerequisites tab. The page appears as ...Deleting The Profiles
To delete Profiles: Go to the WooCommerce Admin panel. On the left navigation bar, click the Qoo10 menu. A Submenu appears below the qoo10 menu as shown in the following figure: Click Profile. OR In the right panel, click the PROFILE tab. The page ...