Product Import
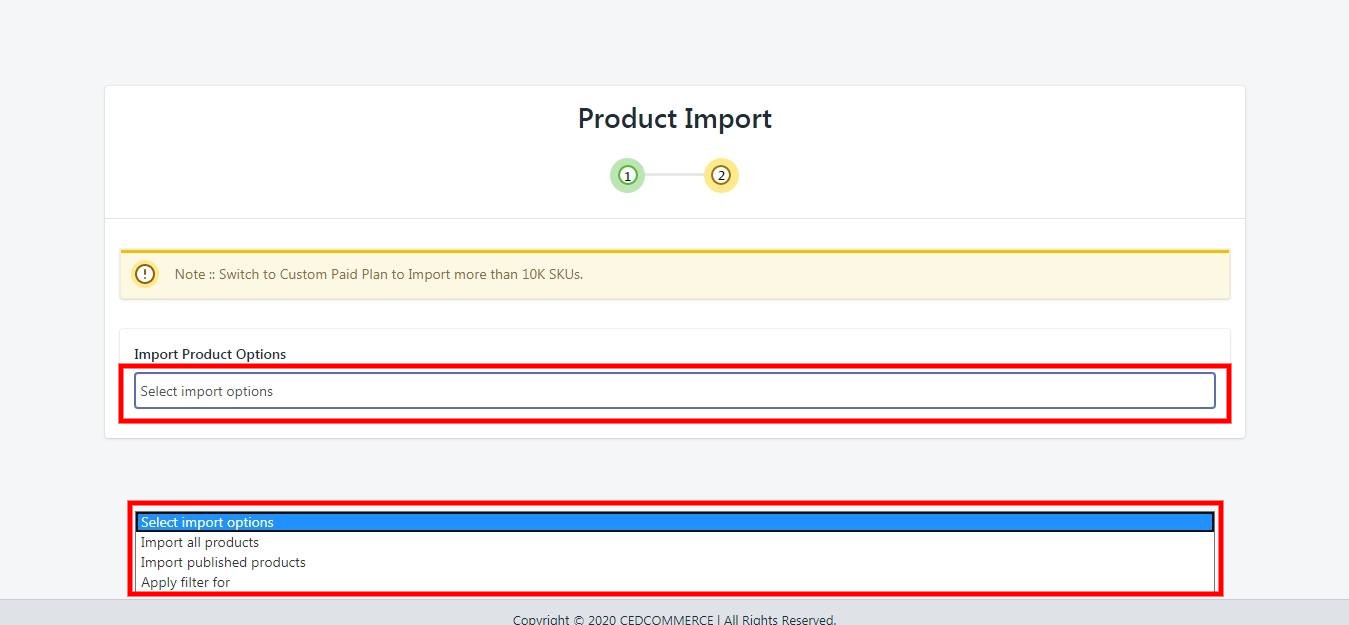
Step 2: "Import Products" page appears as shown in the following figure:


In the Import Product Options list, select one of the following options:
All products: It enables the store owners to import all the Shopify store products in the app.
Published Products: It enables the store owners to import only those products which are available at the Shopify store front-end.
Filter Options to Import: It enables the store owners to import only those products which they want to upload from their Shopify store to the app.
Published Products: It enables the store owners to import only those products which are available at the Shopify store front-end.
Filter Options to Import: It enables the store owners to import only those products which they want to upload from their Shopify store to the app.
-> If selected the "Filter Options to Import" option, then the page appears as shown in the following figure:  You can select one of the above-mentioned options to import:
*Product Type - Import the products on the basis of "Product Type" assigned in your Shopify Store.
*Product Vendor - Import the products on the basis of "Vendor" from your Shopify Store.
*Smart Collection - Import the products on the basis of "Auto Collection" created in your Shopify Store.
*Custom Collection - Import the products on the basis of "Manual Collection" created in your Shopify Store.
-> Once selected the desired option, proceed ahead. Your products will be imported in the app at this step and you'll need to proceed further by pressing the "Next" button.
Related Articles
How to Install the Overstock Integration
Selling on Overstock is a seamless process but one has to apply for the seller account by filling the details required. You can click on the given link to apply for the Seller account: https://overstock.force.com/requestToSell/s/. Once you fill these ...Sync with Overstock
If you are already selling on Overstock and have products on Overstock, you can synchronize the product status from the Overstock.com to the App Go to the "Overstock Marketplace Integration" App. Click on the "Products" in the left panel. The ...Upload Products on Overstock
To upload all the products on Overstock.com Go to the "Overstock Marketplace Integration" App. Click on the "Products" in the left panel. The "Products" page appears as follows: On this page, all the products are listed with all the details. Select ...Dashboard of the App
When you are done with both the "Configuration Steps", you'll be ready to explore the app. Starting from the "Dashboard" of the App, i.e., "Home" on the left menu tab. The Dashboard of the app has several sections which are described below: App ...Import New Products
On the left section, under "Products", you can see "Import New Products" "Import New Products" section is used when you've added new products in the Shopify store and want to import them in the "Overstock Marketplace Integration App". The "Import ...