Product Management
- Upload Products
- Update Products
- Update Inventory
Upload Products
Go to the WooCommerce admin panel, below the CedCommerce menu, which is on the left navigation bar.
Click Kogan on the panel as specified in the captured screen:
On clicking Kogan, it will appear a page in the menu you will click on PRODUCTS to map the categories as specified in the captured screen:
On clicking PRODUCTS, the product page appears as specified in the captured screen: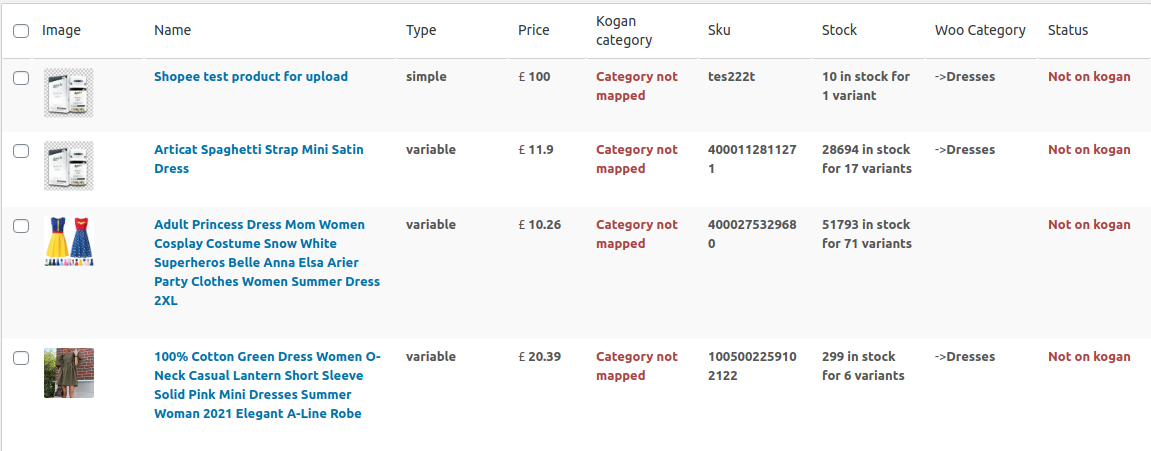
Here, the store owners need to select the checkbox and click on the dropdown placed next to Bulk Action.
Click on Upload Products as specified in the captured screen: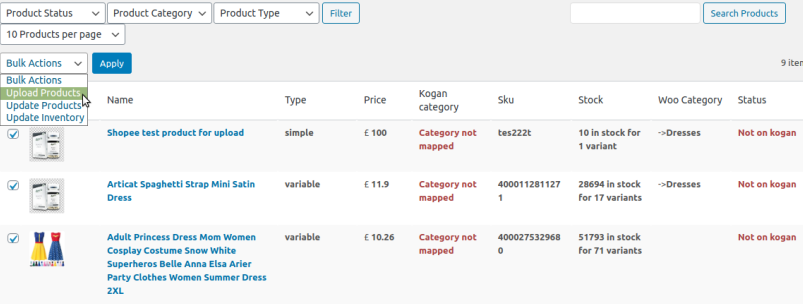
After clicking on it, click on the Apply button next to Bulk Action.
A message of a successfully uploaded feed will appear.
Update Products
Go to the WooCommerce admin panel, below the CedCommerce menu, which is on the left navigation bar.
Click Kogan on the panel as specified in the captured screen:
On clicking Kogan, it will appear a page.
Click on PRODUCTS to map the categories as specified in the captured screen:
On clicking PRODUCTS, the product page appears as specified in the captured screen:
Here, the store owners need to select the checkbox and click on the dropdown placed next to Bulk Action.
Click on Update Products as specified in the captured screen: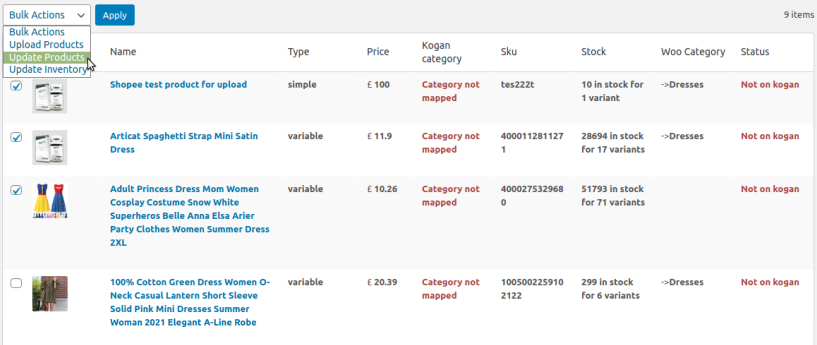
After clicking on it, click on the Apply button next to Bulk Action.
A message of a successfully uploaded feed will appear.
Update Inventory
Go to the WooCommerce admin panel, below the CedCommerce menu located on the left navigation bar.
Click Kogan on the panel as specified in the captured screen:
On clicking Kogan, a page will appear.
In the menu, you will click on PRODUCTS to update inventory as specified in the captured screen:
On clicking PRODUCTS, a page appears as specified in the captured screen:
Here, the store owners need to select the checkbox and click on the dropdown placed next to Bulk Action.
You need to select Update Inventory as specified in the captured screen: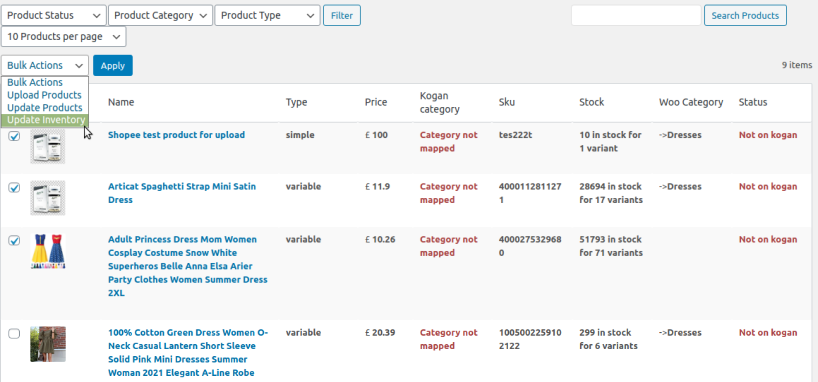
After clicking on it, click on the Apply button next to Bulk Action.
It will send you a message of successfully uploaded feed for inventory.
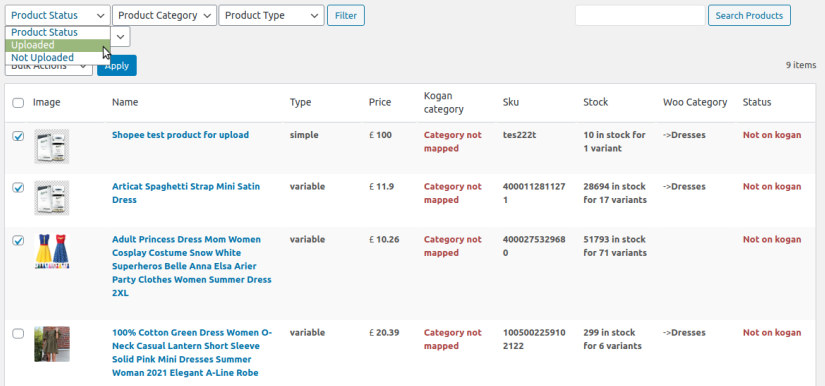
Product Status-
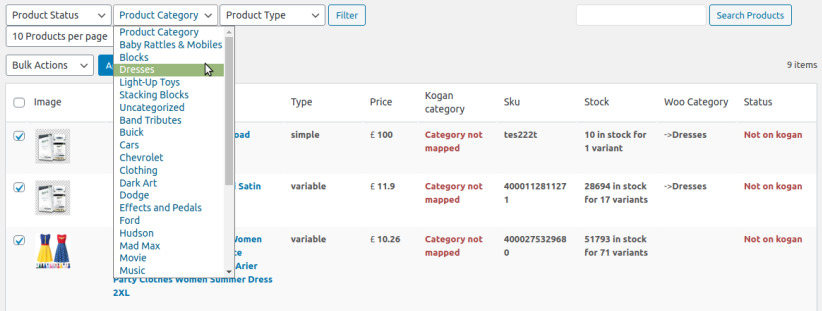
Product Category-
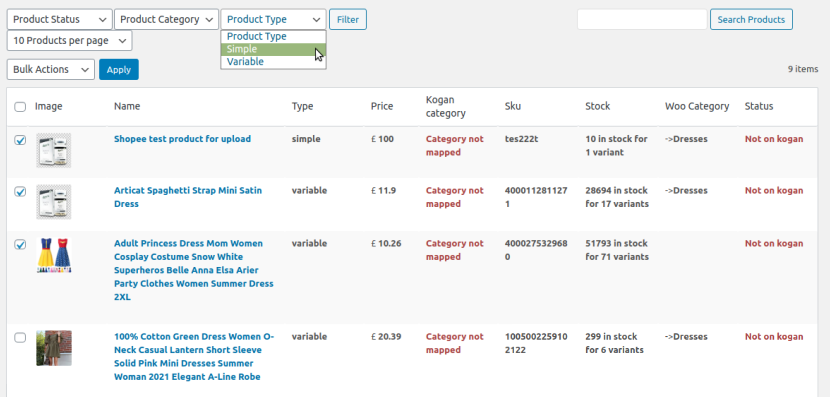
Product Type-
Related Articles
Kogan Configuration
To Configure your account: Go to the WooCommerce admin panel, below the CedCommerce menu located on the left navigation bar. Click on the Kogan option located on the panel as specified in the captured screen: On clicking Kogan, a page will appear ...Schedules On Kogan
To perform the activity in Schedules follow these simple steps: Go to the WooCommerce admin panel, below the CedCommerce menu, located on the left navigation bar. Click Kogan on the panel as specified in the captured screen: On clicking Kogan, a page ...Category Mapping
To Map The Categories On Kogan- The section allows you to map your WooCommerce store product categories with the Kogan Marketplace categories. To map the categories follow these steps: Follow the WooCommerce admin panel below the CedCommerce menu, ...Overview
With the changing times in the e-commerce sector, the Kogan marketplace has achieved new heights since 2006. Amid the COVID situation, Kogan has recorded record-breaking site traffic. Merchants who have successfully used the potential on this channel ...Global Settings
To Carry out global settings: Go to the WooCommerce admin panel below the CedCommerce menu, which is on the left navigation bar. Click Kogan on the panel as specified in the captured screen: On clicking Kogan, a page will appear where you have to ...