Profile Management
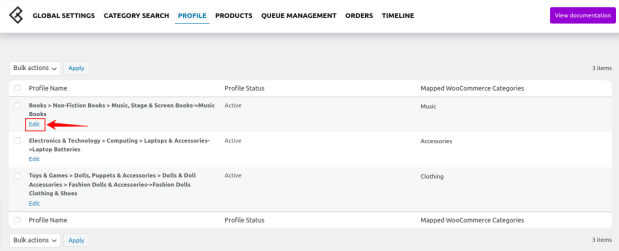
In this section, you will see all the profiles created after category mapping.
You can use the Profiles in order to override the product settings at the category level. For overriding the details edit the required profile using the edit option under the profile name.
In this, the admin can Edit the Profile
To edit the profile:

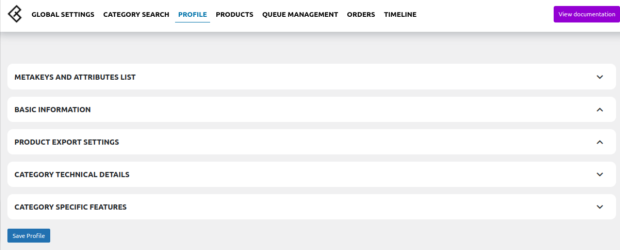
After hitting the Edit button you will be redirected to a page where you will be having some attributes as specified in the screenshot:

Meta keys and Attributes List:
The Meta keys and Attributes List section will help you to choose the required meta key or attribute on which the product information is stored. These meta keys or attributes will further be used in “Product Export Settings” for listing products on OnBuy from woocommerce as specified in the screenshot.
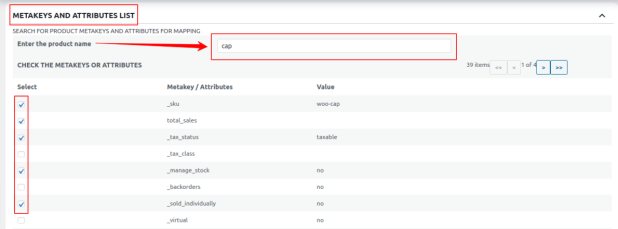
In this, you can search the product by its title as specified in the screenshot.
For selecting the required meta key or attribute expand the Meta keys and Attributes List section enter the product name/keywords and the list will be displayed under that. Select the meta key or attribute as per requirement and save settings as specified in the screenshot:

Basic Information: In this, you can see the profile name as specified in the screenshot:

Product Export Setting: In the product export settings, you are allowed to enter the details of the product which you will be exporting as specified in the screenshot:

Category Technical Details: In this section, you need to fill out the Technical details for a specific category.

Category Specific Features: In this section, you need to map the features for a specific category.

Click the Save Profile button at the bottom.
Related Articles
OnBuy Accounts
To start the integration, the first mandatory step for the admin user is to complete the Configuration. Configuration: Go to your WooCommerce admin panel and you will see the CedCommerce menu displayed in the left navigation bar. Click on the OnBuy ...OnBuy Timeline
The Timeline log stores the information related to the following: Inventory Activity: Title: Reflects the name of the product for which the inventory update is processed. Operation: Operation under the inventory activity will be stated under the ...Overview
The OnBuy Integration for WooCommerce assists in syncing your items from your WooCommerce store to OnBuy and managing your OnBuy orders. The direct API integration enables the WooCommerce store owner to synchronize the price, inventory, order, and ...Order Management
To carry out the Orders Section: Go to the OnBuy account page and click on the “Configure” button, A page will be open where you have to click on the orders Section. In the Orders section, the admin can view all the OnBuy orders here and fetch the ...Managing Queue
To carry out the Queue Management: Go to the OnBuy account page and click on the “Configure” button, A page will be open where you have to click on Queue Management. The queue management will appear on a page where the admin can view the OnBuy Queue ...