Registration and Setup
The merchant has to first create a seller account on the Groupon seller panel. Once the seller account is created and is approved by Groupon, then the Shopify store owner receives the Groupon Supplier ID and Groupon Access token. When Merchant successfully Installs the Groupon Marketplace Integration app on the Shopify store, the admin has to follow the Registration process and set up the configuration settings to establish the connection between the Shopify store and Groupon.com. The store owner has to use the provided Groupon Supplier ID and Groupon Access token while setting up the Groupon Configuration settings. To follow the Registration process and Set up the Configuration Settings 1) Go to the Shopify store admin panel.
2) On the left navigation panel, click the Apps link.
Refer the screenshot:  3) Click on Groupon Marketplace – Integration app link. Step 1: Registration page appears as shown in the following figure
3a. Enter the following information in the respective fields:
 3) Click on Groupon Marketplace – Integration app link. Step 1: Registration page appears as shown in the following figure
3a. Enter the following information in the respective fields:
 - First Name: First Name of the Store Owner.
- Last Name: Last Name of the Store Owner.
- Mobile: Mobile number of the Store Owner.
- Shipping Source: Select the checkboxes associated with the required shipping
source.
Note: If Shipwork or Shipstation is not selected then the store owner should select
the checkbox named “Other”.
- How did you hear about us?: Select the required option from the available list.
- Under Terms and conditions, read the content and then
- Select the Agreement Checkbox.
- Click the Next button.
Step 2: Groupon Api page appears as shown in the image below:
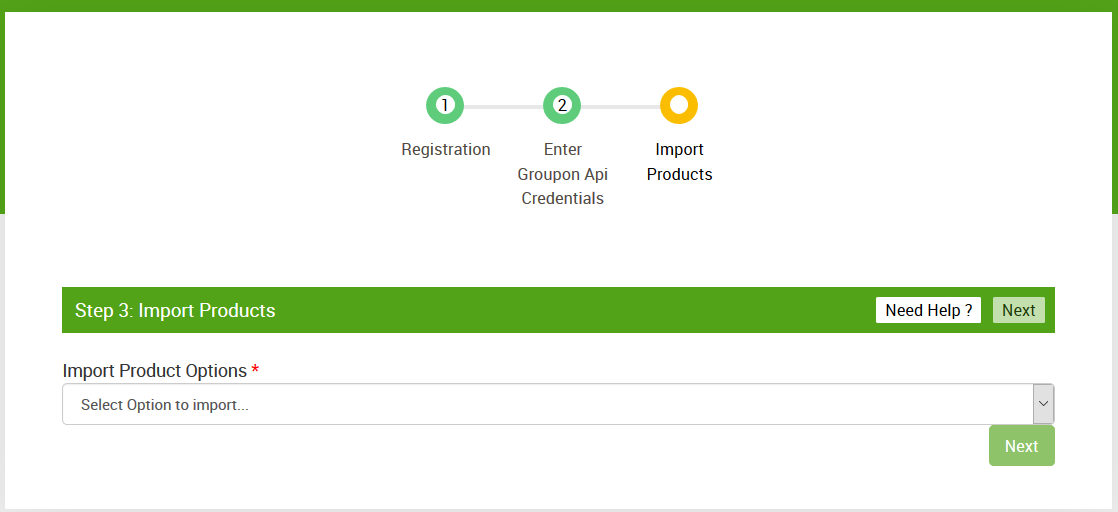
Enter the Groupon supplier ID and the Groupon Access Token  Click the Next button. Step 3: Import Products page appears as shown in the following figure:
  In the Import Product Options list, select one of the following options:
 Click the Next button. Step 3: Import Products page appears as shown in the following figure:
  In the Import Product Options list, select one of the following options:
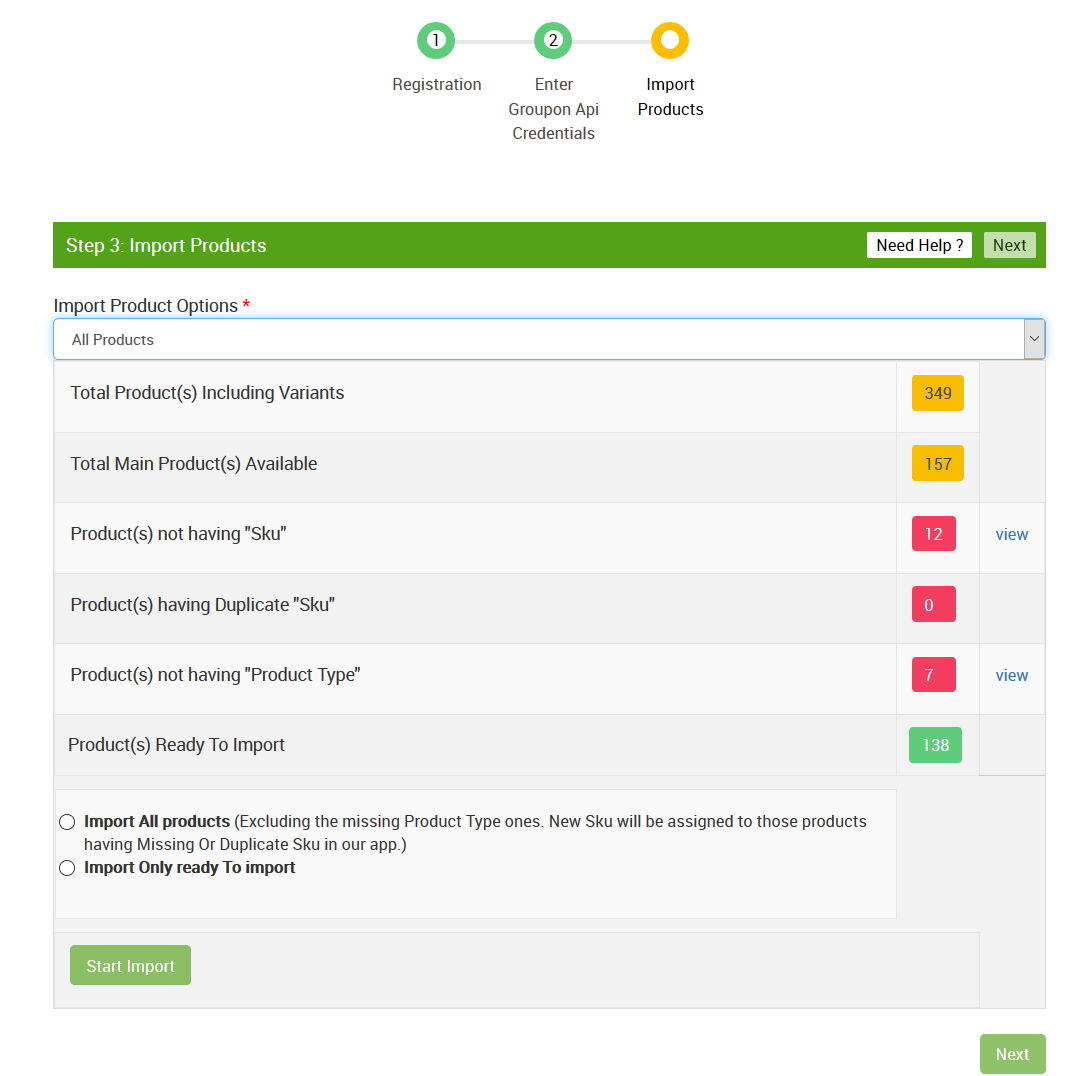
 - All products: It enables the store owners to import all the Shopify store products on the app.
- Published Products: It enables the store owners to import only those products which are available at the Shopify store front-end.
If selected theAll Products or the Published Products option, then the page appears as shown in the image below:  Click the Start Import button.
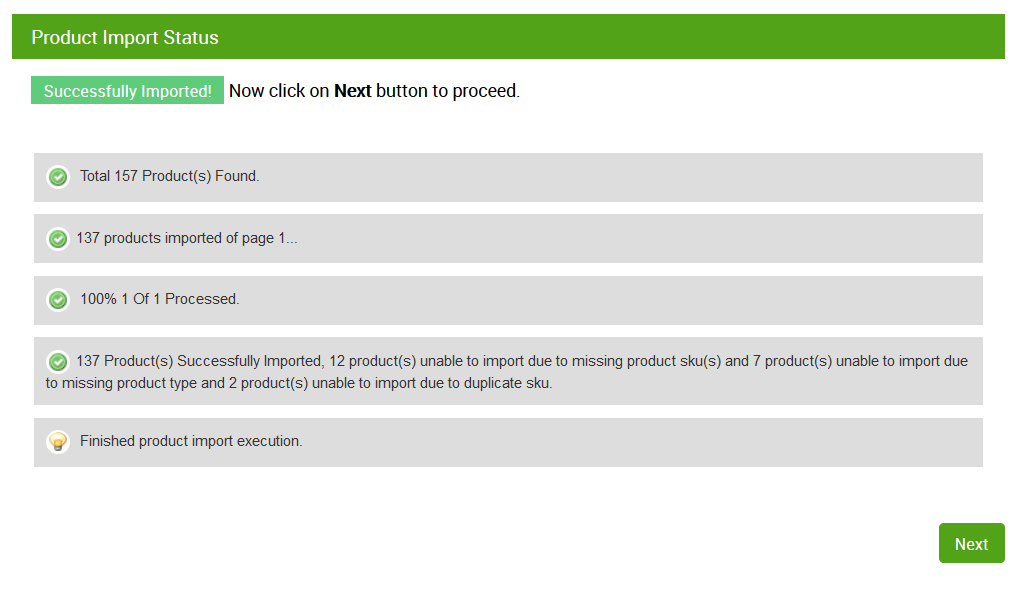
The Product Import Status dialog box appears as shown in the following figure:
Refer the screenshot:
  Click the Next button.
 Click the Start Import button.
The Product Import Status dialog box appears as shown in the following figure:
Refer the screenshot:
  Click the Next button.
Related Articles
Settings
On the top right of the navigation bar is the settings icon (besides the order drop-down). Click on the Settings icon and a page will appear. Refer the screenshot The supplier ID and Access Token fields in the Groupon Setting section will be having ...