For successful installation of the WhatsApp Order Notification extension for Magento 2 , sellers has to enter the authorization details. But before acquiring the authorization details sellers must create a meta developer account by:
- Registering as meta developers by clicking on the link here.
- Enabling two-factor authentication for their accounts by clicking the link here. After successfully creating a meta developer account proceed further with the hep of following steps.
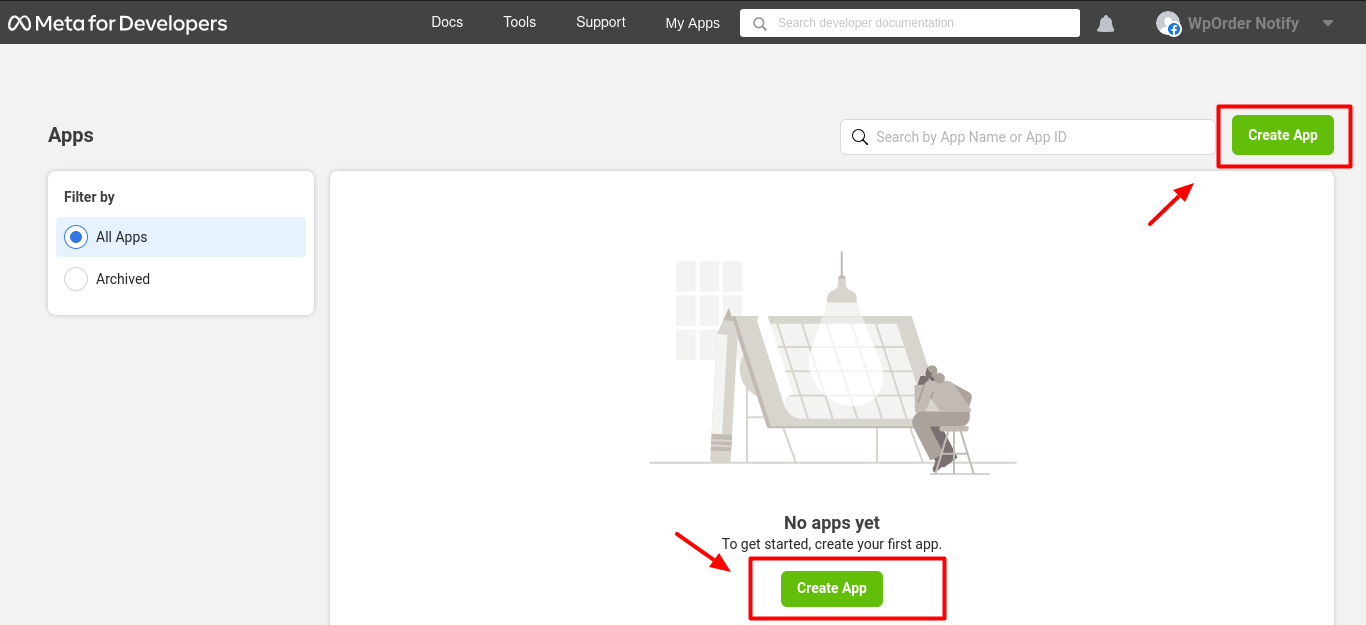
- Go to the Meta App page (https://developers.facebook.com/apps/), select All Apps on left and then move to the top right and click on Create App option.

After creating app following page appears , which have option for selecting main use case you will like to add to you app.Select the second option of Other, this option will add the permissions you will be asked for choose an app. Click on Next to proceed further.
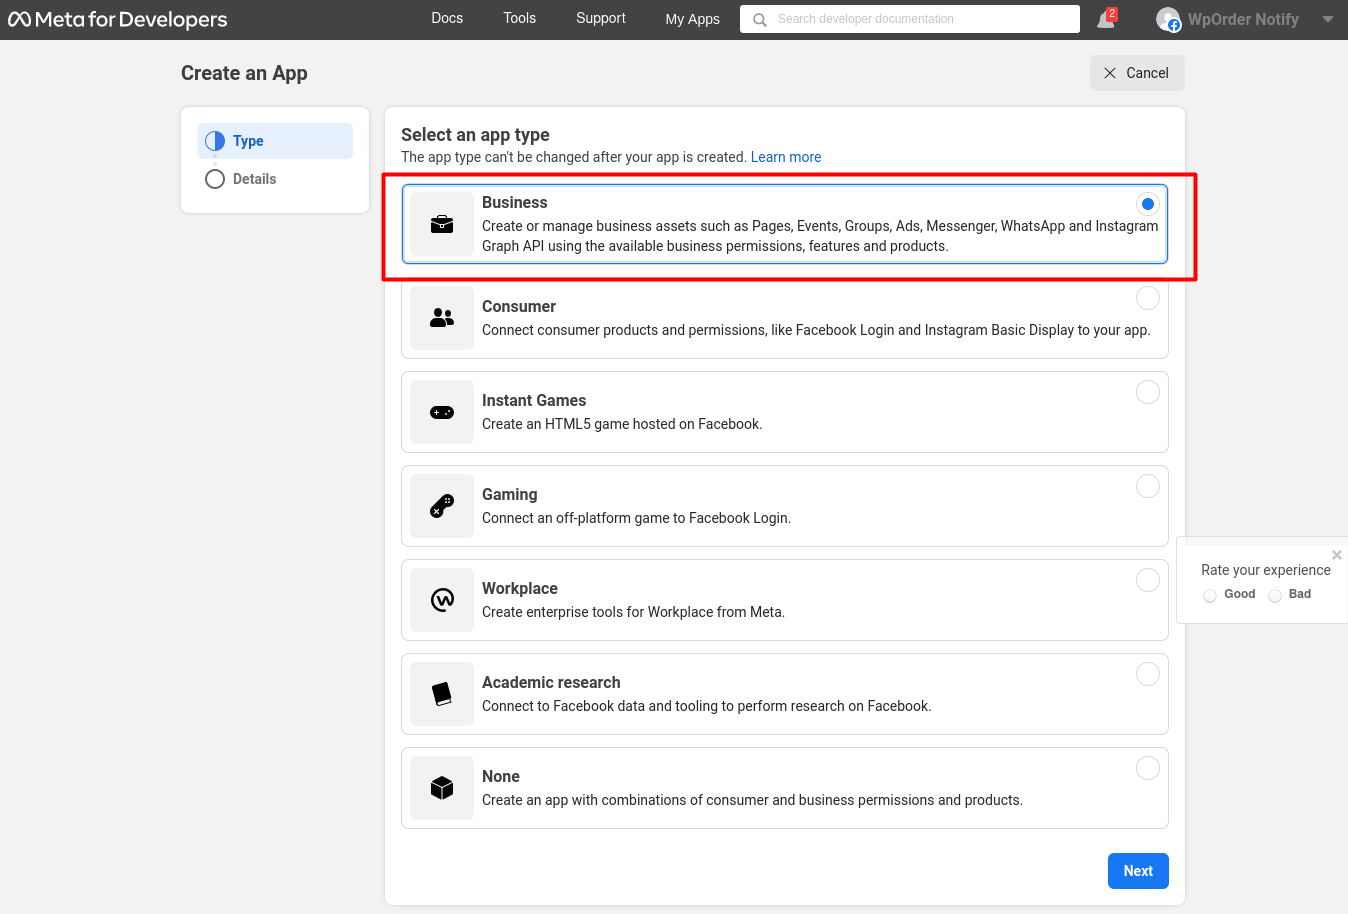
Following page appears, after clicking on Next. On the top left side click on Type and then choose Business Option and then again click on Next.

Then move to top left side ,click on Details , then add app name, app contact email, and business account (optional) . Click on Create app option.
In the following page add products to your app by selecting WhatsApp Set Up.
After clicking on Set Up following page appears, go to the left side and select WhatsApp option and then select Quickstart. Click on blue icon with the message "Start using the API".
After selecting the blue icon you can have access to Temporary Access token ,valid for 23 hours.Get Phone number ID, and WhatsApp Business Account ID and then click on Add Phone Number and then click on Add Payment Method.
On left side of the dashboard click on "App Roles" then following page appears.Then click on Business Manager Account and click on "Edit Roles in Business Manager".
Next in the business page , on the left side , click on Users then on "System Users" then click on Add.
A pop up titled Create System User appears, fill in System Username and System User Role.After filling the credentials click on blue icon with message of "Create System User".
In the subsequent page get permanent token by clicking on "Generate New Token" pointed with red arrow.
In this page, click on Access Token and get access to token information.
Again go back to Business settings Page and click on "Add Assets" enclosed in red square.
After clicking on Add Assets a new page opens up, on left side go to the Select Asset Type and then click on Apps.Select the check box and confirm the name, then enable the options and make changes accordingly by clicking on Save Changes.
In the next page fill in business information like Business name, Business website or profile page, Country name and address (optional), then click on Next
Add Phone number for WhatsApp and then verify the number using text message or phone call, then on Next.
After verifying WhatsApp number move to the left side grid and click on WhatsApp, click on Quickstart ,pointed with arrow.
On next page click on Message templates enclosed in red square box.
A Message Template page opens up click on "Create Template" enclosed in square box.
In subsequent page select Languages option and add language of your choice. The same page have option to Edit Template, fill in the required information in header, body and footer with the necessary details.
You can see the message preview on the the top right side of the page and view the order status. For example there are two template formats - order_create and order_status.For order_create : Header : Hi {{1}}, Body : Thank you for shopping at STORE_NAME Store! Your order has Placed and Order no is # {{1}} Footer : Thank YouFor orders_status :
Header : Hi {{1}}, Body : Your order id # {{1}} has successfully {{2}}. Thank you for purchasing from STORE_NAME Store. Footer : Thank You
**Note: STORE_Name is the name of your store.
Now you can receive messages for all orders through WhatsApp Order Notification Module in the following format on your WhatsApp number.