Sales Order
Admin can perform the following tasks related to Sales Orders:
- Fetch Walmart Orders
- Synchronize Walmart Orders
- Sync Shopify Shipment
- Update Order Status
- Refund Order
- Cancel Order
Manage Sales Orders
To manage the Sales Orders, follow the steps given below:
- Go to the Walmart Integration App.
- Click the Order menu.
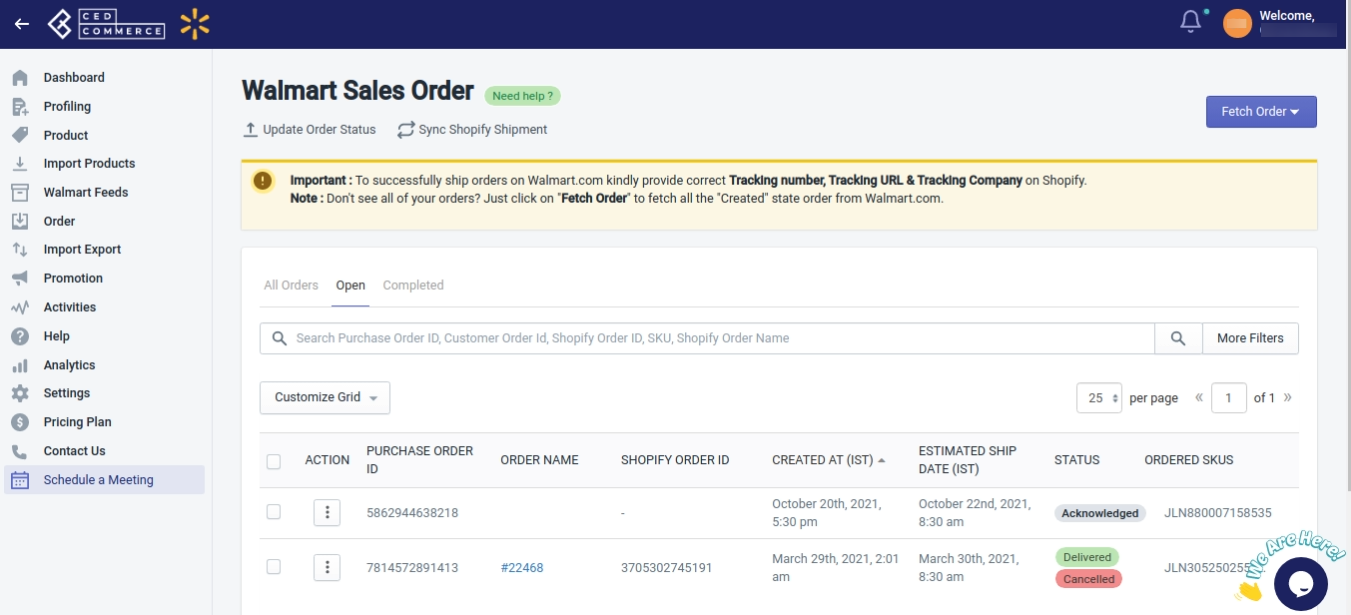
- Then click Sales Order. The Walmart Sales Order page opens up.

- To fetch new orders from Walmart.com to the Walmart Integration App, click the Fetch Order button available at the top right corner. The new orders, if available, are fetched from Walmart.com and are listed on the page and a success message appears. If there are no new orders on Walmart, then the relevant message appears on the screen.
- To synchronize all orders with your Shopify store, click the Synchronize Walmart Orders button.
The newly fetched orders will get created on your Shopify store and a success message appears. - To update the shipment information of the orders on Walmart.com, click the Sync Shopify Shipment button.
The shipment information gets updated successfully and a success message appears on the screen. If no order is ready to be shipped, then the relevant message appears. - To view order details, follow the steps given below:
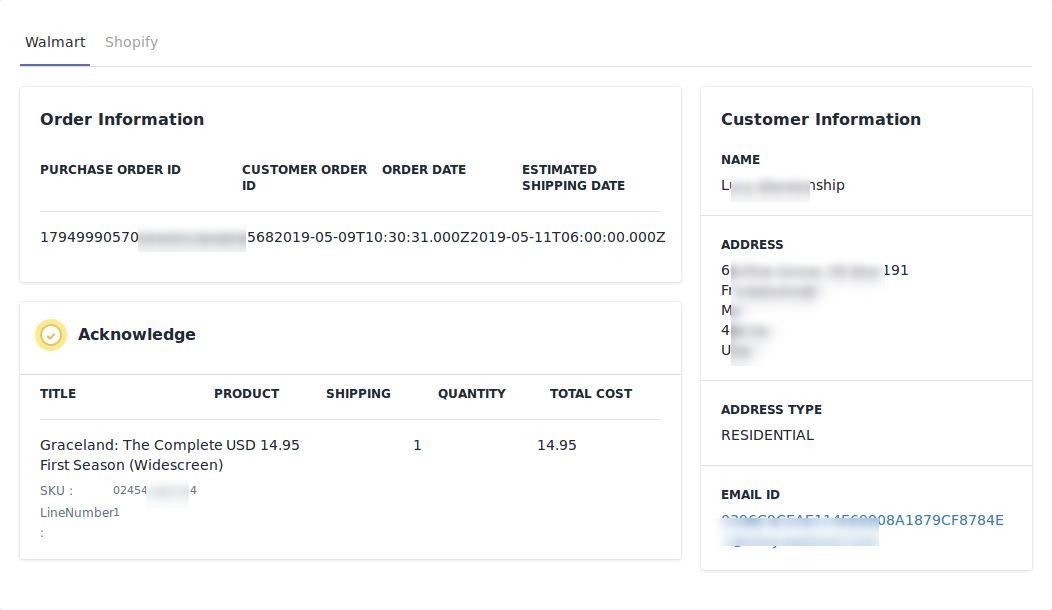
- On the Walmart Sales Orders page, scroll down to the required sales order.
- In the respective row of the sales order, click the three vertical dots, and then the View Icon
 .
.
The page appears as shown in the following figure:
All the details of the current order appear on this page.
Create a Refund
To create a refund, follow the steps given below:
- On the Sales Order page, scroll down to the required sales order for which you want to create a refund.
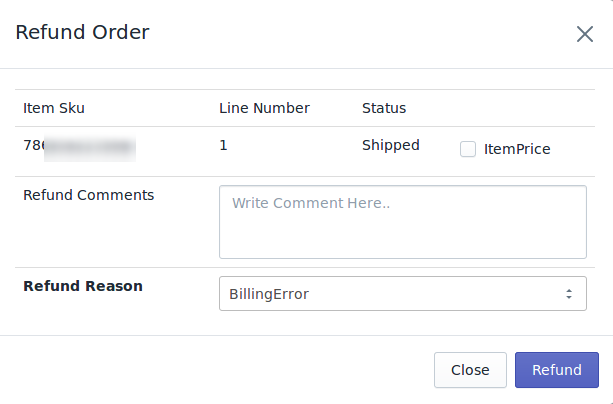
- In the respective row of the sales order, click the three vertical dots, and then click the Refund icon.

The page appears as shown in the following figure:
- Select the check-box associated with the Item Price or any other line item listed.
- In the Refund Comments box, enter the required comments.
- In the Refund Reason list, select the required reason for the refund.
- Click the Refund button.
The order gets refunded and a success message appears on the screen.
Cancel an Order
To cancel an order, follow the steps given below:
- On the Sales Order page, scroll down to the required sales order that you want to cancel.
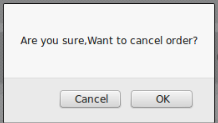
- In the respective row of the sales order, click the three vertical dots, and then the Cancel icon.

The popup appears as shown in the following figure:
- Click OK to continue the Order cancel process.
The order gets canceled and a success message appears on the screen.
Related Articles
Orders
As new orders are created on Walmart.com, they are instantly fetched by the Walmart Integration app. The Same order is created on the Shopify store so that merchants can view the details and fulfill them easily in their native order processing ...Walmart Order Management
Order Configuration The order management section helps you manage and configure order-related settings for your Walmart products. To configure order management, go to the Walmart Integration app and click Order management under the Settings menu. The ...Return Order
View the Walmart Return Orders To view Walmart Return Orders, follow the steps given below: Go to Walmart Integration App. Click the Order menu. Click Return Order. The Walmart – Return Order page opens up as shown in the following figure: Click the ...Failed Order
The Shopify store owner can view the list of failed Walmart orders on the Walmart – Failed Order page. Following may be the reasons for Order not importing to the app: When you will receive an Order for Out of stock Product. If the Ordered SKU ...Walmart Product Configuration
Product Configuration This section helps you to manage your product-related settings for Walmart. On clicking the Product Configuration under the Settings menu, the following page opens up: The product configuration section consists of the following ...