Settings
The Wish Integration allows you to customize and set preferences for your Shopify store and the Wish store right within the app. As soon as you install the app and import products into the app, you can move to settings to complete all the configurations you need to apply. Here, can make all the necessary changes as per your preferences.
To get to the settings tab, you have to:
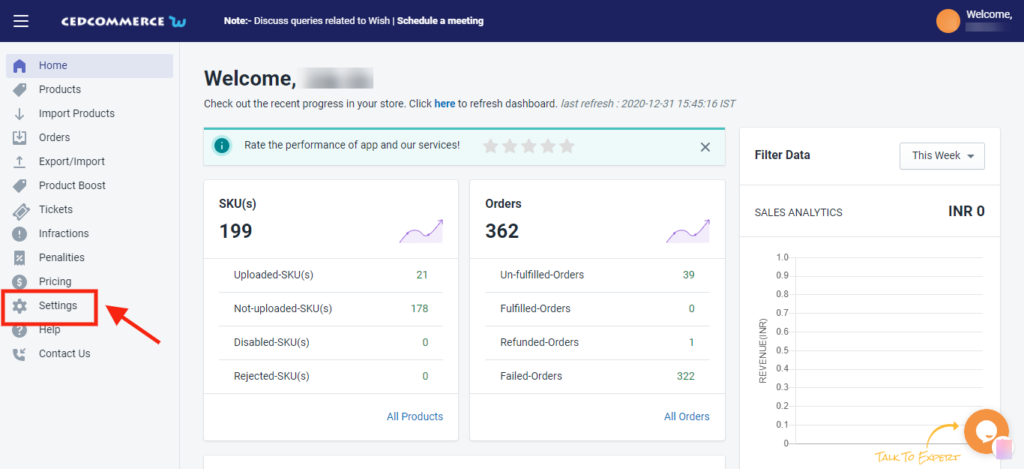
- Navigate to the left sidebar of the app. Click on the “Settings” button to enter the options.
- A new window will appear with several different options consisting of several options to configure.
The image is shown below:
After clicking the settings options from the right side of the screen, a page with a list of settings options will open from where you can configure on the Wish Integration app, as shown in the image below:
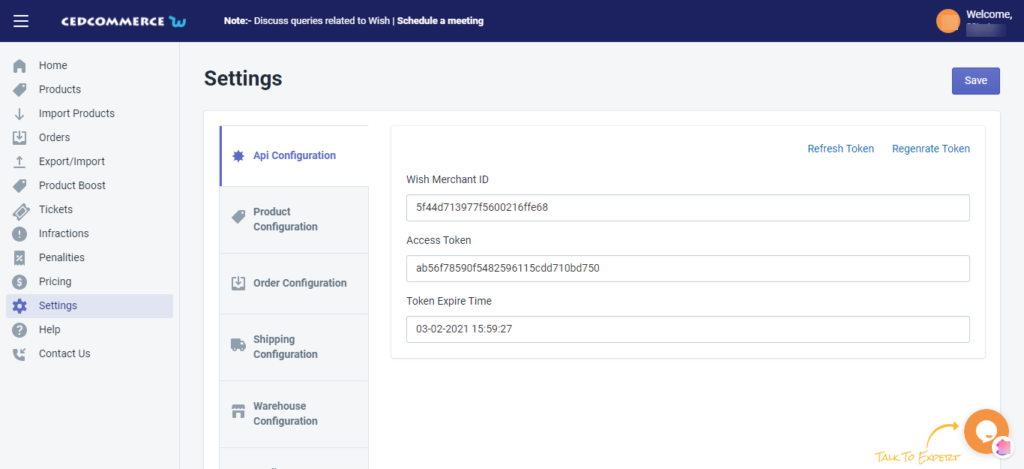
Section 1: API Configuration-
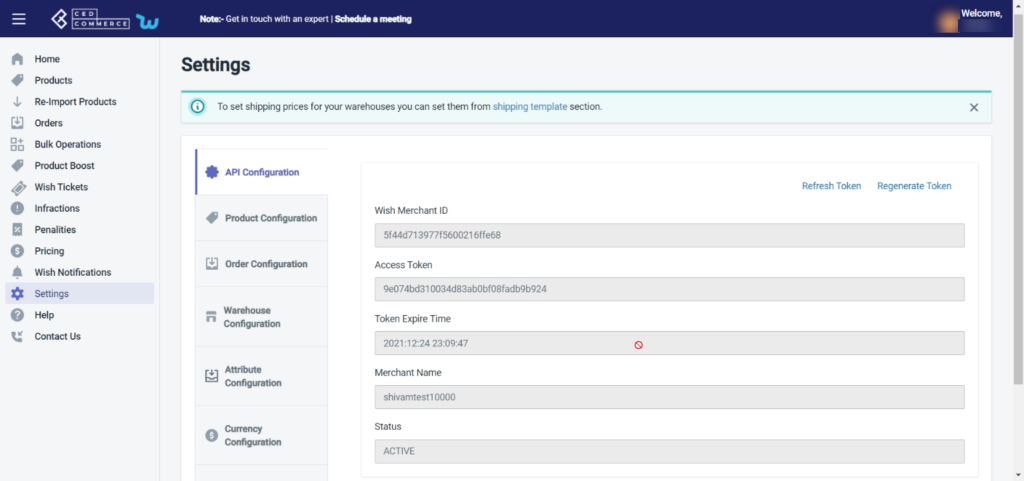
In the API Configuration section, you will find the API details that you have filled in while configuring the app on your Shopify store. The section displays the already filled-up Wish Merchant ID, the Access Token, Token Expire Time, Merchant Name, and Status. The API configuration appears in the image shown below:
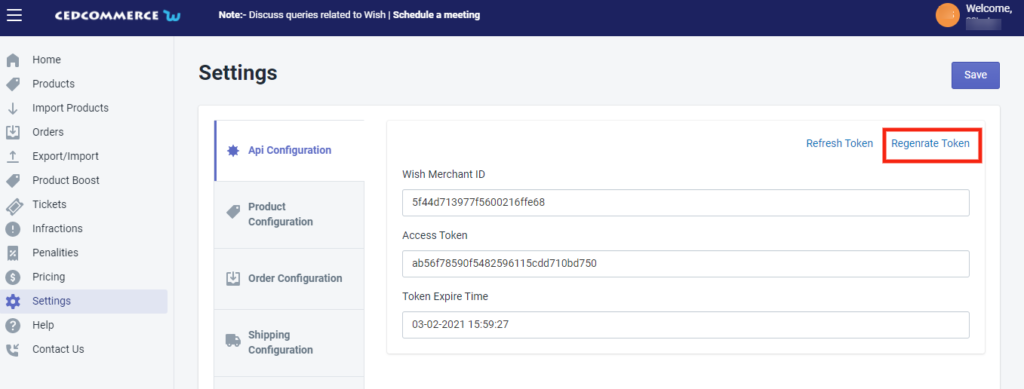
In case your token gets expired from the Wish marketplace, then you can generate a new token by clicking on the Regenerate Token button, as shown in the image below:
When you will click on generate a token, you will be redirected to your seller panel wherein you will have to fill up your login details, as shown below:
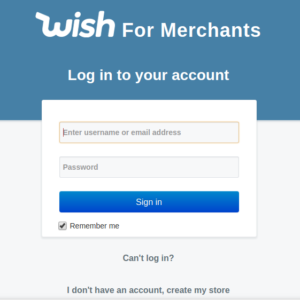
After filling up the login details, click Sign in and a new popup window will appear as shown below:
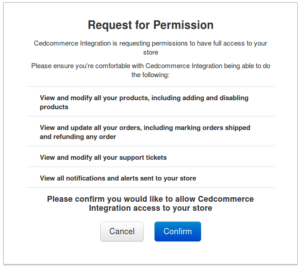
Click on Confirm and you’re done. Thereafter checking all the API details, click on Save.
Refresh Token
Sometimes, your token may get expired and you fail to perform any task in the “Wish Integration App”. And while performing any action you will get the following message.
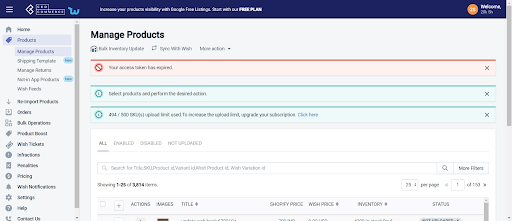
To resume all the services
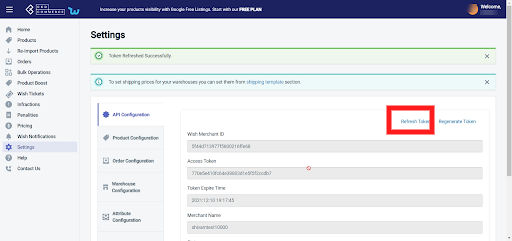
- Go to “setting”
- API configuration
- Click on “Refresh Token”
- A confirmation message will pop up.
Section 2: Product configuration
The section covers everything related to product sync, threshold inventory, brand authorization, and custom pricing. It consists of the following-
- Auto Sync – Here you can manage attribute synchronization from Shopify to the app. You can tick the given attributes to control the variant product upload from Shopify.
- Allow product creation – Whether you want to add a new product in the app automatically or not, the feature facilitates this.
- Vendor As Brand- If you want to use your vendor name as a brand name, Select yes. If not, Select No.
To help sellers sell better, Wish introduced Brand tagging. Through this, you can get your brand name registered in the Wish Brand directory. And while uploading and listing products you can use your own brand name. - Threshold inventory – You can set a threshold limit for products whenever the inventory limit is equal or below the set limit, your products will show out of stock/sold out on Wish
- Brand Authorization – Choose “Yes” if you had submitted a brand reselling authorization document to the Wish marketplace
- Custom Pricing – You can customize product prices either in % or fixed value Without making any changes in Shopify, this price will work in between our App and Wish Marketplace.
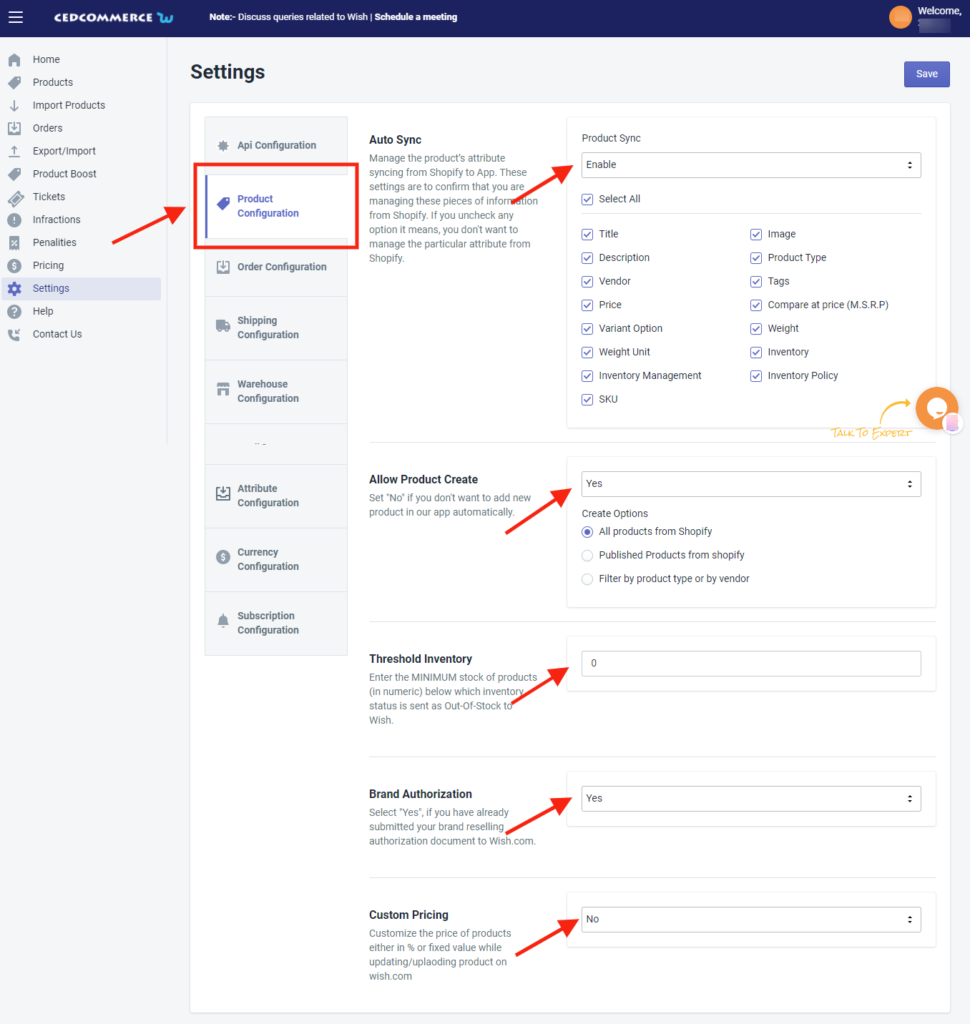
Section 3: Order Configuration
The Order configuration setting section will allow you to manage your orders accordingly. The section appears as shown in the following figure:
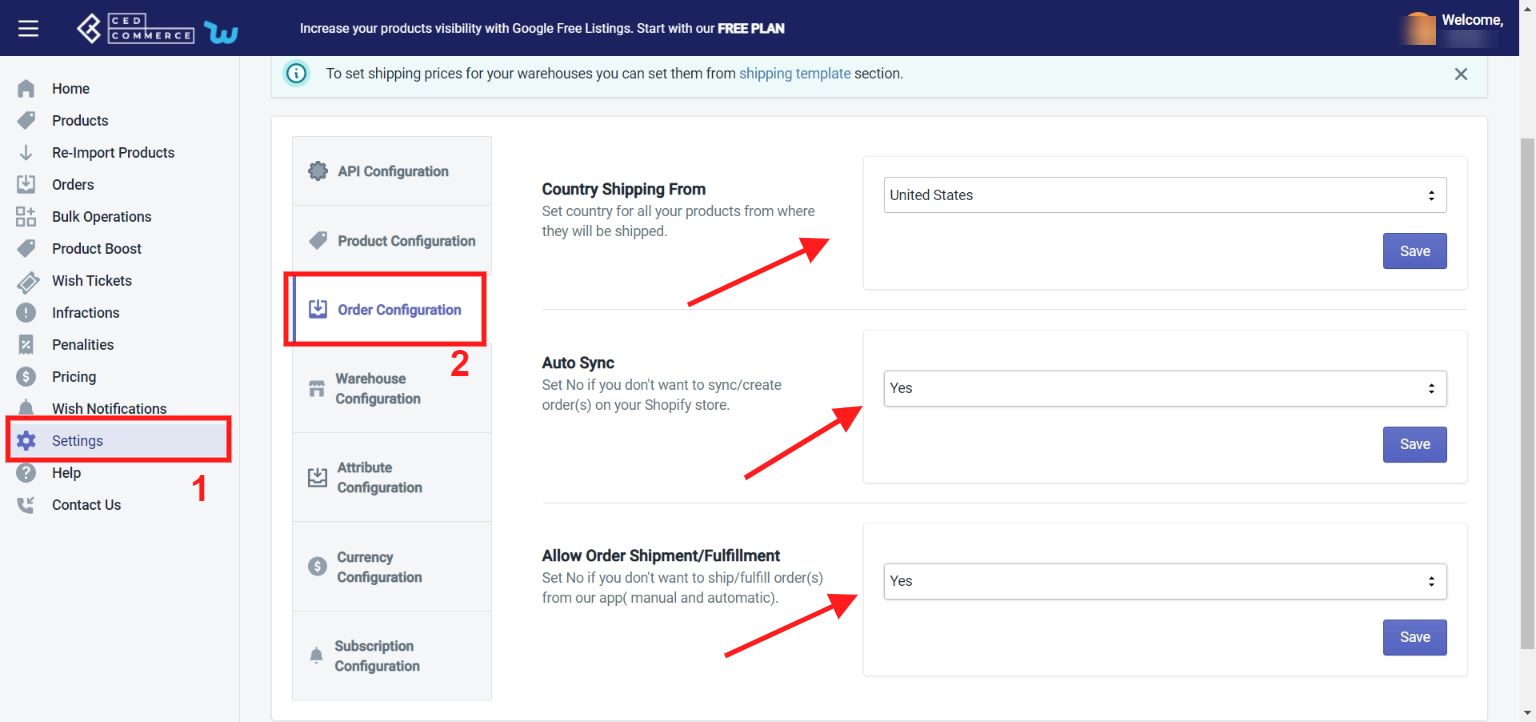
- Country Shipping From- Choose the origin country of the products from where they will be shipped.
- Auto Sync – Choose Yes, if you wish to apply the auto-order syncing feature in the Shopify store, This will lead to the automatic creation of Wish orders in your Shopify store from where you can easily ship them.
- Allow Order Shipment – Select “Yes” It will allow the shipping information to be fetched to the app and synced to the Wish to ship the order.
Section 4: Warehouse configuration
The Warehouse configuration section enables you to keep track of your warehouse operations, from here you can manage your multiple warehouses on Wish.com
The section comprises-
- Active warehouse – From here you can check the number of active warehouses on Wish.com. You can create multiple warehouses directly on Wish.com and after that, you can fetch the data by clicking on “Refresh active warehouses”
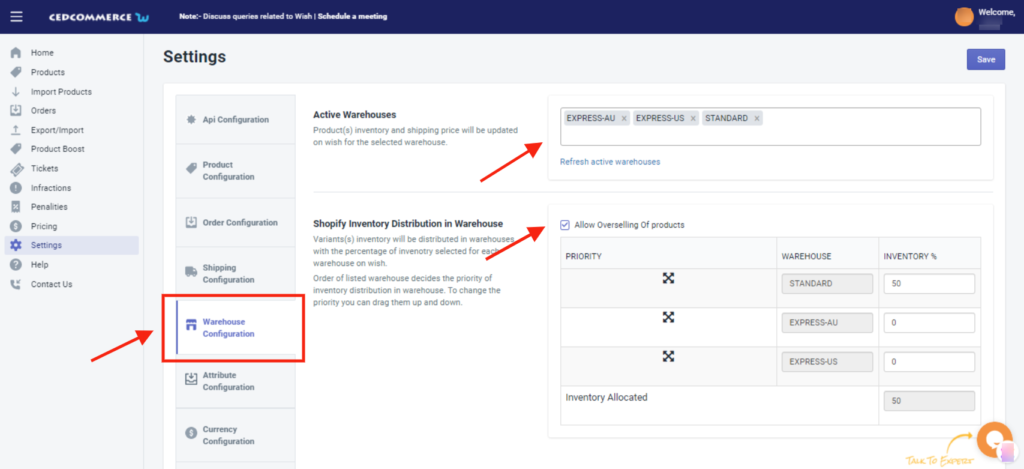
- Shopify inventory distribution in Warehouse: this is the required section and designed to manage the inventory of the products in the multiple warehouses
As you can see below are the 3 active warehouses on Wish, you need to allocate the inventory in each of the warehouses, this inventory allocation would work in percentage, which means you need to distribute the inventories in each of the warehouses that must be in b/w 100%
You can set the priority by swapping the warehouses, as shown in the image below
Note: whenever you will create a new warehouse you need to distribute the inventories and run “update inventory on Wish” to make the products active on Wish.com.
- Countries Available In Warehouse: From here, you can choose the country from which you want to ship the product and from where the delivery destination is near.
Section 5: Attribute Configuration
Although it is not necessary to map categories and attributes on Wish, you need to map variant product attributes into the two mandatory attributes i.e. color and size recommended by Wish. Without that, you cannot upload the products Wish.
If you want to automap your product attribute from Shopify to Wish, select Yes. It will automatically use the Shopify product attribute as the Wish products attribute.
To enable auto-mapping you need to select “Yes”.
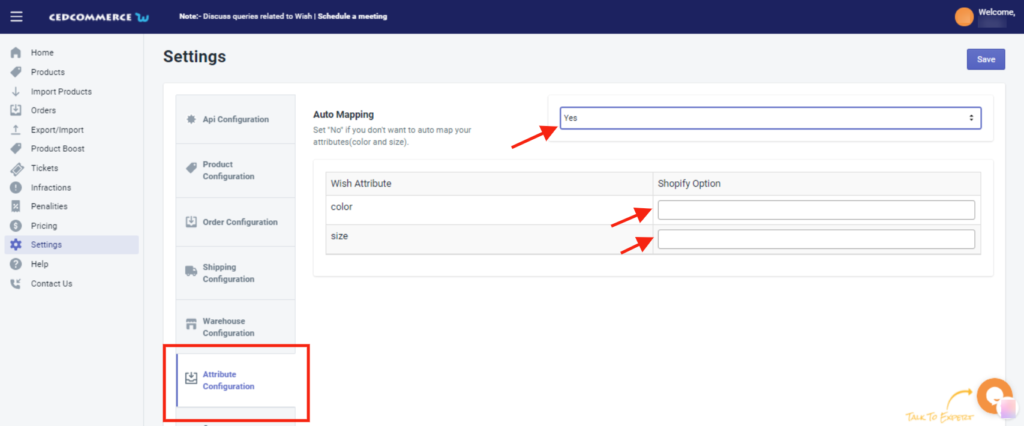
Attribute Mapping: Then, you will be provided with two main attribute options –
- Colour
- Size
Merchants need to map the other attributes of Shopify in “size” or “color” attributes as Wish accepts only these 2 attributes.
Note: Map all the attributes other than color in “Size” as Wish has several attribute options in this field
Section 6: Currency configuration
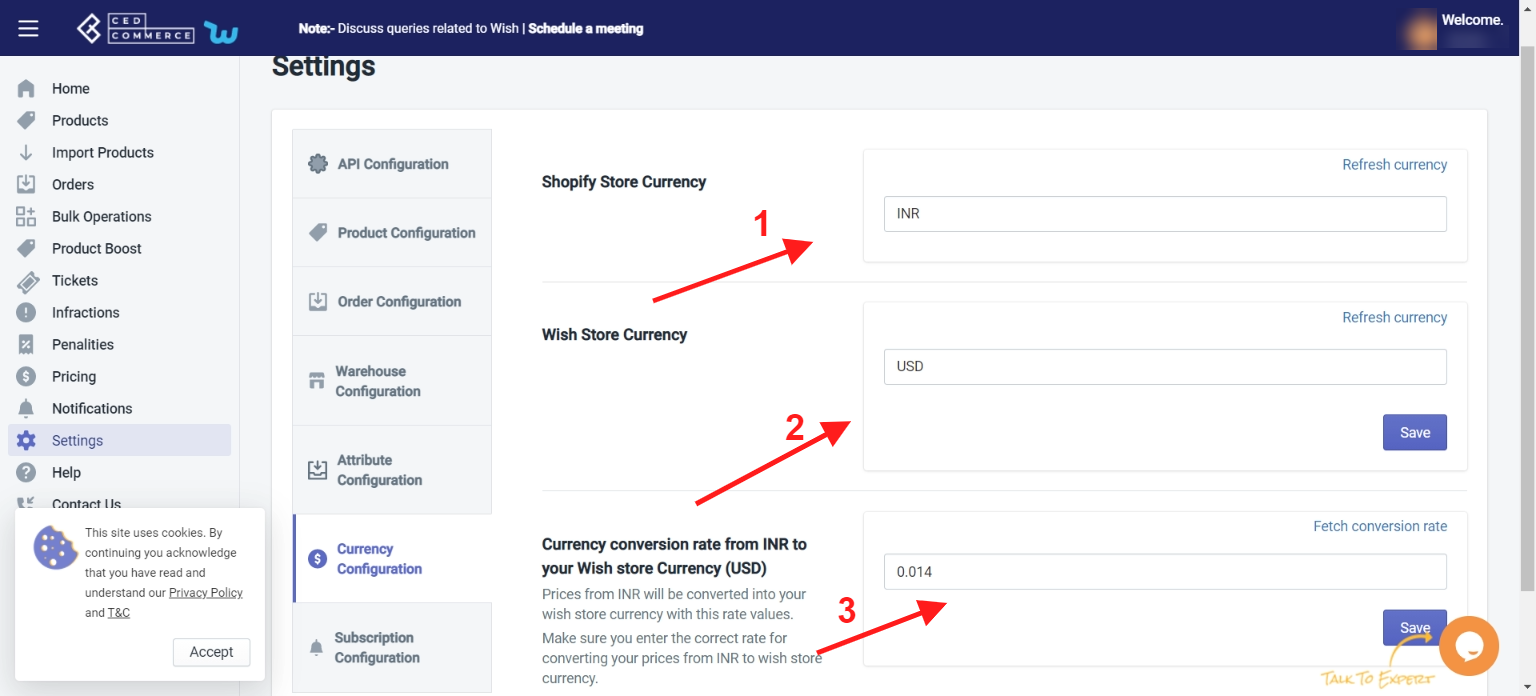
This configuration helps you easily convert your Shopify currency directly into Wish Currency, i.e. all you need to do is provide a conversion amount or you can also fetch the current conversion rate and set it for all products being sold worldwide.
Steps to configure currency settings
- Go to ‘Setting’.
- Choose ‘Currency Configuration’.
- Set your ‘Shopify Store Currency’.
- Set ‘Wish Store Currency’.
- Provide ‘Conversion Rate’ or fetch current conversion rate.
- Now ‘Save’ your setting.
- Now, sell tension-free, without worrying about currency conversion.
Section 7: Subscription Configuration
Here sellers can check different preferences for the email subscription. It means merchants can choose their preferred reasons for what they should be kept updated via email.
Sellers will be getting emails regarding new orders, failed orders, low-stock alerts, shipping orders, and so on.
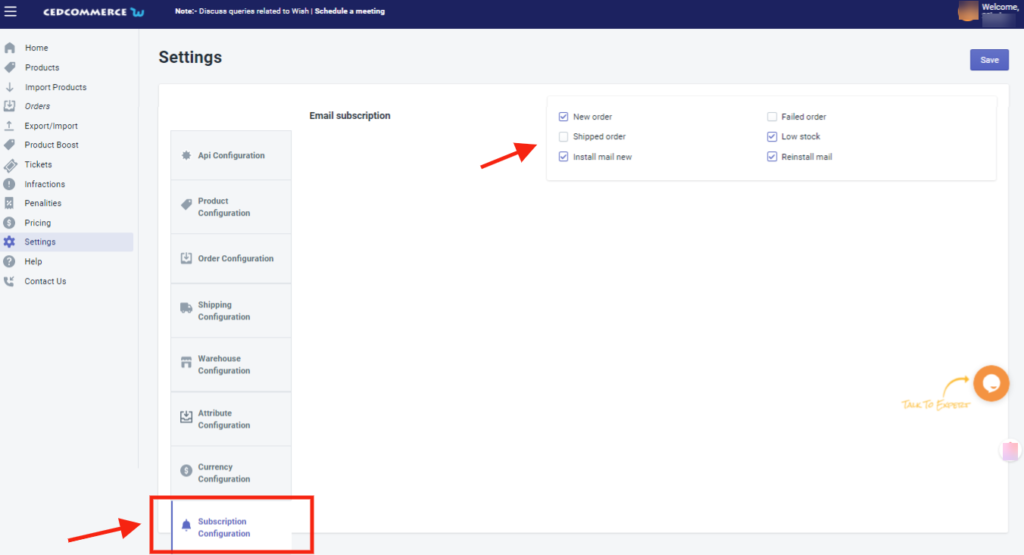
Tick on the Checkboxes for which you want to receive emails.
And following this, we are done with the Settings section of the Wish Integration App.
Related Articles
Sync Product from Shopify
This option enables users to immediately sync the selected product(s) or bulk products with the Shopify store. You can sync Shopify products with the app in just a few clicks. It helps in managing products and reduces repetitive work by ensuring that ...Shipping Template
‘Wish Marketplace Integration’ allows you to create and save custom shipping settings in a predefined format called a ‘Shipping Template.’ The shipping options range from ‘Standard‘ to ‘Express shipping,‘ with each set having its own transit periods ...Edit Product
The “Edit Product” allows you to edit even the minute detail of a single product. That means, if you wish to edit the basic information, variant, inventory, logistic details, shipping details, or product syncing option of any particular product, then ...