Steps to Add a Supplementary Feed
Now that you have understood what supplementary feed is, let us now go through the steps to add a supplementary feed.
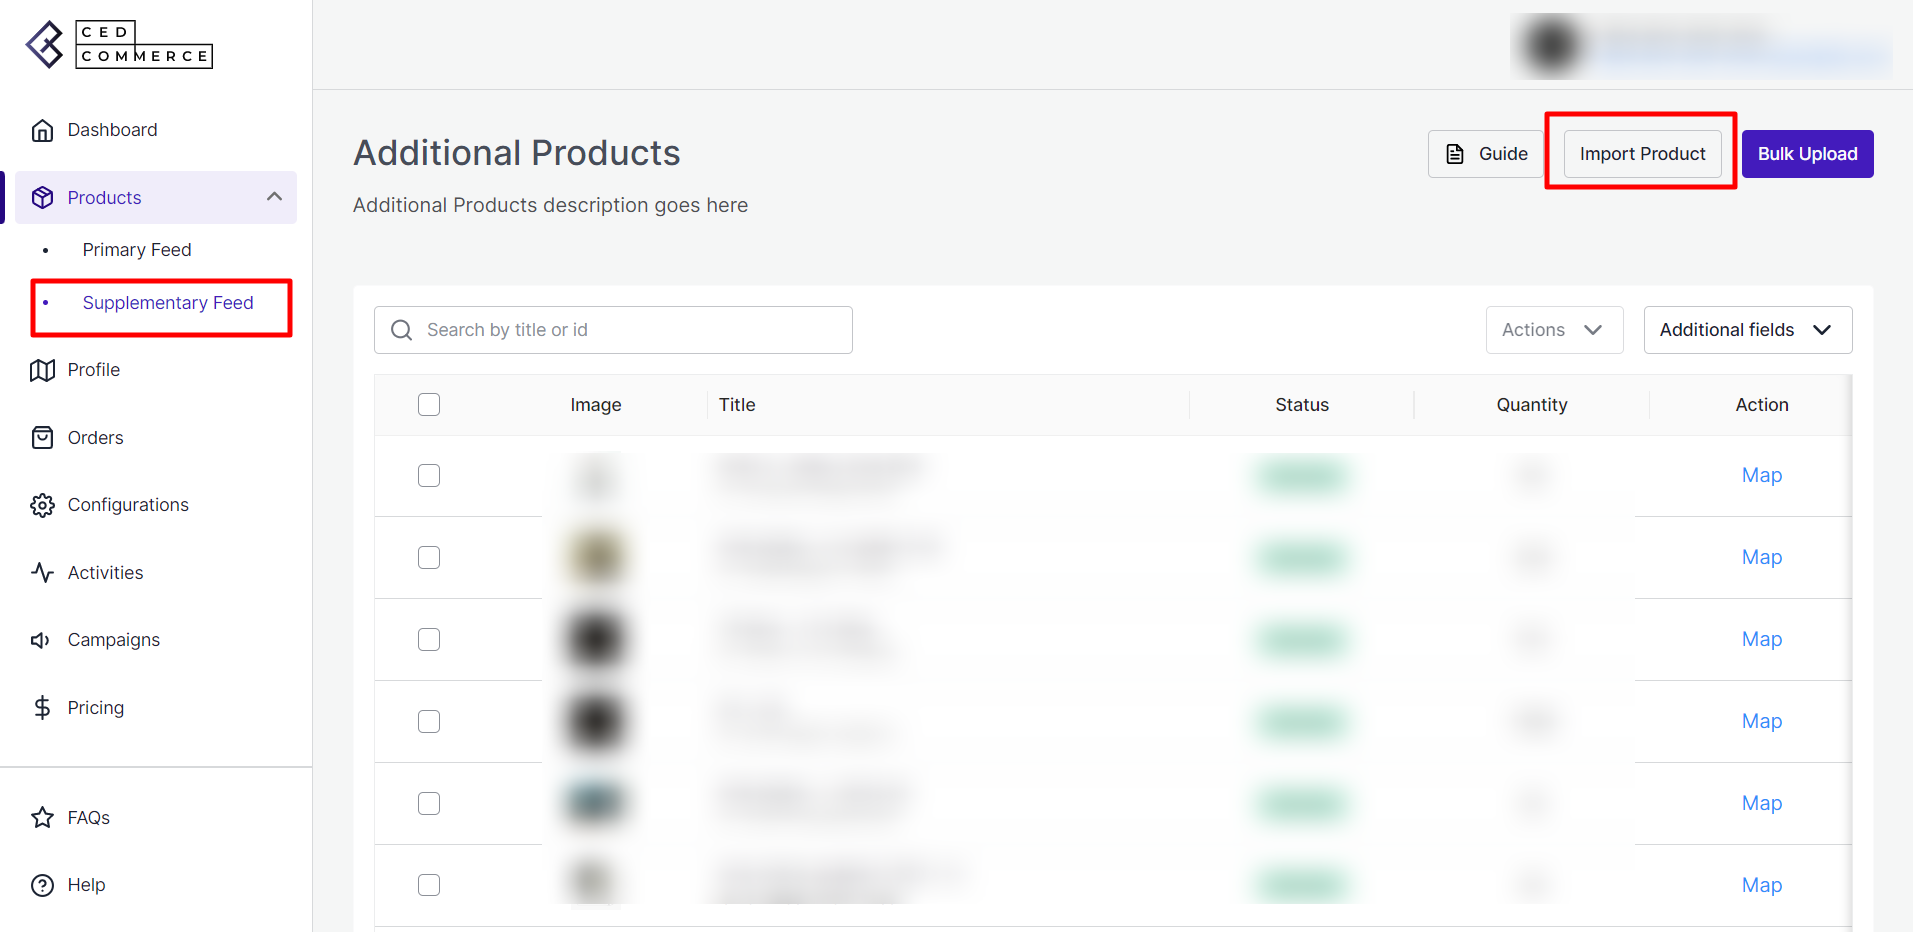
- Go to the dashboard and click on “Products” from the panel on the left-hand side.
- The drop-down panel will show you two product options: Primary Feed and Supplementary Feed. From the drop-down, click on the “Supplementary Feed.”
- When you select “Supplementary Feed,” an empty panel will appear on the app window. Select “Import Products” from the upper right-hand side.
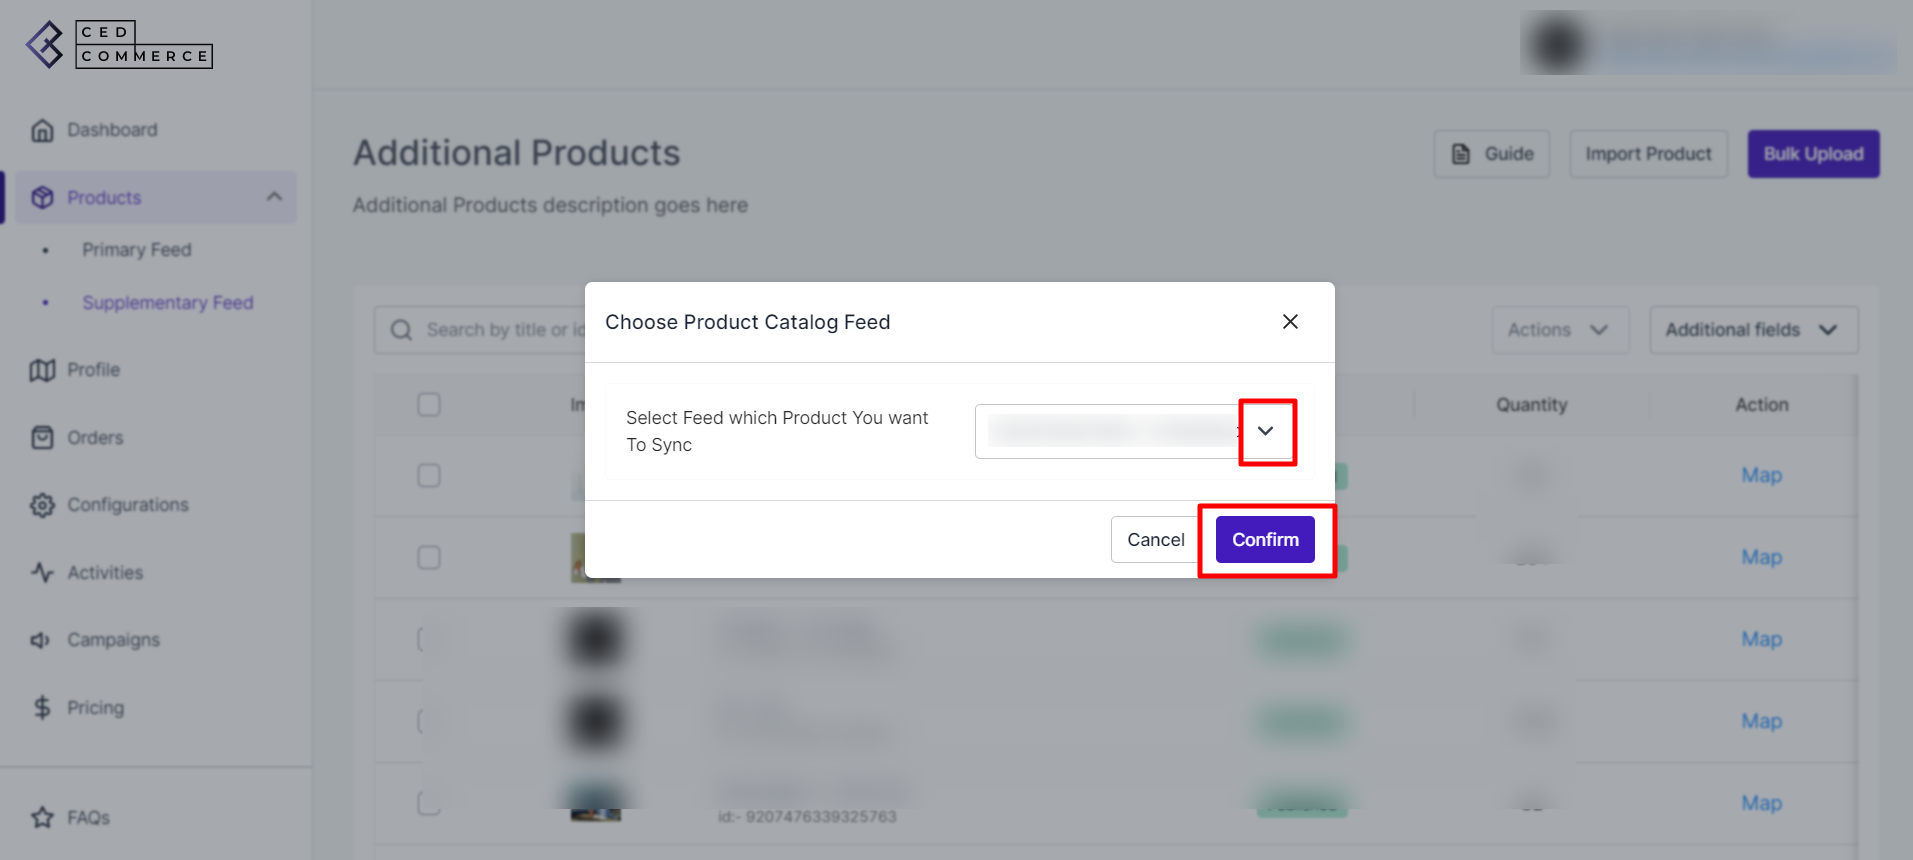
- A pop-up stating “Choose Product Catalog Feed” will appear.
- From the “Choose Feed” drop-down menu, select the “Feed” from where you want to sync the product. After selecting the required feed, click “Confirm.”
- A green pop-up box “Additional product sync started” will appear.
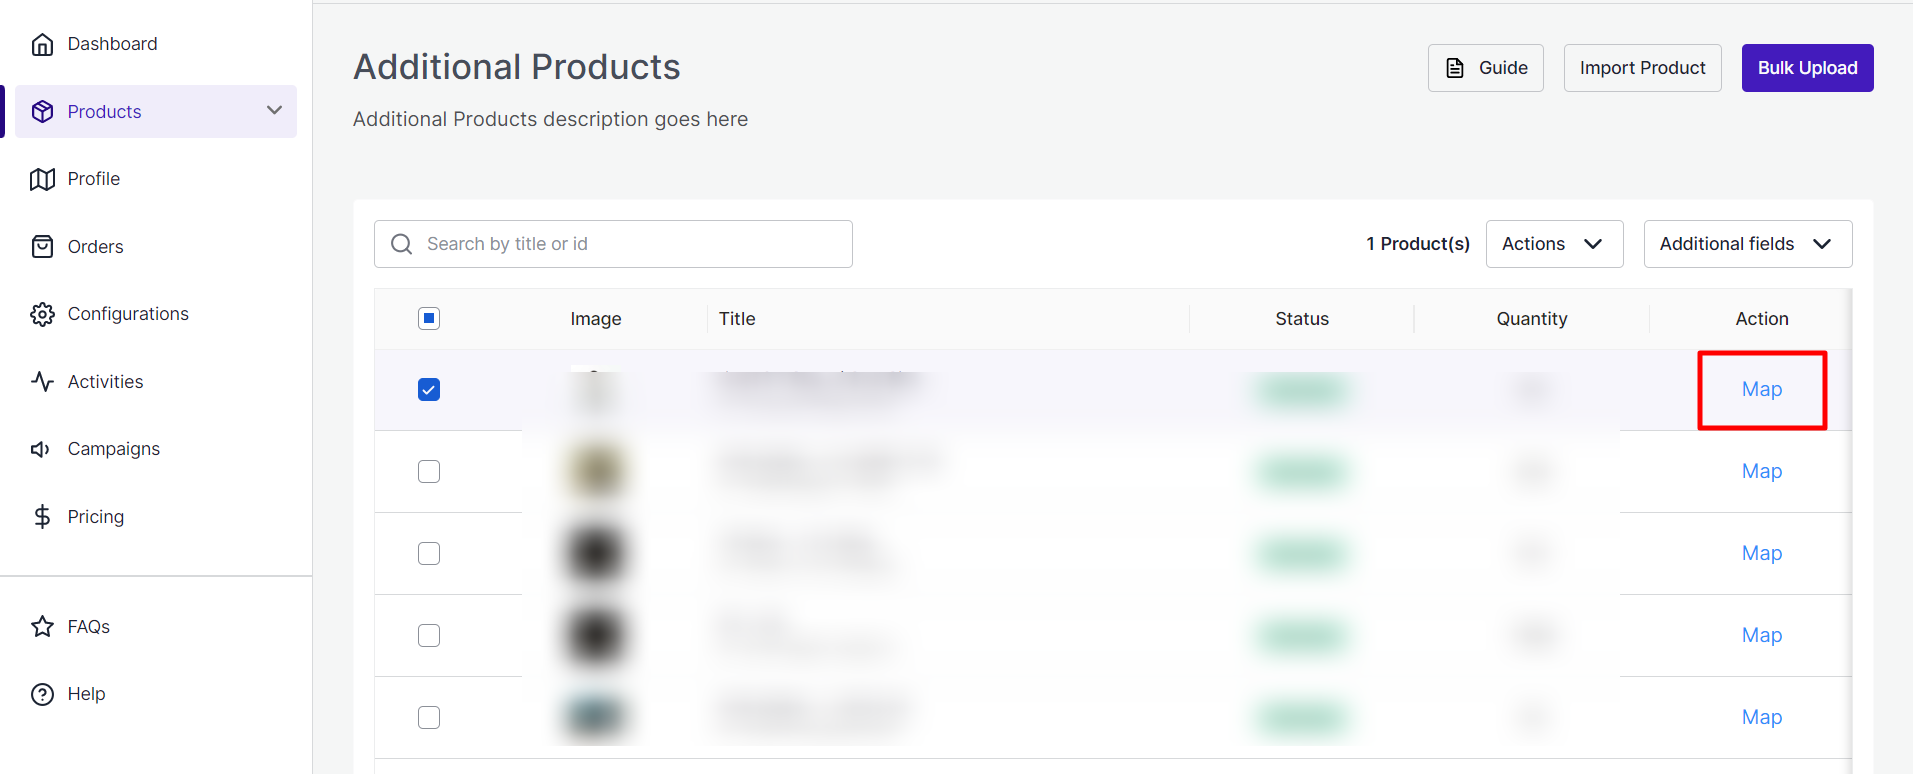
- Now, select the item for which you want to provide additional information. Click on the “Map” button below the Action tab. A “Map Attributes” window will appear.
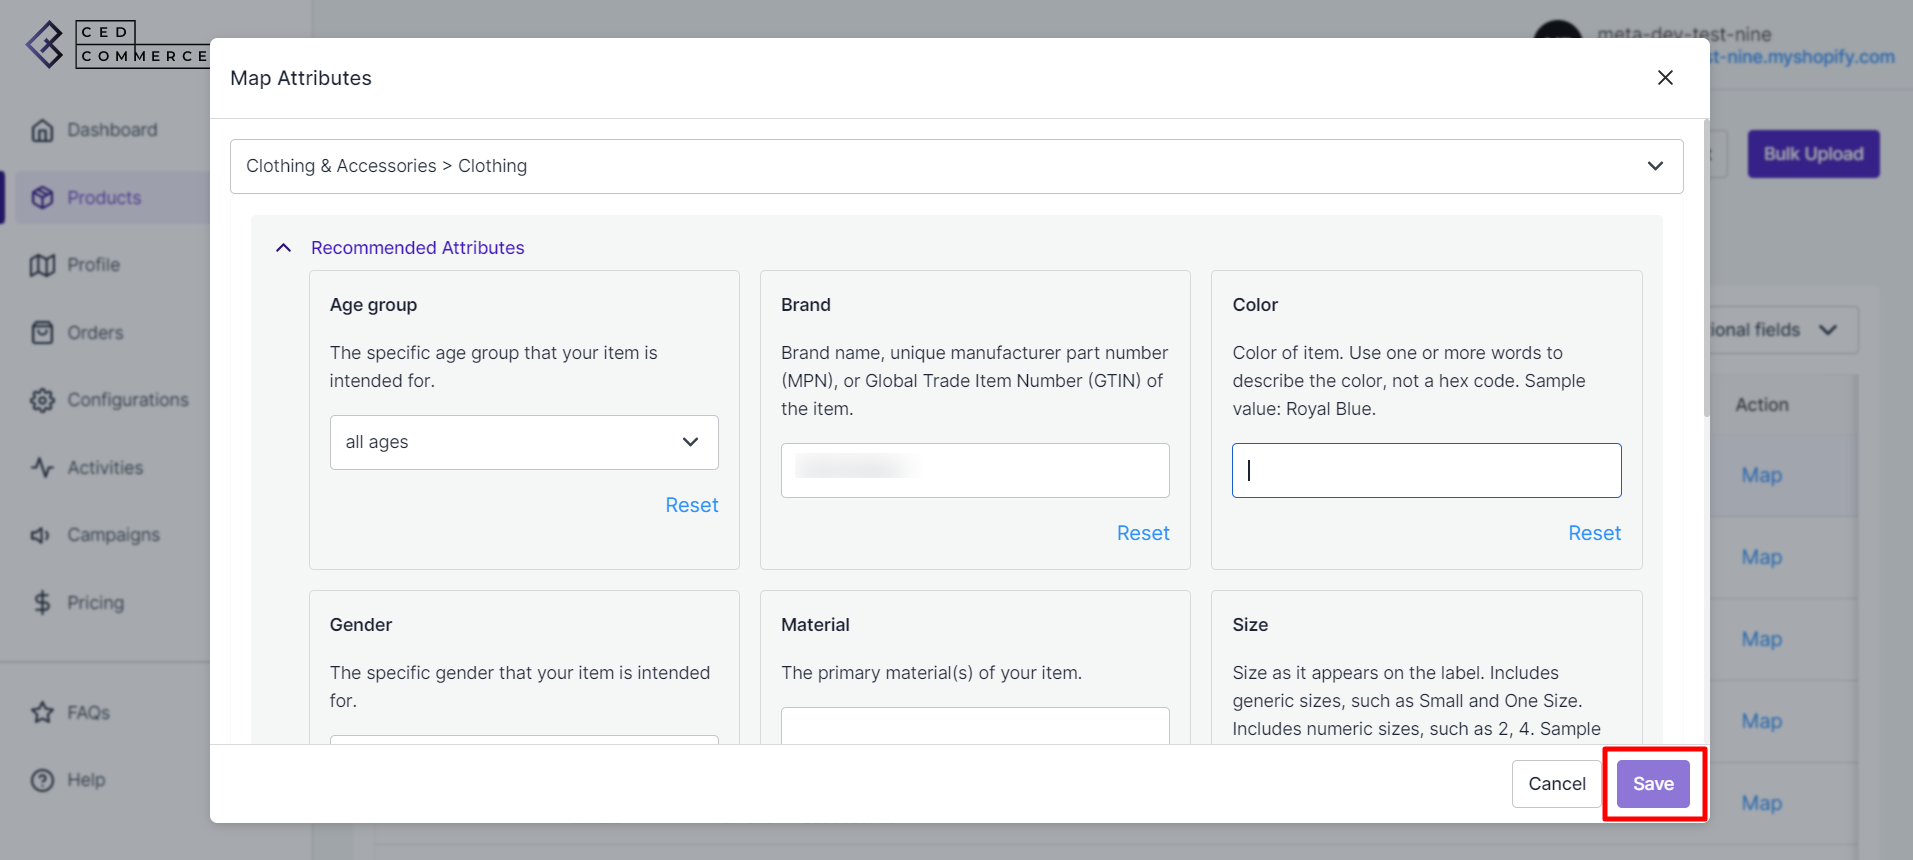
Note: The Category of the product will be Pre-assigned. You have already defined the required product category during the onboarding process. However, you can update the category if necessary.
A list appears from where you can add additional attributes.
- From the list of “Recommended Attributes,” you can choose to fill the attributes you want to include.
- Once you have filled in all the details, click on the “Save” button.
- A green pop-up box “Attribute mapping saved successfully” will appear.
- Now select the item again for which you have recently added attributes. Head to the top left-hand side, click on Choose “Action” and select “Update” from the drop-down.
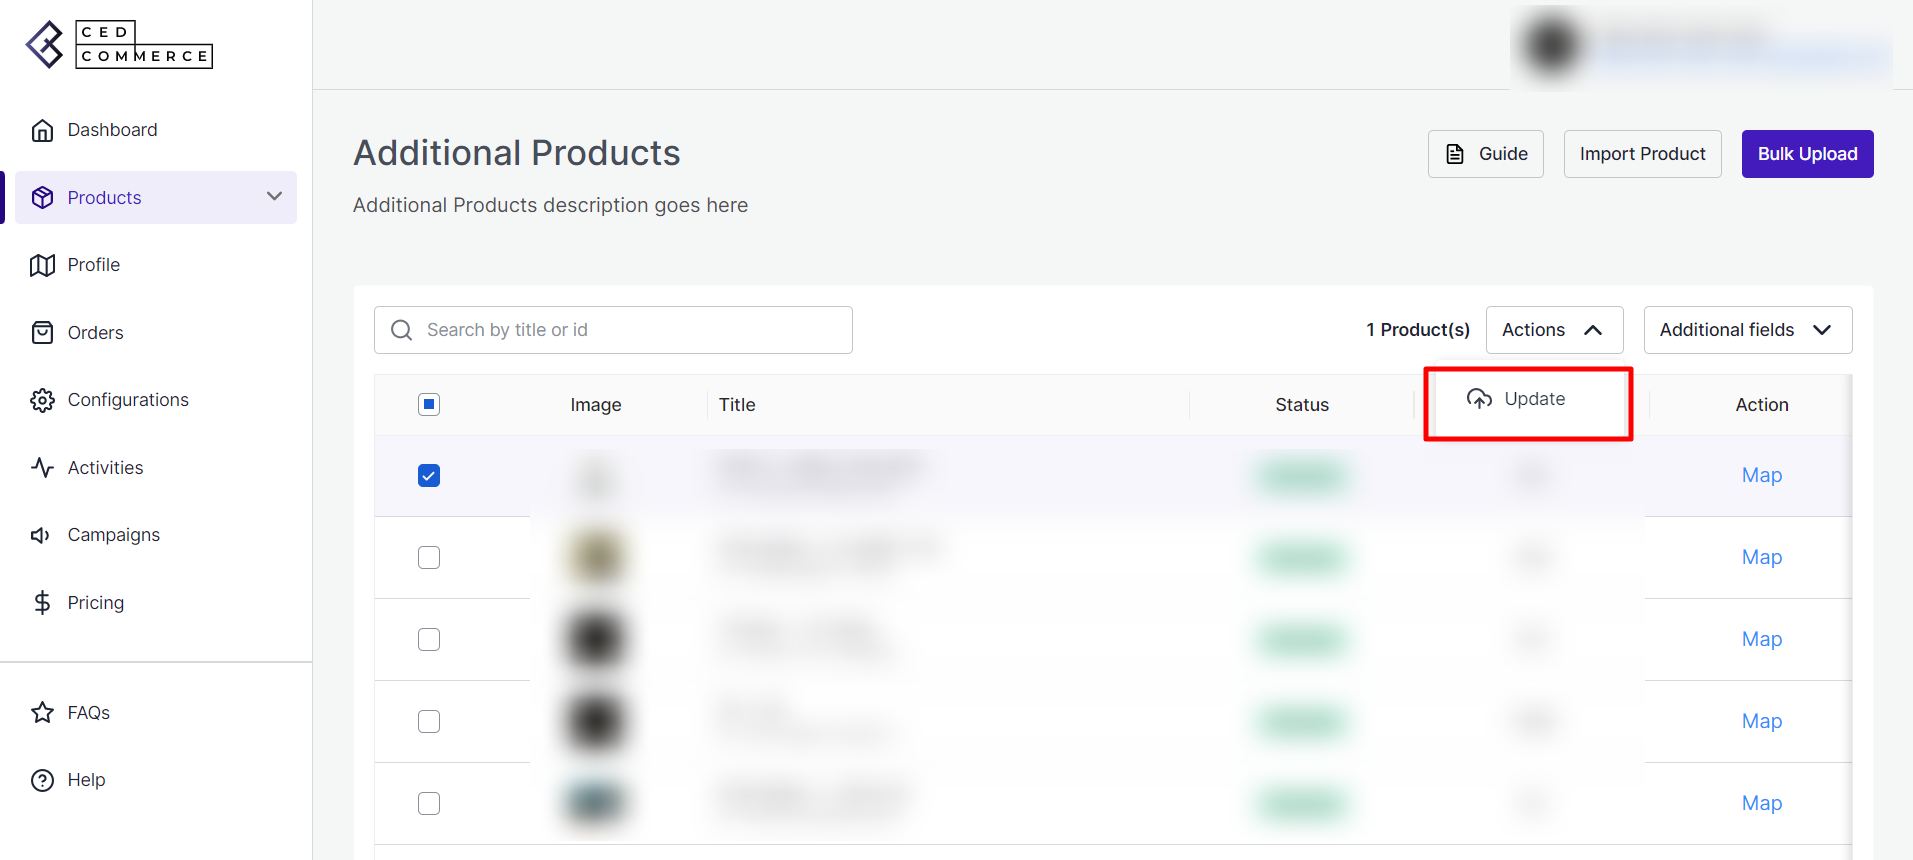
- A green pop-up box “Product Updated successfully” will appear.
You can check your supplementary feed update by following the step below:
- Go to “Facebook Commerce Manager” and click on “Data Source.” Under Data Feeds, you’ll see, Supplementary Feeds.

- Through this panel, you can track the progress of your “Feed Uploading.”

- Once the Feed is uploaded successfully, go back to the items list on Facebook Commerce Manager.
- Select the item for which you updated the Supplementary feed. Click on “View More” Feeds.

- A Feed window will appear, with all the product related details. Check if all the updated attributes are visible.
- Once all the changes appear on the list, choose the “Done” option.

Once you complete all the steps, the Supplementary feed will be successfully updated without leaving the app.
Related Articles
What is Supplementary Feed?
[Quoting from Facebook] Supplementary Feeds supplement the product information provided by another data feed in the Commerce Manager. They can add or update certain fields for existing items but can't create new items or delete items. Adding a ...Adding Supplementary Feeds
Adding supplementary feeds to your product catalog makes your listing richer in terms of product information and would also help buyers find what they are looking for when they make a search. When you provide a supplementary feed for your product, it ...The App Overview
Expand your Shopify store's reach with the updated CedCommerce: Facebook & Insta app. The app offers seamless connectivity between your Shopify store and Meta Surfaces. The all-new updated app is the perfect tool for taking your e-commerce business ...Products Tab of the App
The Product section provides all the information regarding your products. It keeps records of all products and their status and reflects notifications. The Product tab is divided into two sub-tabs: Primary Feed & Supplementary Feeds. Primary Feeds: ...How Does the App Work?
The CedCommerce: Facebook & Insta app provides seamless integration between your Shopify store and Facebook surfaces, enabling you to expand your business reach and optimize your advertising efforts. Here's a general overview of how the CedCommerce: ...