Validate a Single Product
To Validate a Single Product,
- Go to the Magento 2 Store Admin panel.
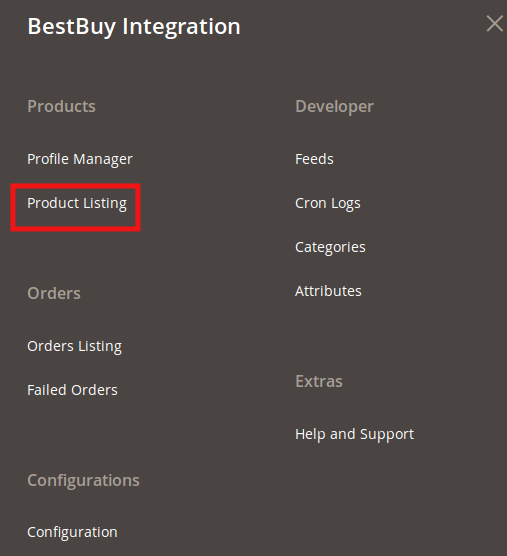
- On the left navigation bar, click the BESTBUY INTEGRATION menu.
The menu appears as shown in the following figure:
- Click Product Listing.
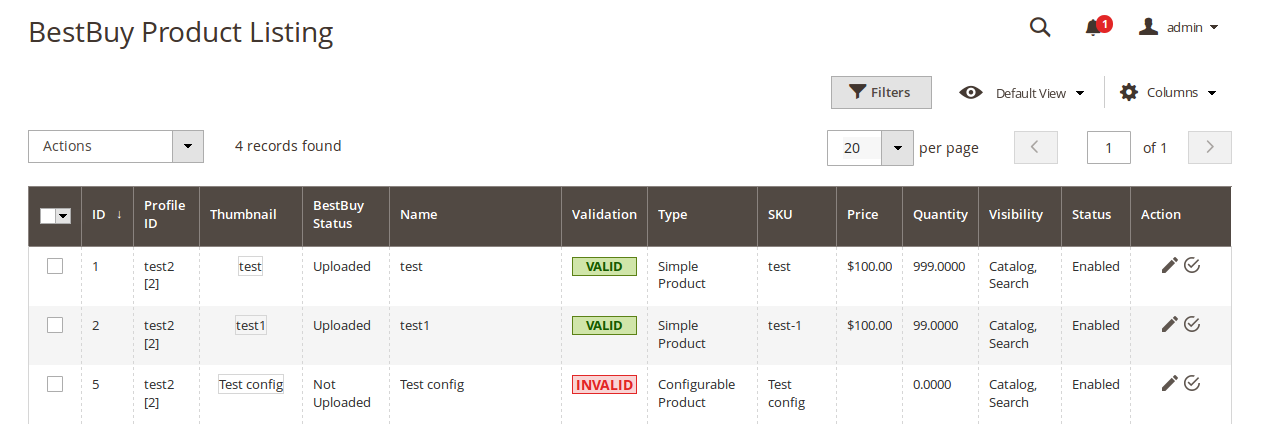
The BestBuy Product Listing page appears as shown in the following figure:
- Scroll down to the required product row.
- In the Action column of the respective row, click the Validate
 icon.
icon.
If the product is validated successfully and a success message appears on the top of the page.
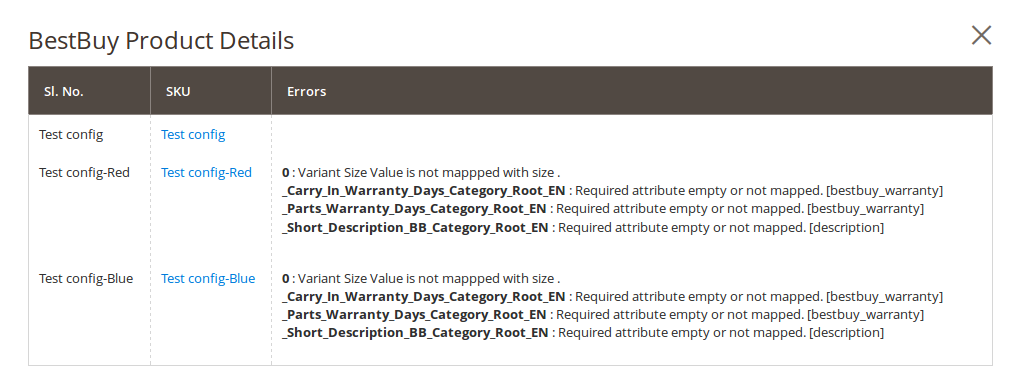
If there is an error, then an INVALID button appears in the Validation column of the respective product row. - To view the cause of product invalidation, click the respective INVALID button.
A dialog box appears as shown in the following figure, which displays the errors related to the product.
- Correct the issues and then again click the Validate icon to validate the product.
Related Articles
BestBuy Product Listing
On this page, admin can View, Edit, and Validate the individual products. Also, the admin can view the Error Message if any error exists in any product details. After uploading the product on BestBuy or after updating the product inventory or the ...Submit Bulk Actions for the Selected Products
Admin can perform the following tasks through the Bulk Action feature: Validate Product: To validate the selected products before uploading to the BestBuy website. It displays the corresponding validation error if any. If there is no error, it ...Overview
BestBuy Integration for Magento 2 is a seller-compliant extension by CedCommerce that empowers the sellers to sell on BestBuy Canada. Not only that but it enables the admin to manage the BestBuy orders in their Magento 2 stores without making any ...Edit the BestBuy Products
To Edit the BestBuy product details Go to the Magento 2 Store Admin panel. On the left navigation bar, click the BESTBUY INTEGRATION menu. The menu appears as shown in the following figure: Click Product Listing. The BestBuy Product Listing page ...BestBuy Feeds
After uploading the product on BestBuy or after updating the product inventory or the product price, the user can check the status of the feed and sync the selected feeds from the BestBuy Feeds page. To View and Manage the Product Feeds Go to the ...