Walmart Integration Configuration
After obtaining the Consumer ID and the Private Key from the Walmart Seller account, the Prestashop store owner has to paste them on the Configure Walmart Integration page of the admin panel of the merchant.
To Set up the Walmart Integration settings in the Prestashop Admin panel
- Go to the Prestashop Admin panel.
- On the left navigation bar, click the Modules and Services menu.
The menu appears as shown in the following figure:

- Click Modules and Services.
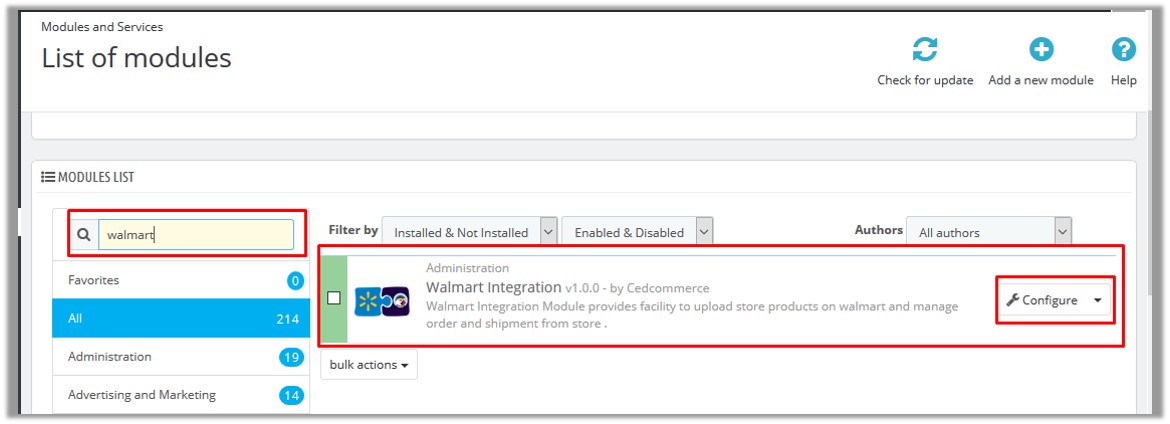
The List of modules page appears as shown in the following figure:

- In the Search box, enter the Walmart Integration module name. The Walmart Integration module appears in the right panel.
- Click the Configure button.
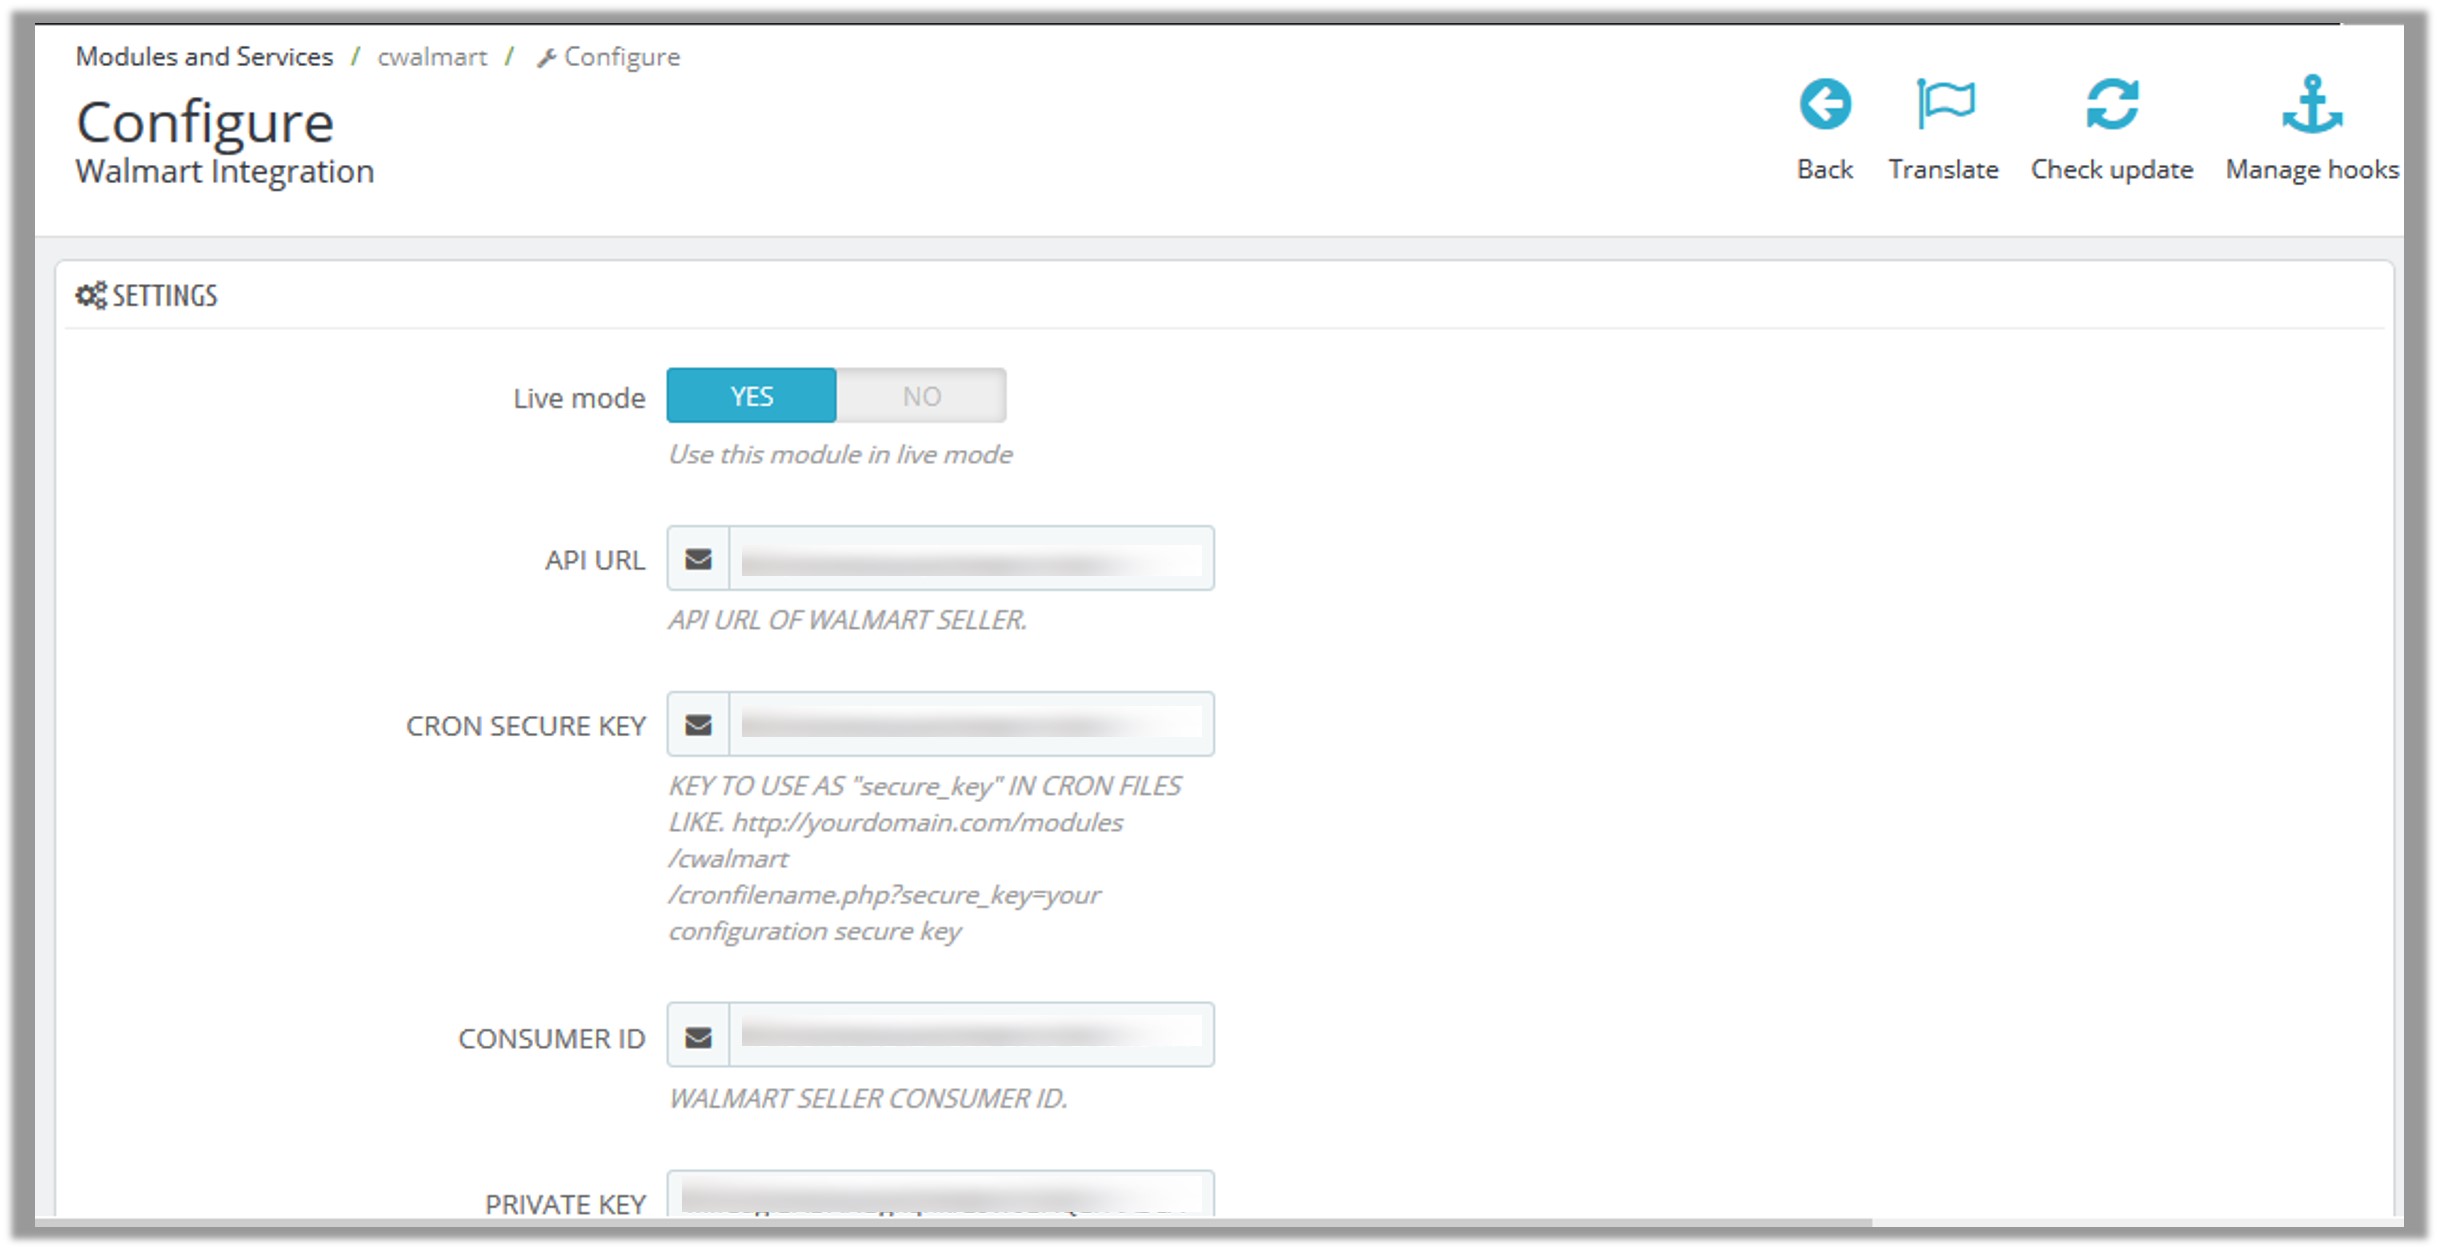
The Configure Walmart Integration page appears as shown in the following figure:

- Click the Yes button next to the Live mode field to use the module in the live mode.
- In the API URL box, enter the API URL of Walmart Seller.
- In the CRON SECURE KEY box, enter the configuration secure key.
- Paste the corresponding values of the CONSUMER ID, PRIVATE KEY, and CHANNEL TYPE ID fields copied from the Walmart seller account.
- Enter the required options or values in the following fields:
- CUSTOMER ORDER EMAIL: Enter the email Id to intimate that the orders created in the store are imported from Walmart.
- CUSTOMER ID: Enter the Customer Id to intimate that the orders created in the store are imported from Walmart.
- Order Status: In the list, select the required Order Status while importing the order.
- Order status when Acknowledge: In the list, select the required Order Status after order acknowledgment.
- Order status when Shipped: In the list, select the required Order Status after the order Shipment.
- Order Carrier: In the list, select the required Order Carrier while importing the order.
- Order Payment: In the list, select the required Order Payment while importing the order.
- Tax Code For All Products: Enter the 7-digit product tax code. For more information, see Walmart Tax Codes.
- Fulfillment lag Time: Enter the number of days to fulfill the inventory when the product is out of stock.
- PRICE VARIANT AMOUNT: Enter the amount to vary based on Increment or Decrement value.
- Select the required root category.
- Map All Category to Walmart Children Category: Select the required sub category.
- Click the Yes or No button to enable or disable the corresponding features:
- Auto Order Acknowledge/Reject: Enables to automatically acknowledge or reject the order based on fulfillment status.
- Auto Sync Inventory and Price By Cron: Enables the auto synchronization of quantity and price of the products based on Cron settings.
- Remove Free Shipping: Removes free shipping from Walmart products.
- Update Price on Product Edit: Updates product price on Walmart after the changes are made in the product price listed in the store.
- Update Inventory on Product Edit: Updates product quantity on Walmart after the changes are made related to the product quantity available in the store.
- Update Product Data on Product Edit: Updates PRODUCT DATA on Walmart after the changes are made in the product data available in the store.
- Debug: Logs data while request is sent on walmart.
- Click the Save button.
Related Articles
Walmart Feed
After uploading the product on Walmart or after updating the product inventory or the product price, the user can check the status of the feed and sync the selected feeds or all the feeds from the Walmart Feed page. To view product feeds status Go to ...Walmart Promotion
The promotion that supplements or coordinates product advertising, generating sales, and creating brand loyalty. With this Promotion feature, store owners can promote their products on Walmart through adding some promotional offers. To add a ...Walmart Refunds
If a front-end user returns the product or order directly to the store admin without the involvement of walmart.com, then the store admin has to send a request on walmart.com to complete this type of return. To complete this type of return the store ...Manage Walmart Option
Admin can view the Walmart options, which are Walmart attributes. Options are the attributes that the front-end users can use based on their requirements while placing an order for the product. Also, the admin can map the store options (store ...Manage Walmart Attribute
Admin view the attributes and map the attributes with the corresponding Walmart attributes. To view the Walmart attributes Go to the Prestashop Admin panel. On the left navigation bar, click the Walmart Integration menu. The menu appears as shown in ...