WooCommerce Wayfair Profiling
Profiles can be created to assign similar values and categories to multiple products. You can manage profiles on your WooCommerce store, assign products to it using your CSV file and then upload it.
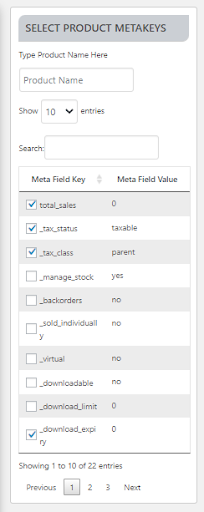
While creating and editing the profile, the admin can select the product and the corresponding meta-keys. These meta-keys apply to all the products assigned to the profile.
The admin can perform the following task:
Profile Creation: To add a profile, You will have to access the profile creation panel. The steps to open the panel are:
- Go to your WooCommerce seller panel.
- On the left side, you will see the navigation bar. Click on the Wayfair button.
- Now select the “Profile” option.
- On clicking a profile, a page will appear. Refer to the screenshot below:

5. When you click on the “Add Profile” button, you will be redirected to the Profile creation panel.
On this page, you can perform the following actions:
- Under the “Select Product And Corresponding Meta Keys” section, you can select the meta keys of products for category mapping. Once you select the meta keys, click on UPDATE and assign these meta keys to the product.

- The “Basic settings” section is used to lint your profile name, and the checklist to enable it.

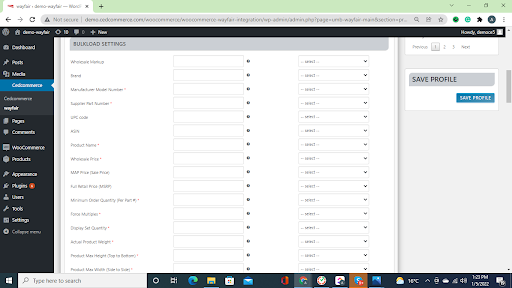
- Under the”Bulk load” settings, you have to fill in all the mandatory details in fulfillment for the product upload.

- All of these fields need to be filled with product-related categories. The fields with a red asterisk are mandatory and must be filled.
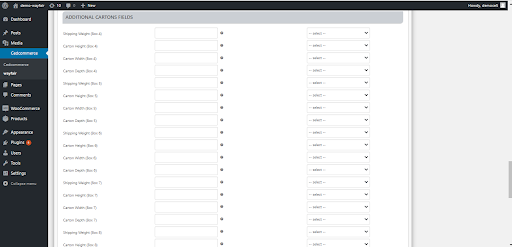
- Next, you have to fill in your shipping details if you are opting for fulfillment by Wayfair. It in the section, Bulk loads are shown in the image below:

- Next, select the WayFair category from the “Wayfair CATEGORY” section. Once you select the category, you will get a field to list variation products on Wayfair.
- Once done with the above steps, you can fill in the Extra information.
Edit Profile: To edit profile, follow the following steps:
- Go to the panel below the Wayfair Menu, which is on the left navigation bar.
- Click on the Profile section of the panel.
- On clicking a profile, it will appear a page where you will click on edit below the profile name:

4. Once you click on edit, you will be redirected to the edit profile page.
5. Once you provide all these, click on SAVE to save your edits in your profile.
Delete Profile: To delete a profile, follow the following steps:
- Go to the panel below the Wayfair Menu, which is on the left navigation bar.
- Click on the Profile section of the panel.
- On clicking a profile, it will appear a page where you will click on delete below the profile name:

4. Once you click on Delete, your profile will be deleted.
Related Articles
Wayfair WooCommerce Configuration
After the registration process on the Wayfair marketplace, you will be able to establish your link with the Wayfair marketplace via Wayfair API Integration for WooCommerce. Follow these simple steps for the WooCommerce configuration: Getting the API ...Order Management
To Perform Order Management: Go to the WooCommerce panel click on the Wayfair Menu, which is on the left navigation bar. Click on the Orders section of the Wayfair integration panel. On the landing page, you can Fetch Orders to fetch your orders. Now ...Overview
The Wayfair Integration for WooCommerce helps you sell on the marketplace with great ease and a greater customer pool. The extension synchronizes your product inventory and stocks seamlessly between platforms and lets you operate a centralized unit. ...Product upload
A “Comma-separated values” file is used to list all your products and product details like product name, photo, and Global Trade Item Number (GTIN). You can create a Product catalog with the help of Google docs and include everything from SKUs to ...Bulk Action
With the Bulk Action incorporated feature, you can perform actions on multiple products with just a click. Bulk Profile Assignment: Assign the picked profile to your preferred category. Thus, the chosen profile is given out to all the products under ...