Upload a product as a New Listing
Use a New Listing when your product does not yet exist on Amazon. You provide the full product details — title, description, barcode, category, attributes, and images — and Amazon creates a new product page (ASIN) for it.
Steps
1. Open the product and set the Product Title
On the Listings page, click the product you want to upload. At the top of the edit page, under List As, keep New Listing selected.
In the Product Title section, choose one of two options:
- Set same 'Title' as Shopify — reuses your Shopify title (up to 200 characters).
- Set a custom 'Title' — type a title made specifically for Amazon.
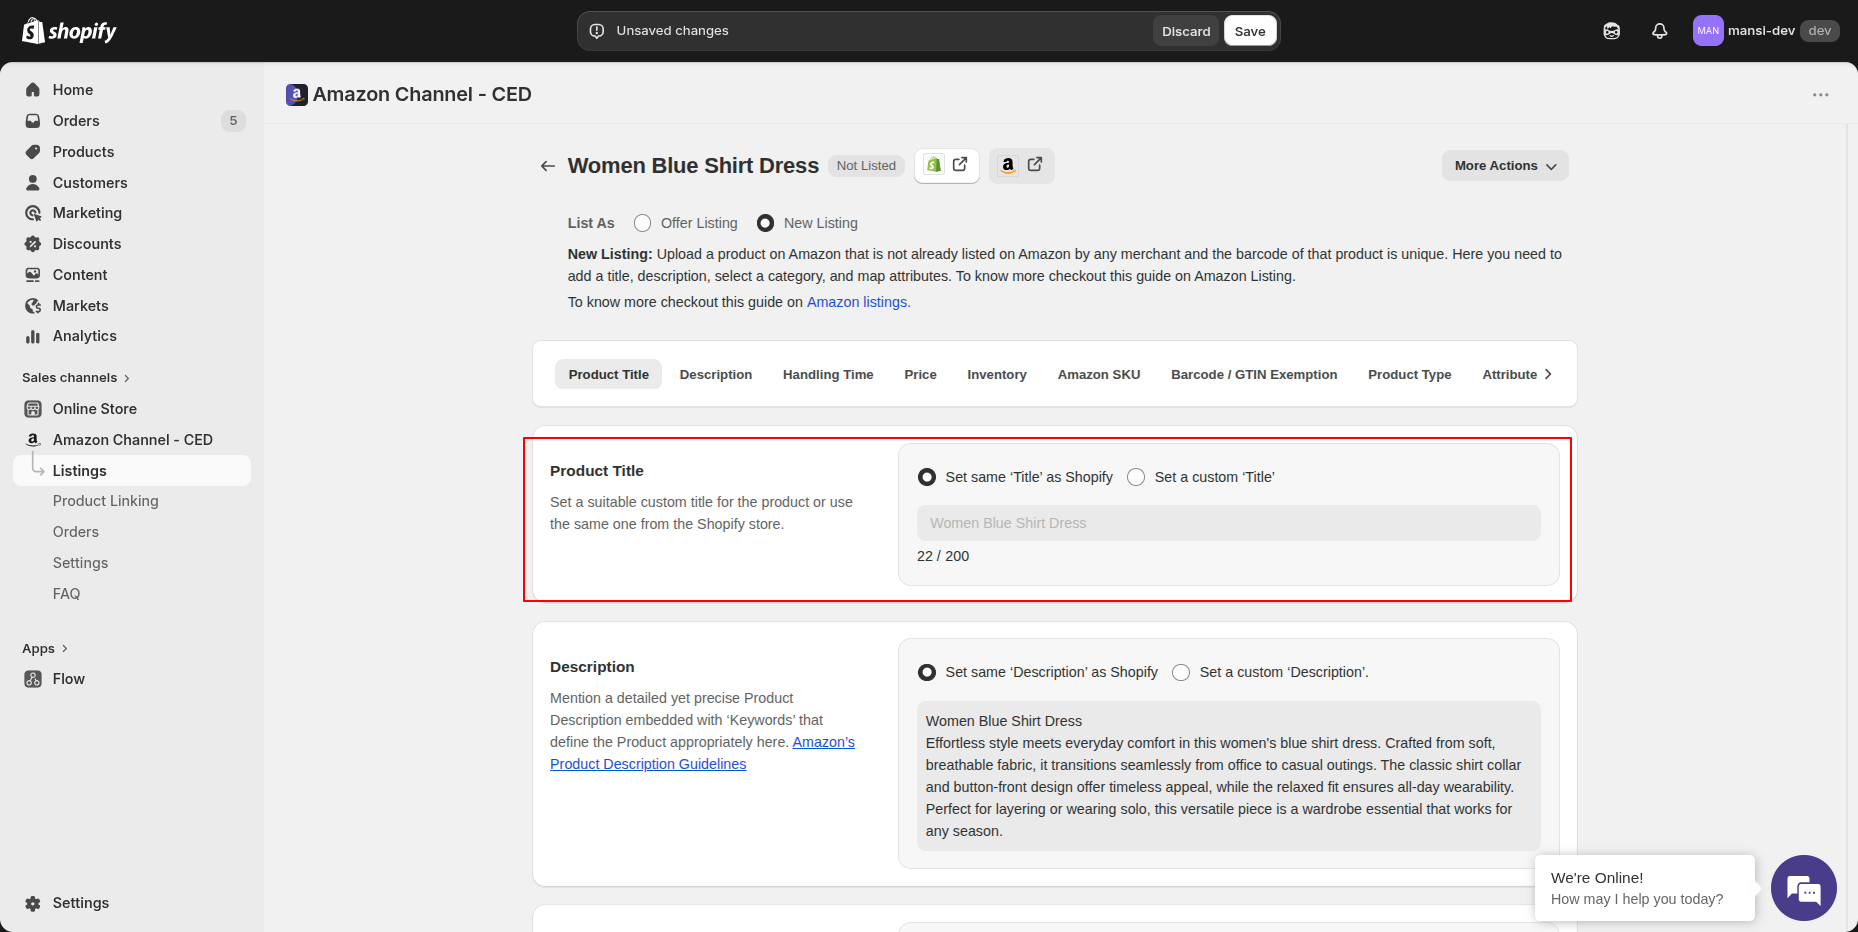
Below it, fill the Description, Handling Time, Price, Inventory, and Amazon SKU sections. For each field you can keep the Shopify value or set a custom one.
2. Set Barcode / GTIN Exemption and Product Type
In the Barcode / GTIN Exemption section:
- If you have a barcode, pick the type (UPC, EAN, GTIN, or ASIN) and let the app use the Shopify barcode.
- If you do not have a barcode but Amazon has approved your GTIN exemption, tick "Check this if you have already applied for a Barcode Exemption".
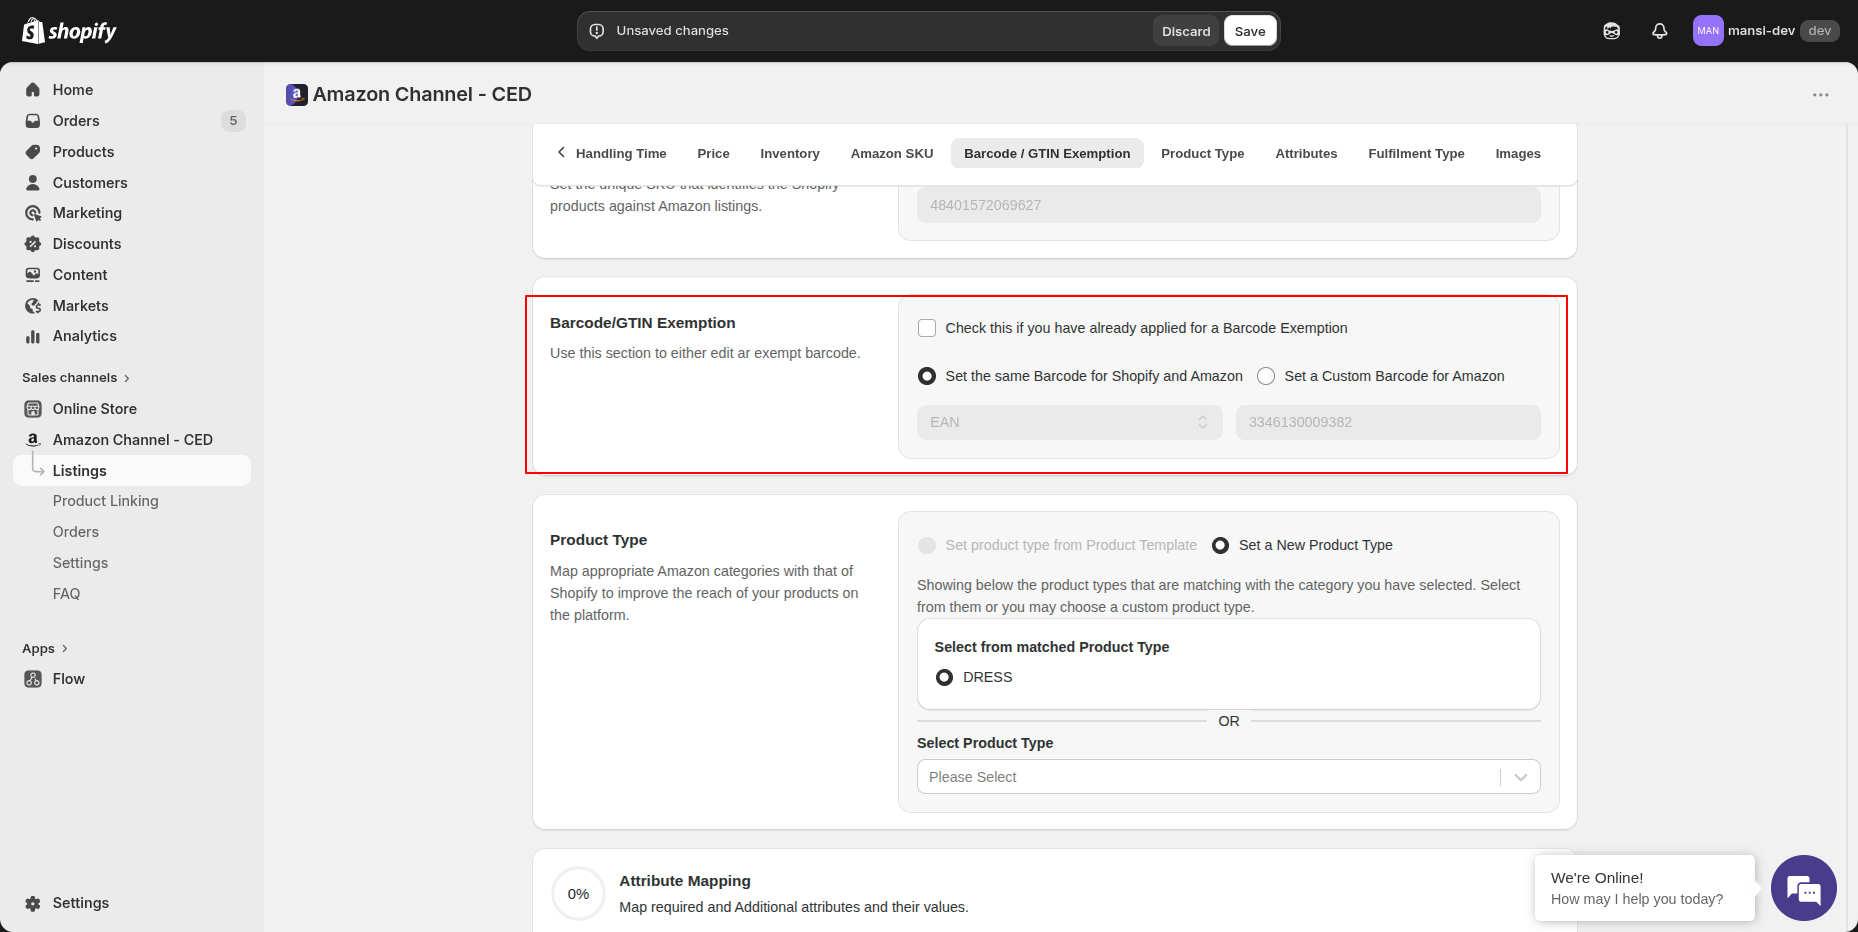
Product Type: The app automatically selects the matching Amazon product type based on your product's title and description, so you usually don't need to set it manually. If the auto-selected type isn't the right fit, override it by choosing a custom product type from the dropdown.
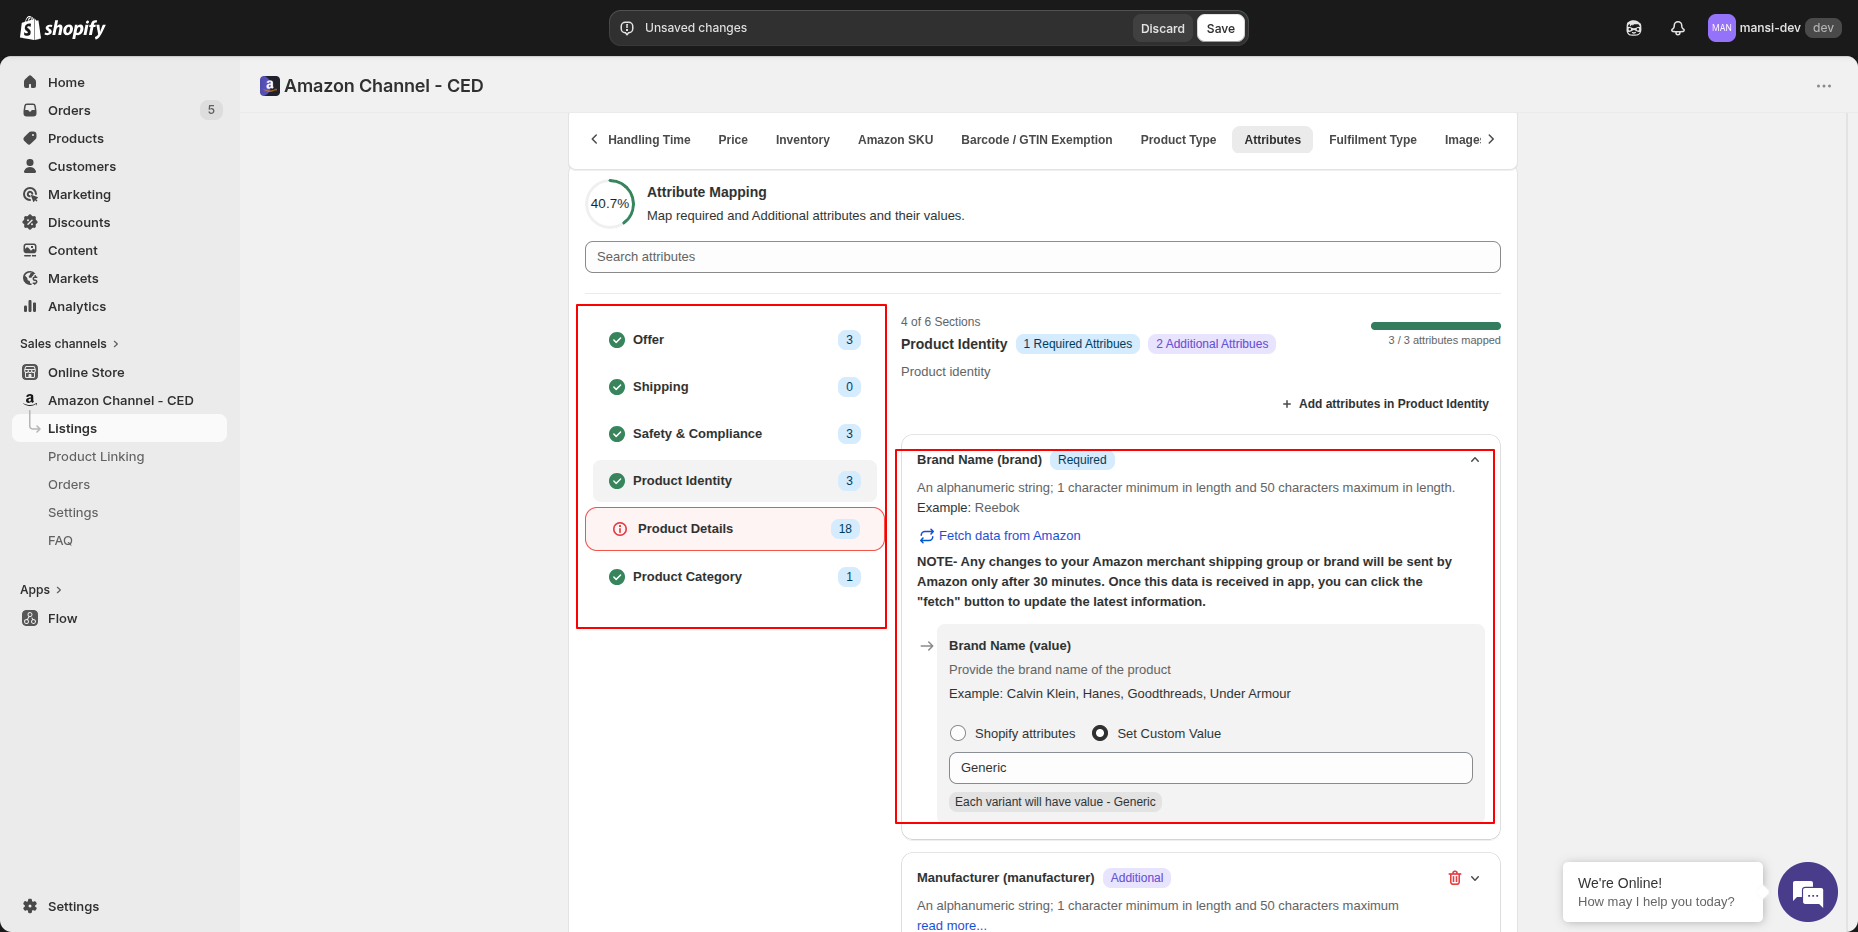
3. Fill Attribute Mapping
Scroll to the Attribute Mapping section. Amazon's attributes are organized into six groups: Offer, Shipping, Safety & Compliance, Product Identity, Product Details, and Product Category.
Work through each group and fill in every attribute marked Required — these are the fields Amazon will not accept the listing without. Within each group, you can map a Shopify field to the Amazon attribute or click Set Custom Value to enter a fixed value.
Brand Name (special case): If your brand is not enrolled in the Amazon Brand Registry, click Set Custom Value and type the brand name exactly as it should appear on the Amazon listing.
4. Select images, Fulfilment Type, and Save
- Images — use the Shopify images or upload up to 9 custom images for Amazon.
- Fulfilment Type — choose FBA or FBM.
- Click Save at the top of the page.
5. Upload the product
Go back to the Listings page. Tick the checkbox of the product you saved, then click Select Actions → Upload Product(s).
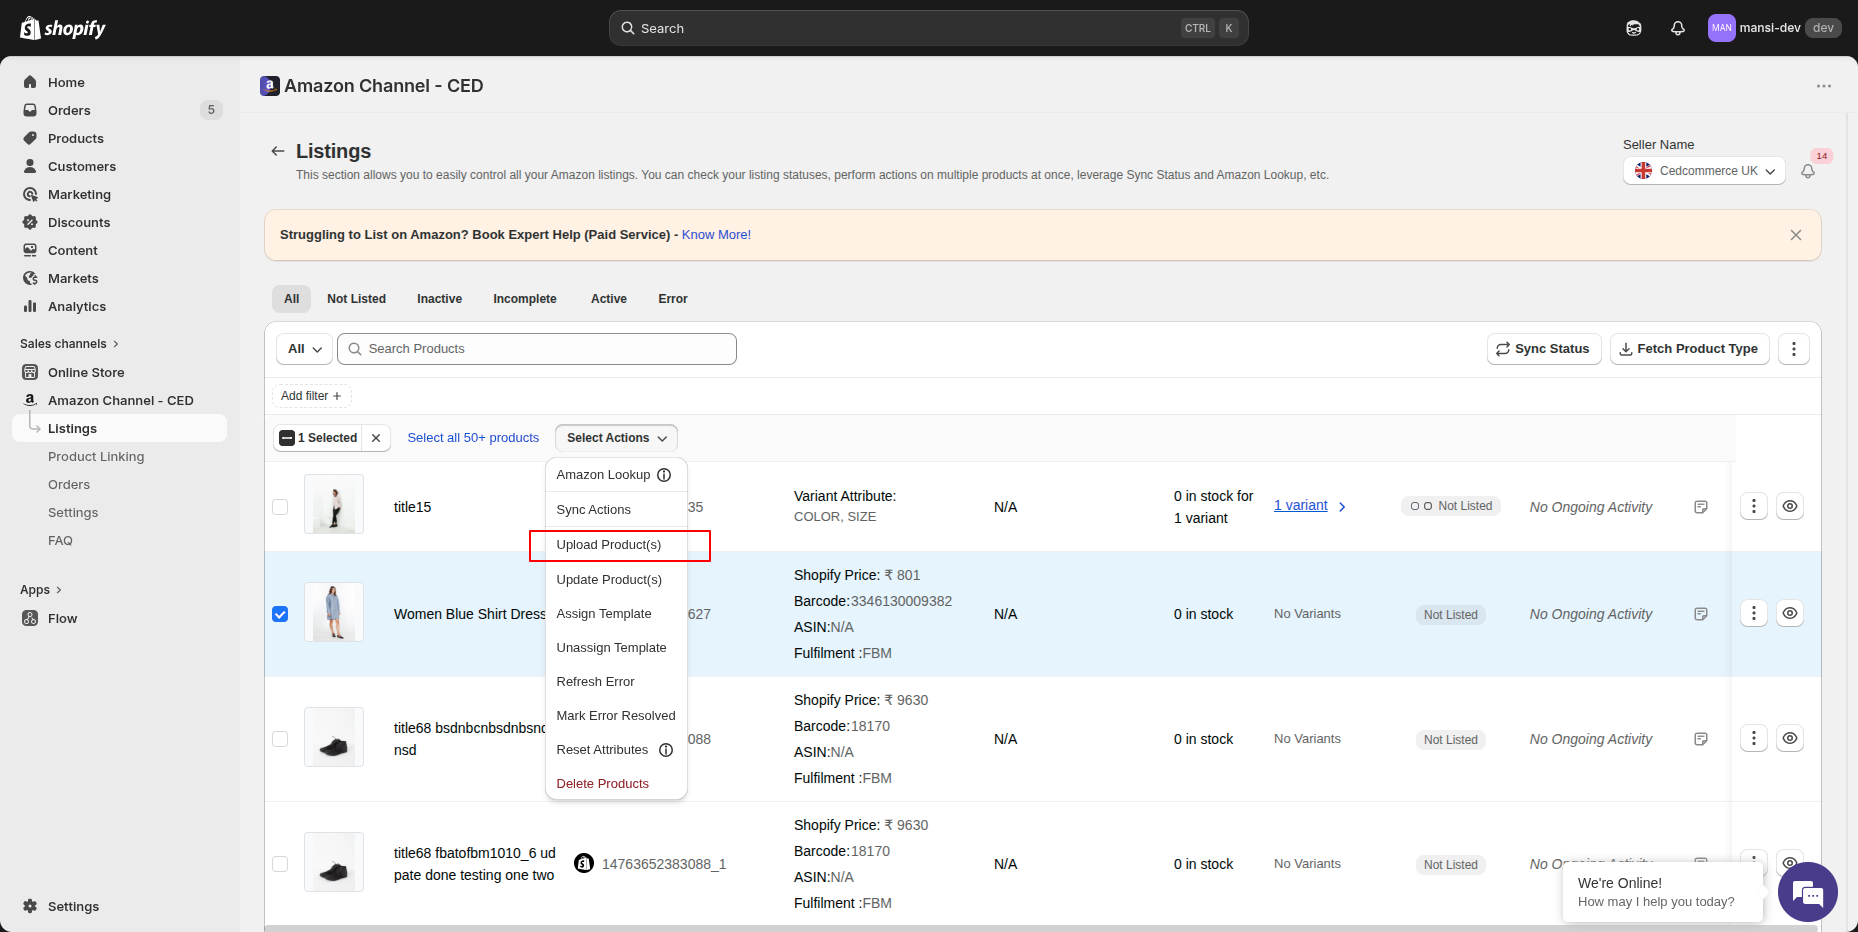
The app submits the listing to Amazon. Once Amazon accepts it, a new ASIN is created and the product moves out of Not Listed status.
Related Articles
Upload a product as an Offer Listing
Once Amazon Lookup finds a match for your product (status Not Listed: Offer), you can send it to Amazon as an Offer Listing. Your SKU gets attached to the existing Amazon product page — so you only need to fill a few fields, not the full product ...Error 5461: You may not create new ASINs for the brand
Amazon returned this error to block creating new ASINs under the named brand. Amazon enforces this when the brand has restrictions in place — typically to protect Brand Registry-enrolled brands or to prevent unauthorized sellers from listing under ...Difference between New Listing and Offer Listing
When you send a product to Amazon from the app, it can go up in one of two ways — as a New Listing or as an Offer Listing. Here's what each one means and when it's used. New Listing A New Listing is created when your product does not exist on Amazon ...Onboarding the CedCommerce Amazon Channel
Onboarding Welcome to the CedCommerce Amazon Channel App onboarding process! This guide will help you install the app in your Shopify store and integrate it with your Amazon account. To ensure a successful start, have the following prerequisites ...Map Shopify attribute values to Amazon-accepted values
Some Shopify attribute values don't match what Amazon expects (e.g., your Shopify product uses Red but Amazon's listing schema requires Cherry Red). The Global Value Mapping tab lets you build named lists that translate Shopify values into ...